一、本地docker环境搭建
mac下安装docker: brew install docker
https://hub.docker.com 拉取镜像速度比较慢,我们推荐使用国内的镜像源访问速度较快 https://hub.daocloud.io
1.1 设置国内镜像源
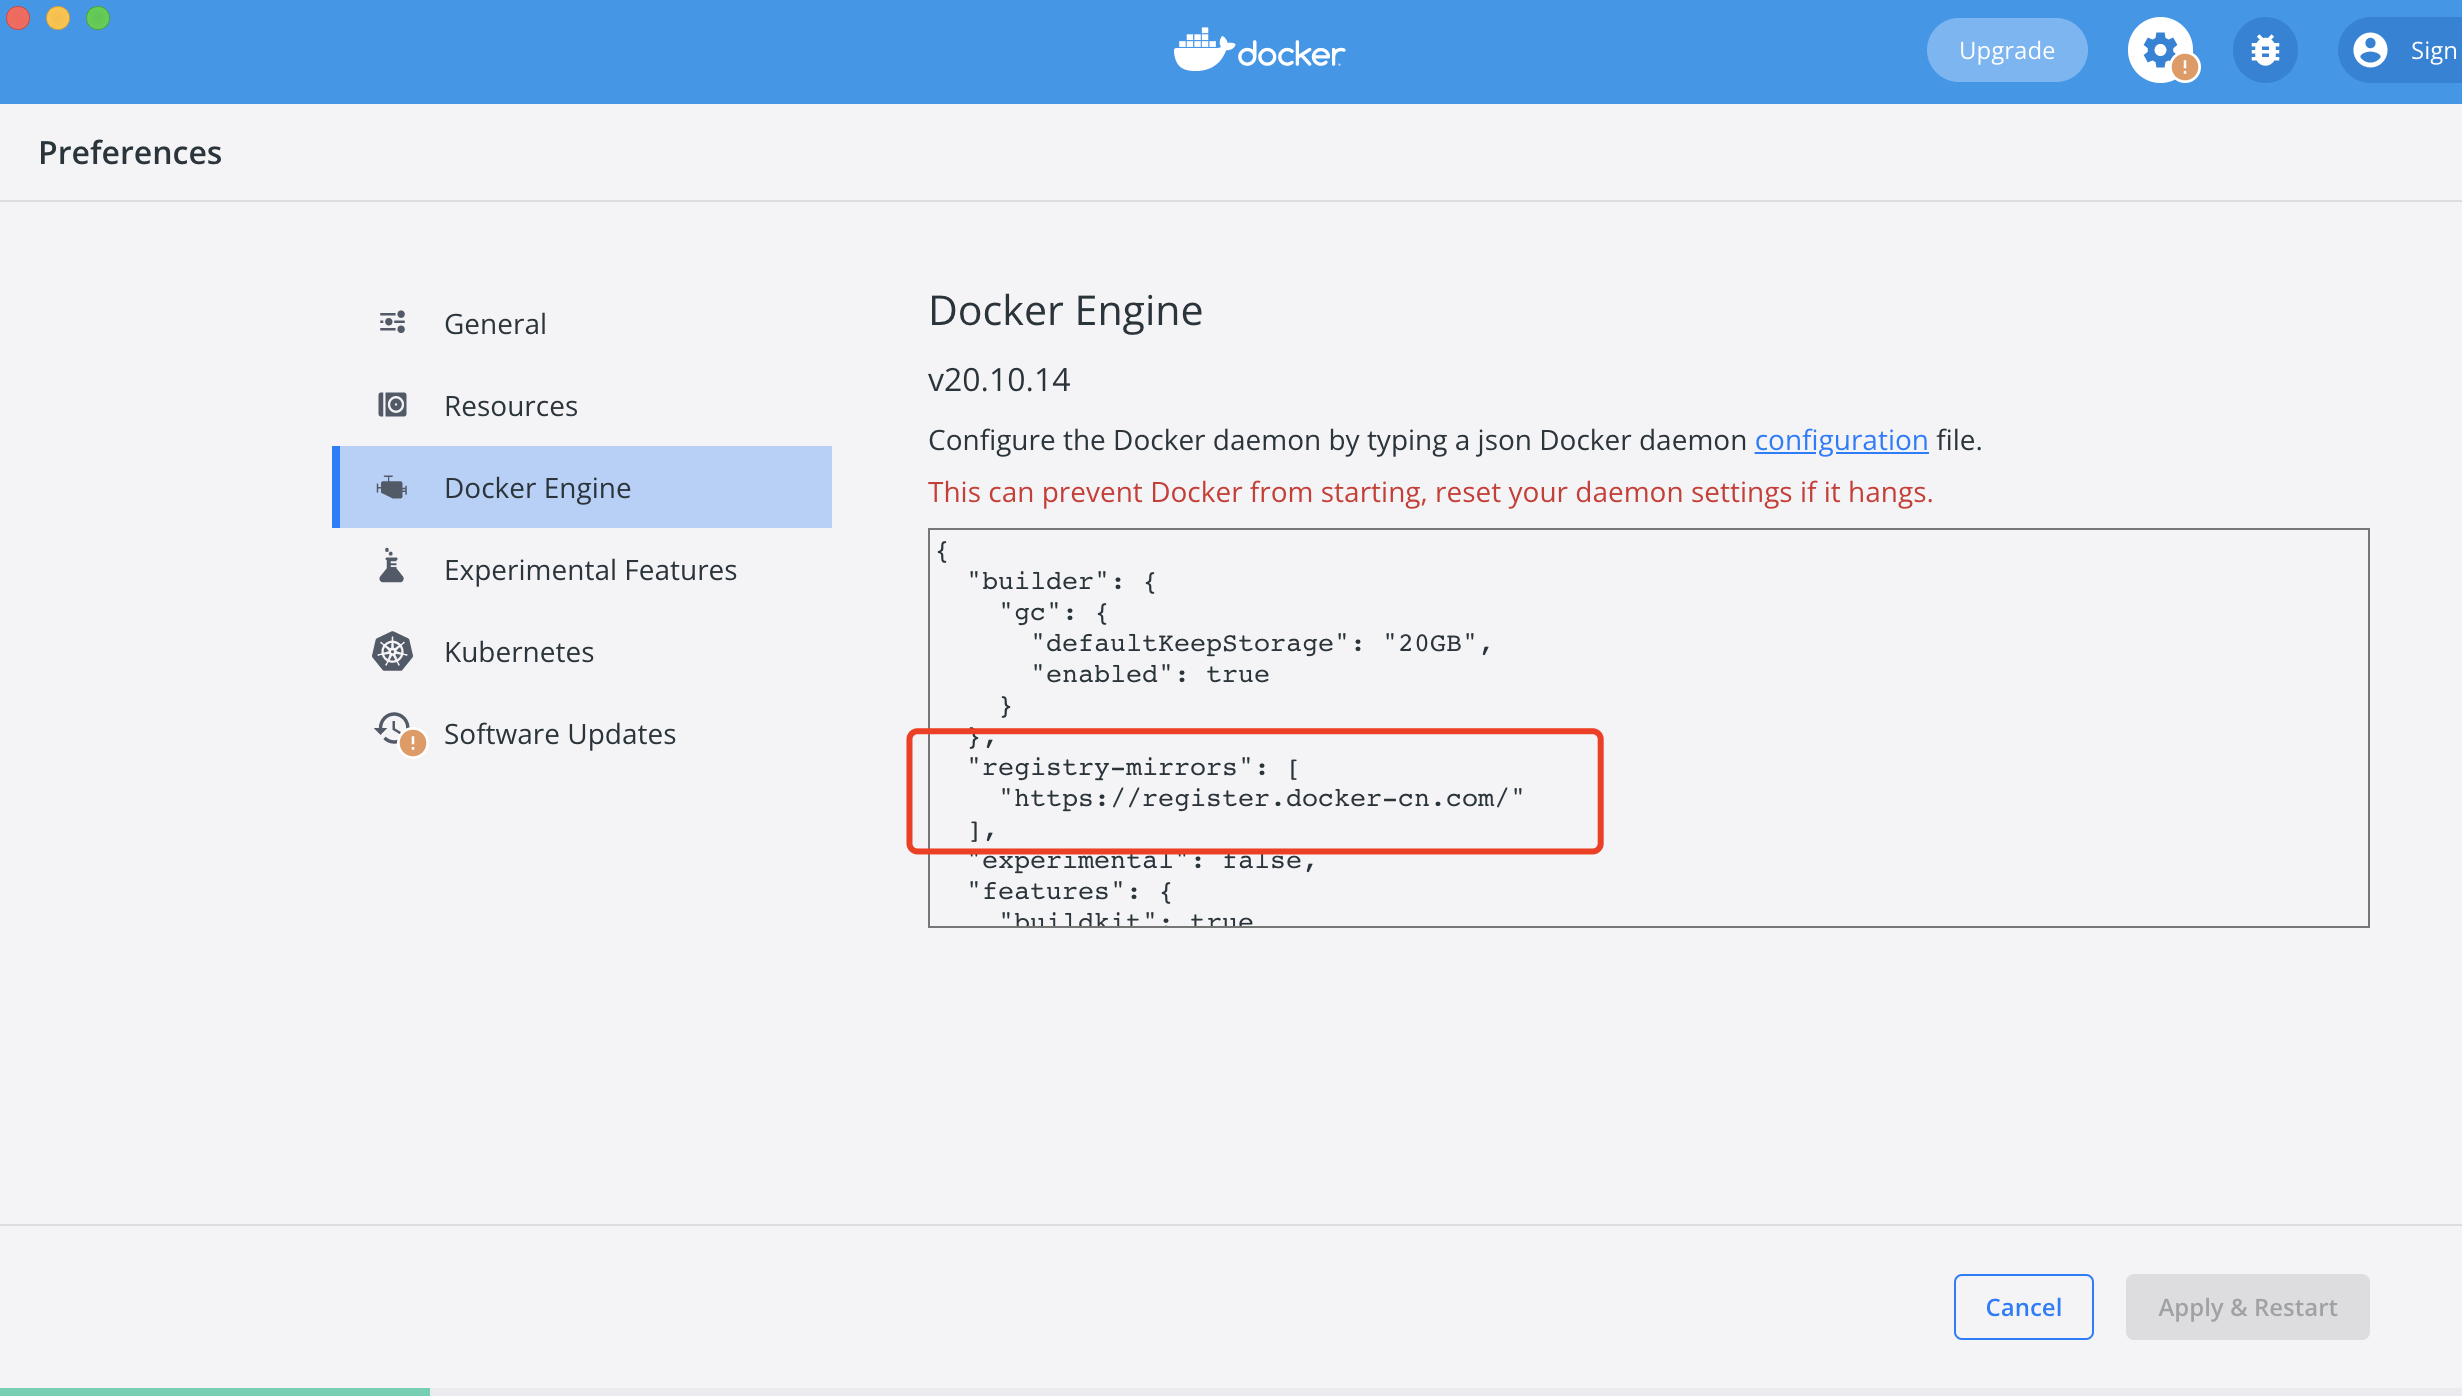
{ |
进入该网站https://hub.daocloud.io获取镜像的下载地址
1.2 docker命令基础
docker images查看镜像docker ps查看启动的容器 (-a查看全部)docker rmi 镜像ID删除镜像docker rm 容器ID删除容器docker exec -it 1a8eca716169(容器ID:docker ps获取) sh进入容器内部docker inspect bf70019da487(容器ID)查看容器内的信息
删除none的镜像,要先删除镜像中的容器。要删除镜像中的容器,必须先停止容器。
$ docker rmi $(docker images | grep "none" | awk '{print $3}') |
$ docker stop $(docker ps -a | grep "Exited" | awk '{print $1 }') //停止容器 |
1.3 环境准备
这里拉取nginx、node、redis、mysql镜像
1、安装node镜像
进入https://hub.daocloud.io 搜索node,切换到版本获取下载地址
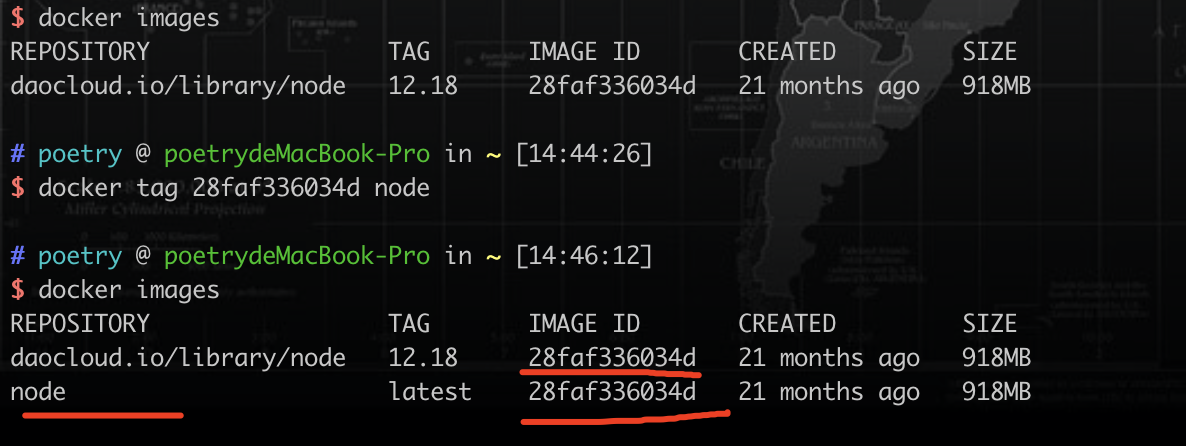
docker pull daocloud.io/library/node:12.18docker tag 28faf336034d node重命名镜像
重命名镜像后IMAGE ID都是一样的
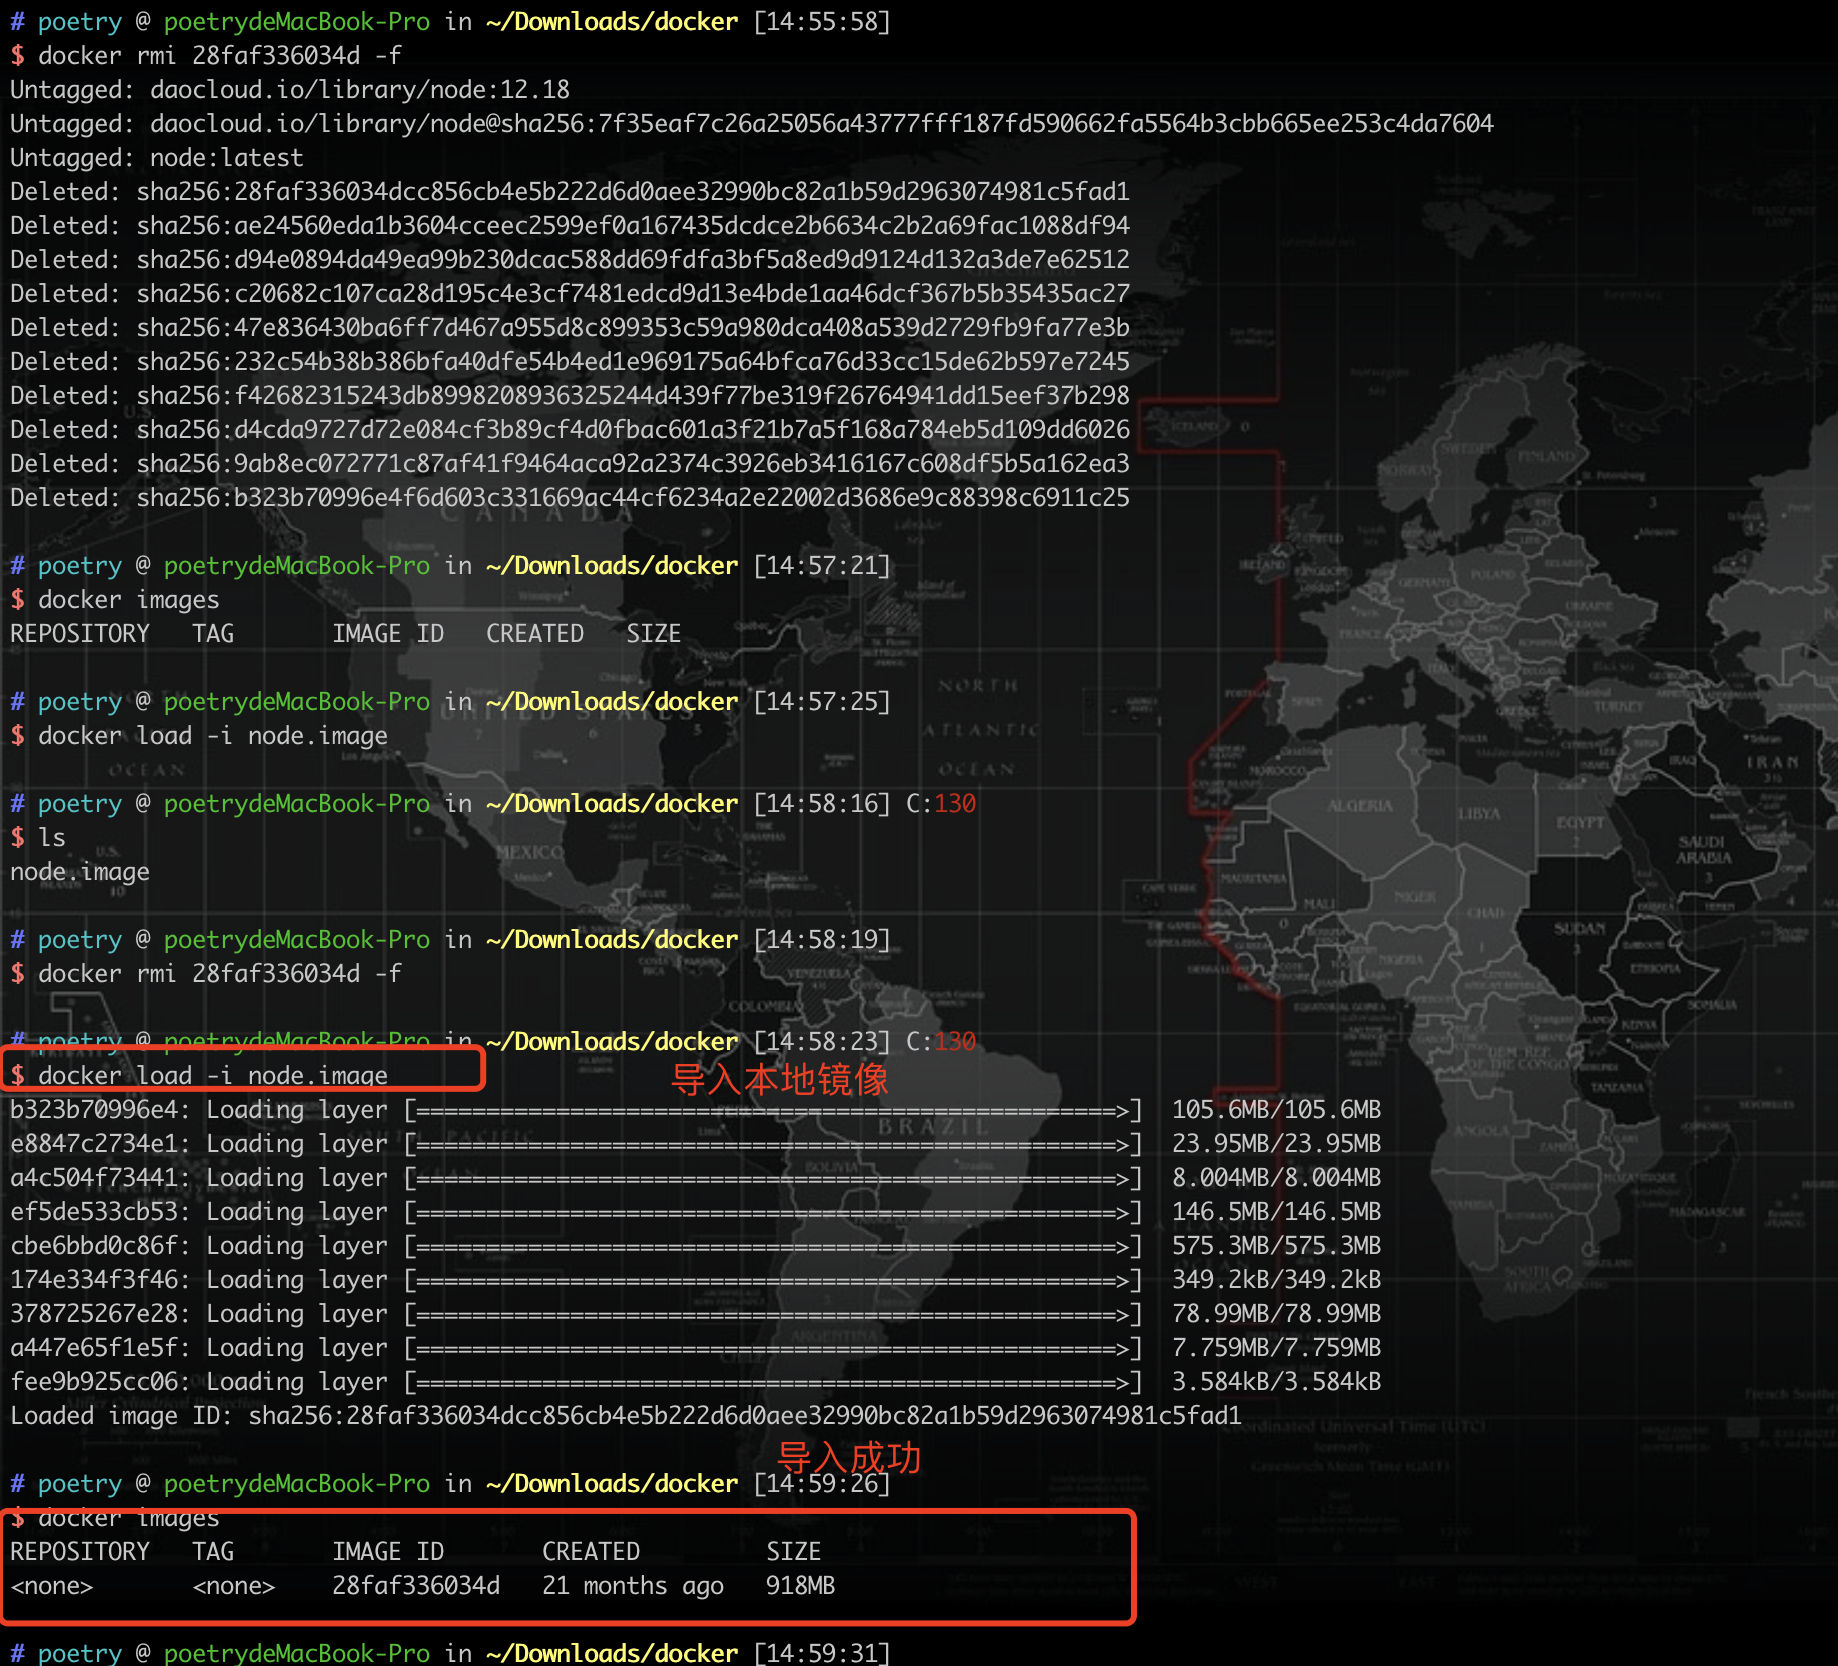
也可以导出镜像到本地备份 docker save -o node.image(导出镜像要起的名称) 28faf336034d(要导出的镜像的ID)

我们先删除之前的镜像 docker rmi 28faf336034d -f 强制删除

再次导入本地镜像
docker load -i node.image(导入的镜像名称)
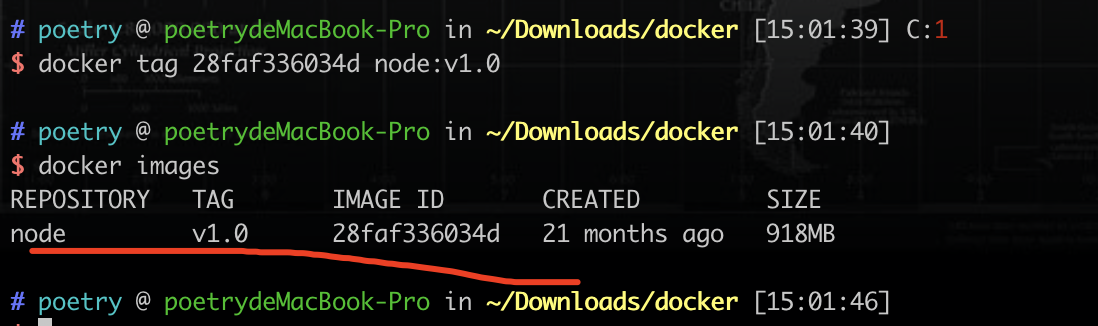
然后再次重命名镜像即可
docker tag 28faf336034d node:v1.0(版本v1.0)
2、安装MySQL镜像
进入https://hub.daocloud.io 搜索mysql,切换到版本获取下载地址
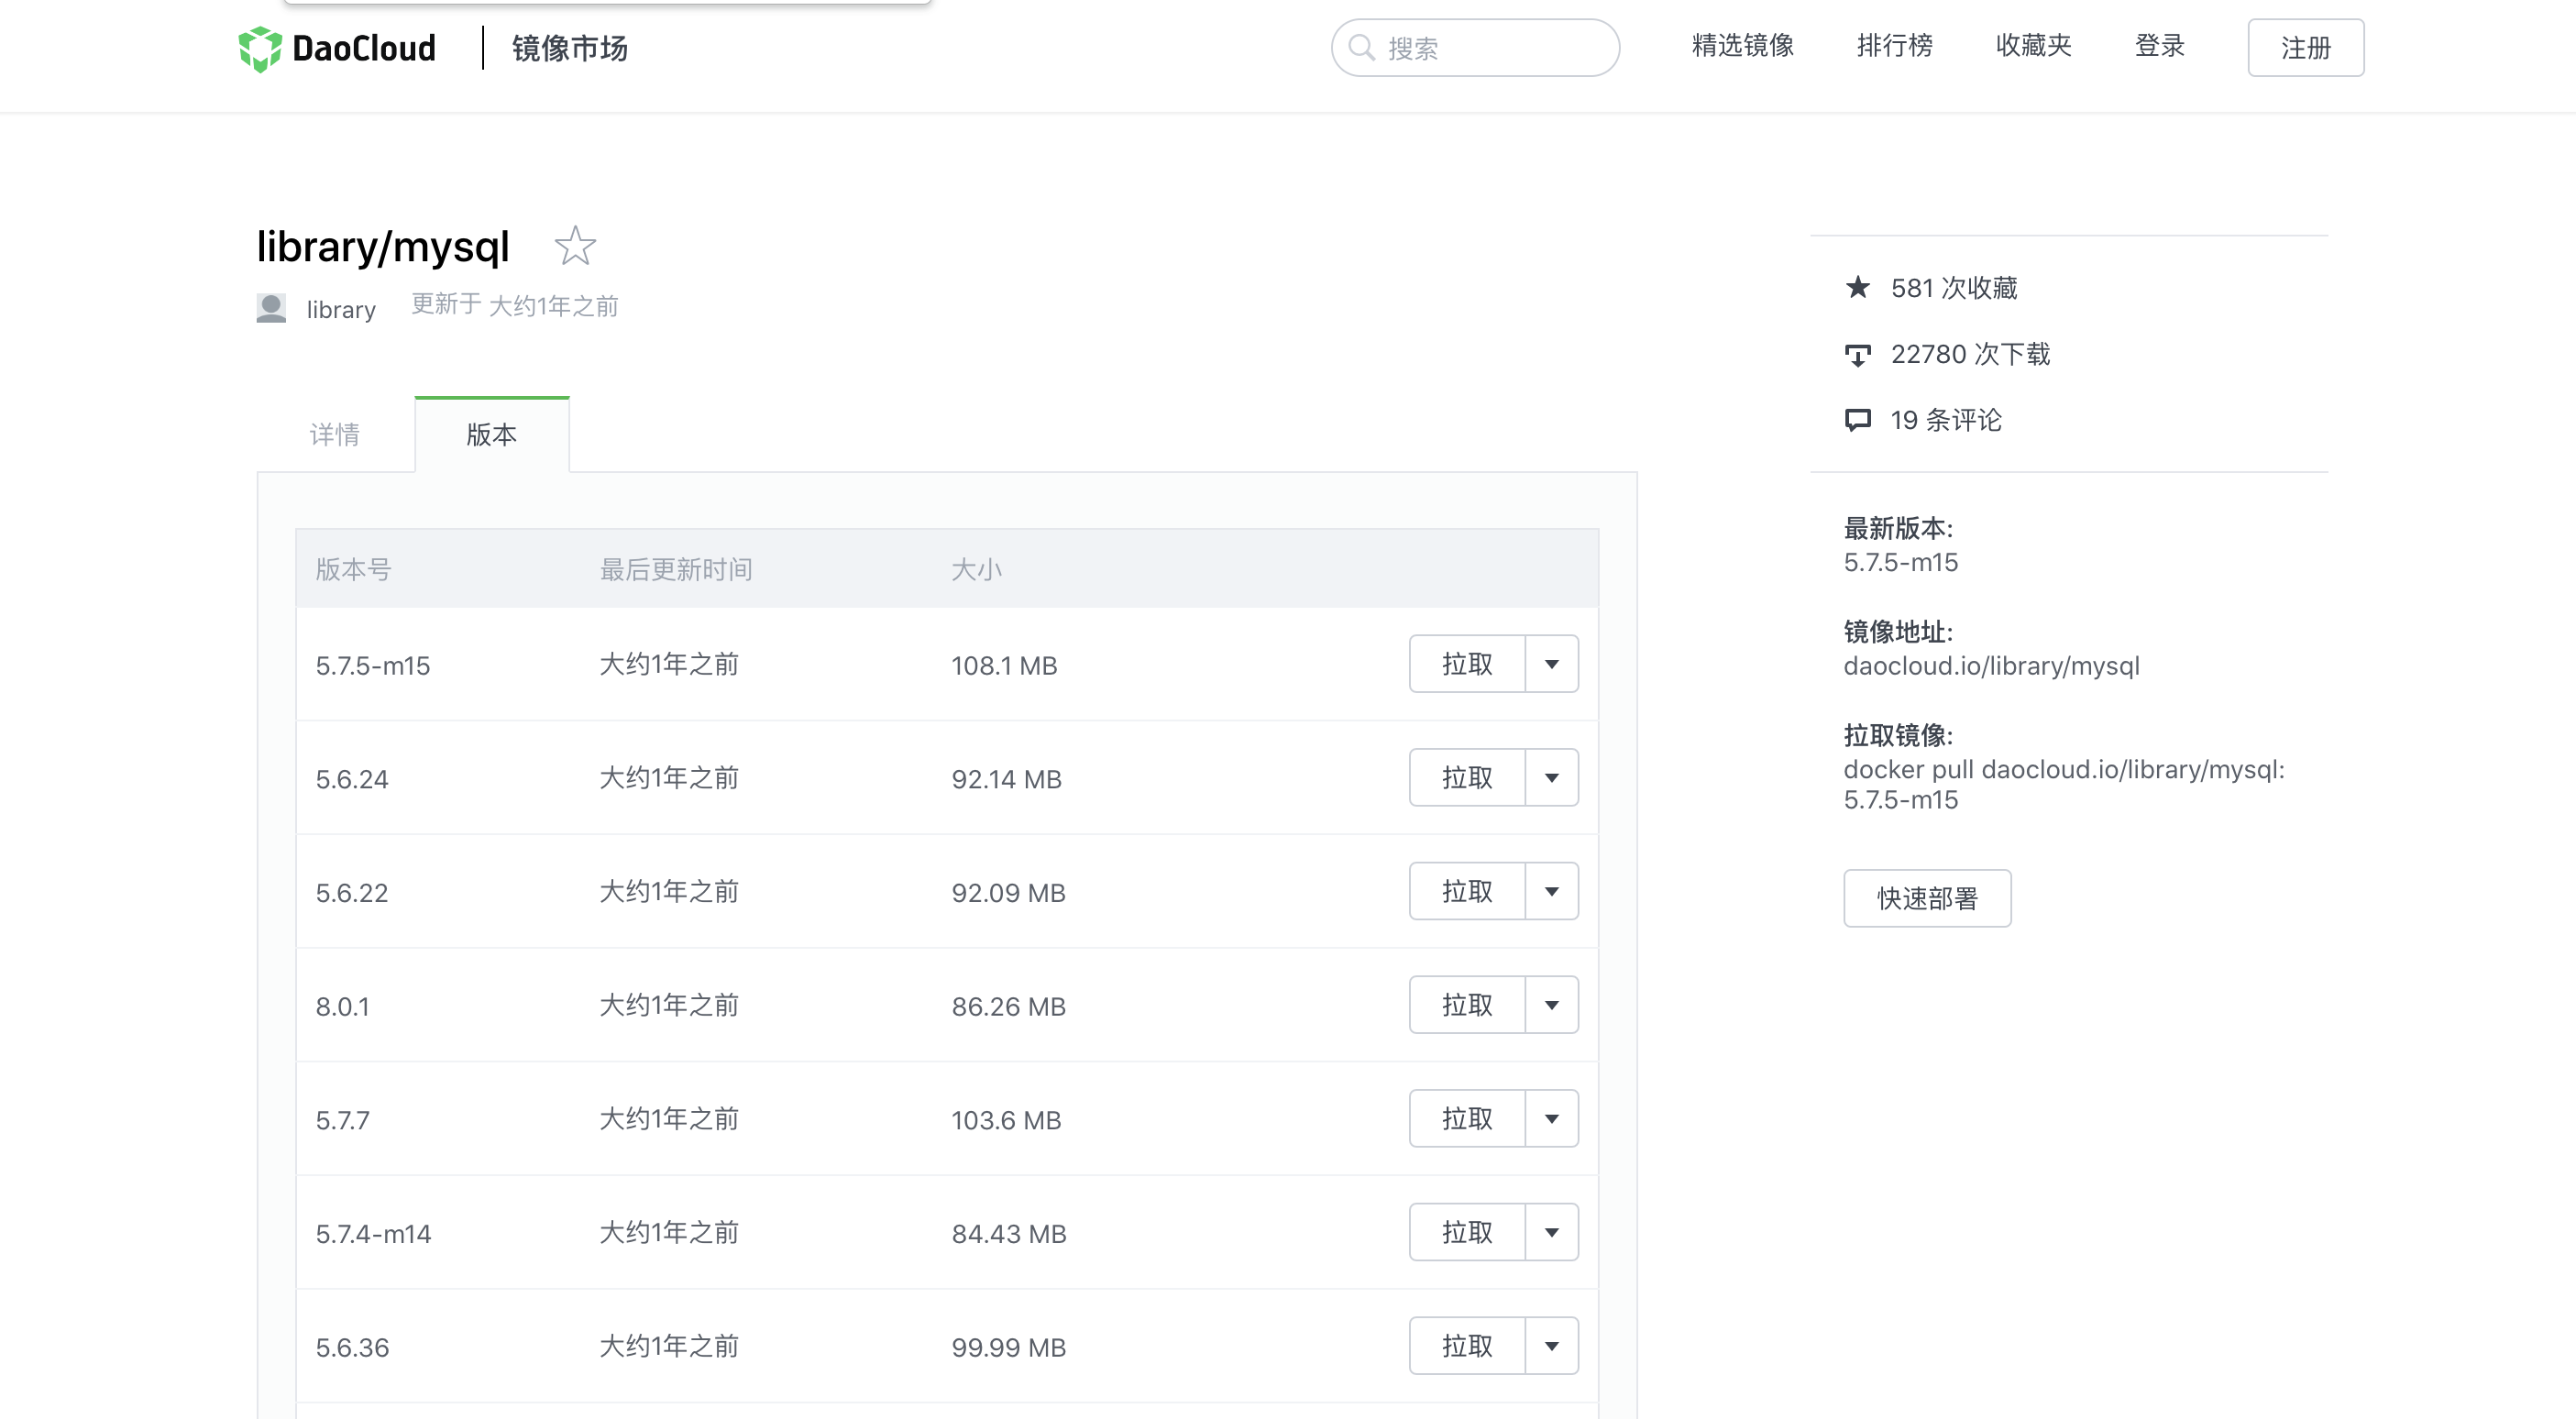
docker pull daocloud.io/library/mysql:8.0.20

启动MySQL镜像
docker run -d(后台运行) -p 3307:3306(本机端口:MySQL运行端口) --name mysql(容器名称) -e MYSQL_ROOT_PASSWORD=123456(设置mysql密码) be0dbf01a0f3(mysql镜像ID) |
查看当前正在运行的镜像
docker ps -a(正在运行和停止的镜像-a都可见) |

删除容器
删除之前需要stop:docker stop bac2692e2b9a(容器ID)
docker rm bac2692e2b9a(容器ID:docker ps获取) |
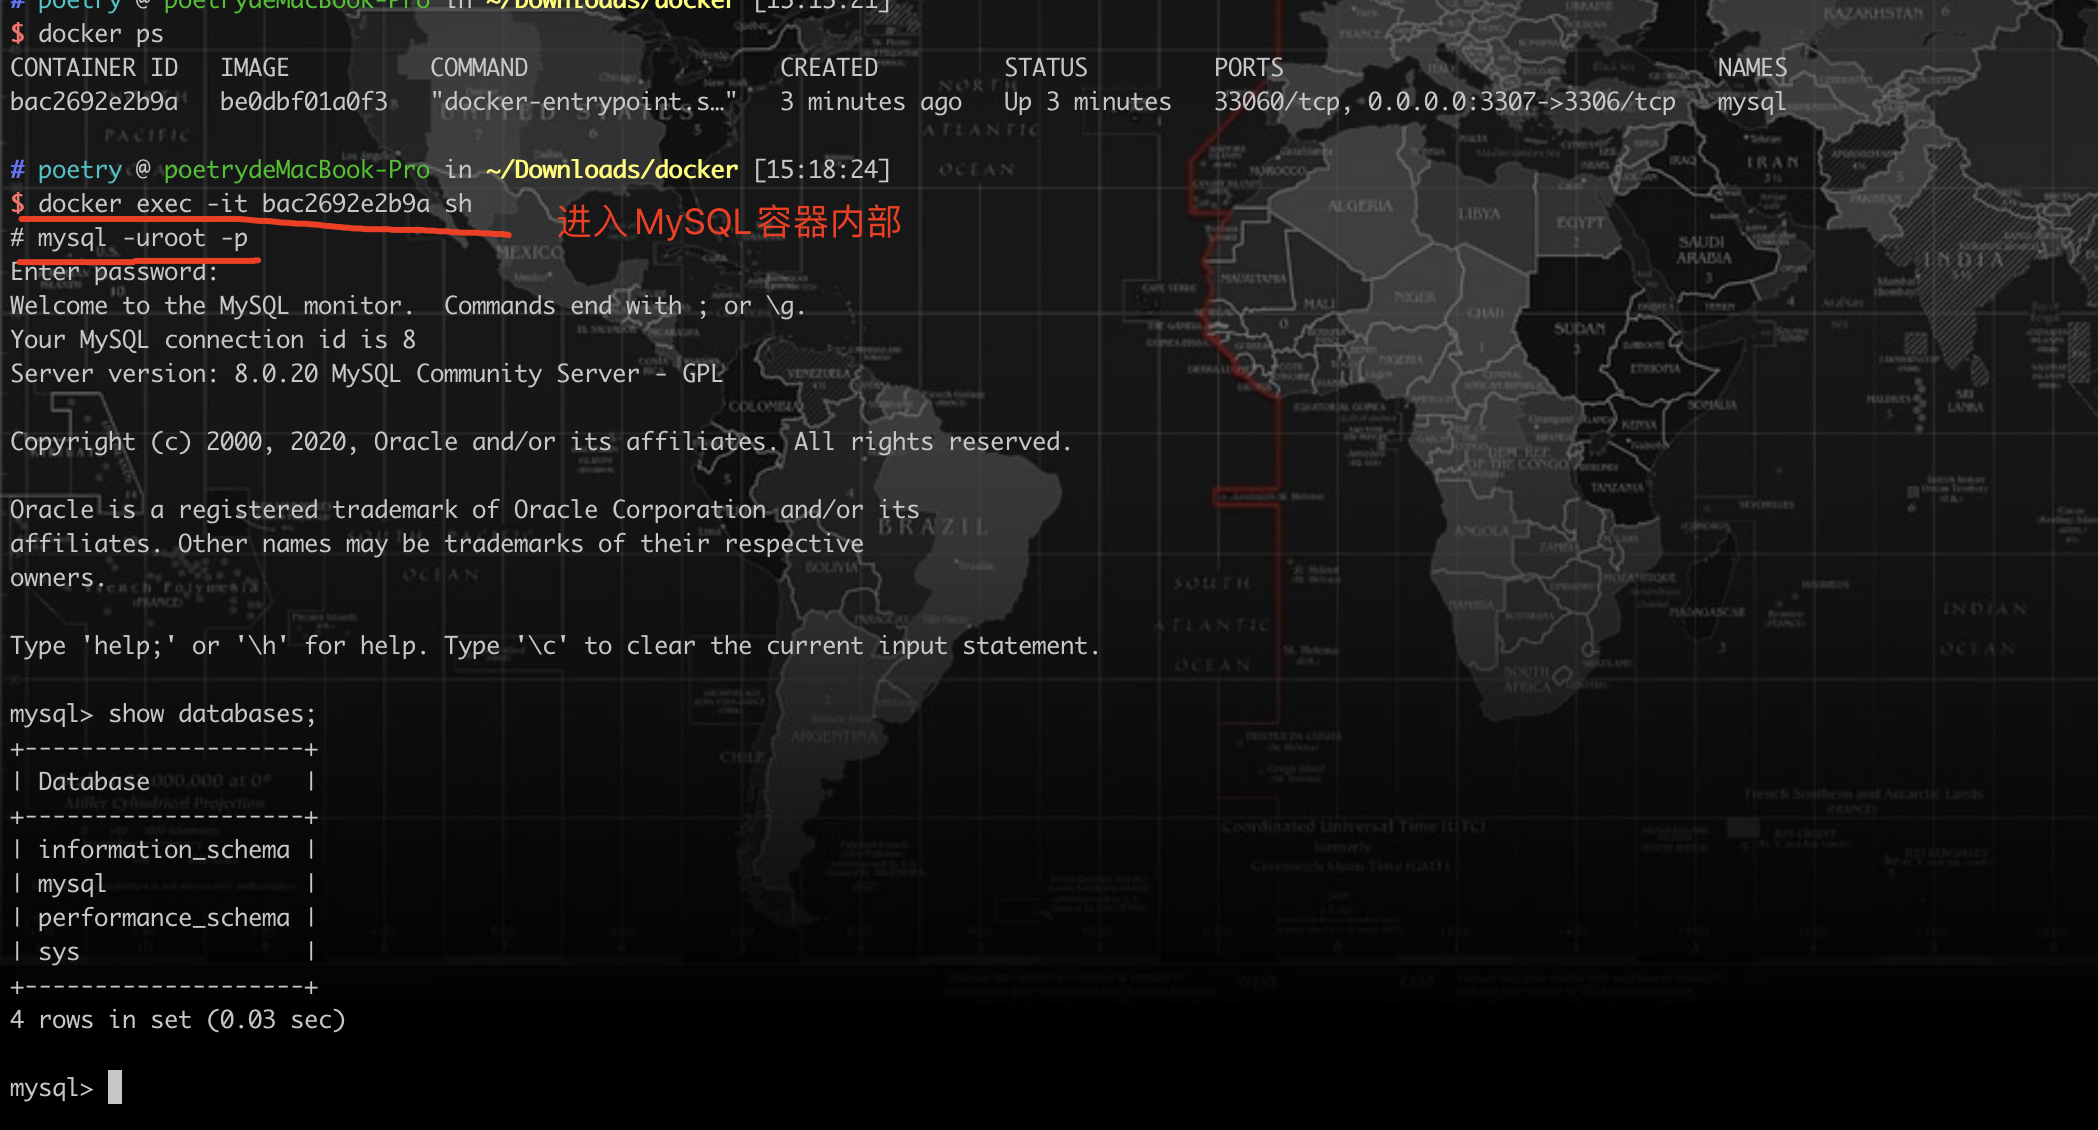
进入容器内部
docker exec -it bac2692e2b9a(容器ID) sh(指定进入方式) |
我们使用Navicat新建一个连接测试一下
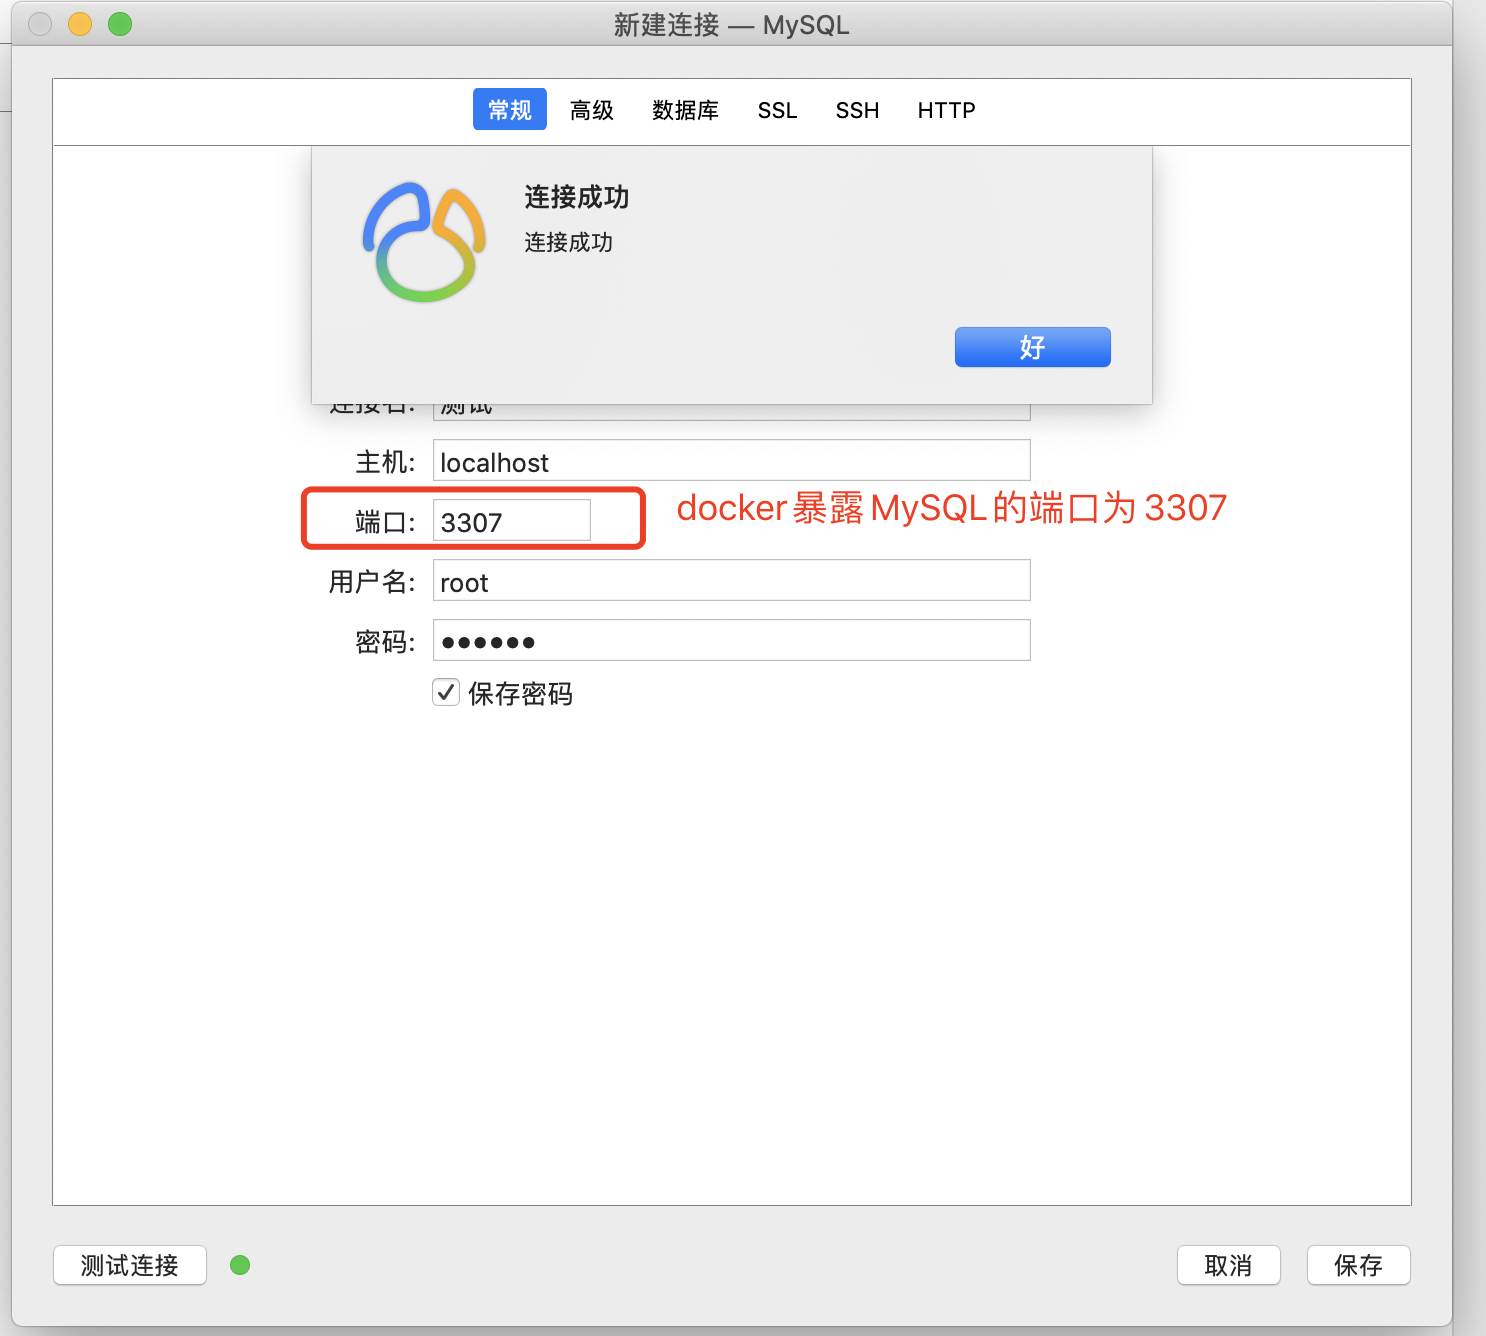
说明我们使用docker安装MySQL的方式是没问题的
查看MySQL容器日志
docker logs -f(查看最后几条) bac2692e2b9a(容器ID) |

重启容器
如果修改了容器配置,我们需要重新启动容器
docker restart bac2692e2b9a(容器ID) |
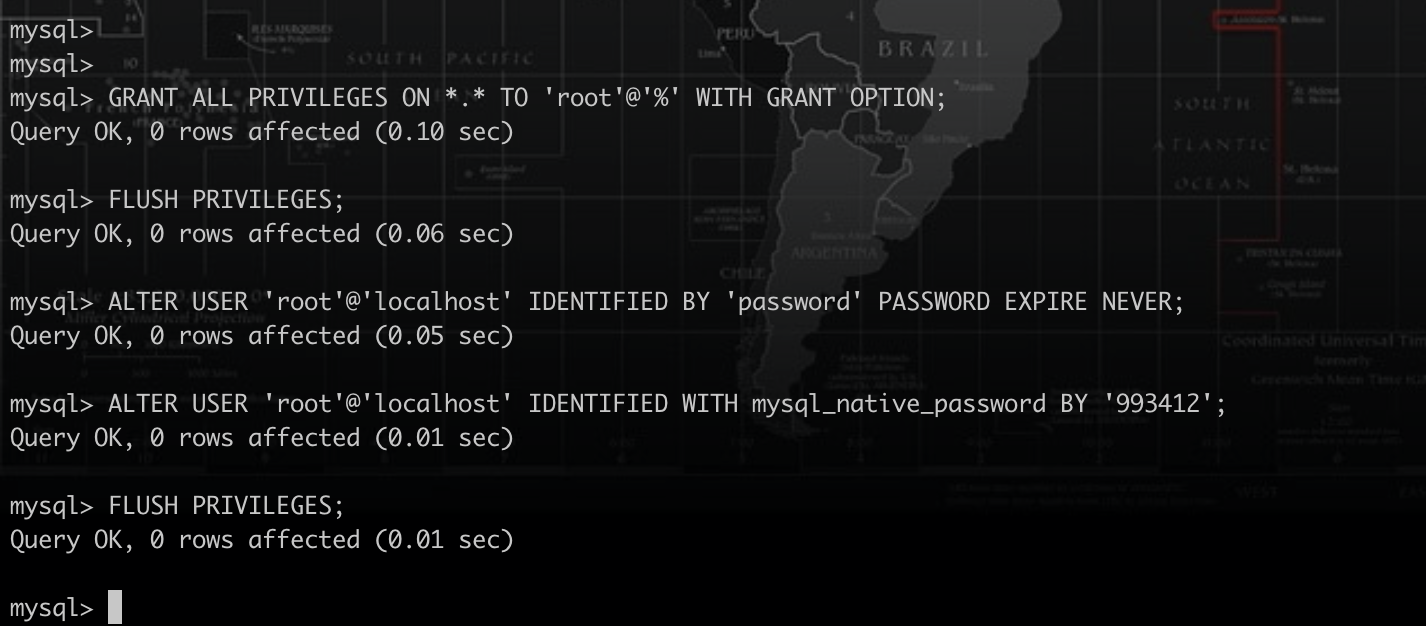
设置MySQL权限
mysql8.0后,需要设置,否则node连接不上
docker exec -it bac2692e2b9a sh |
# 远程连接权限 |
3、安装redis镜像
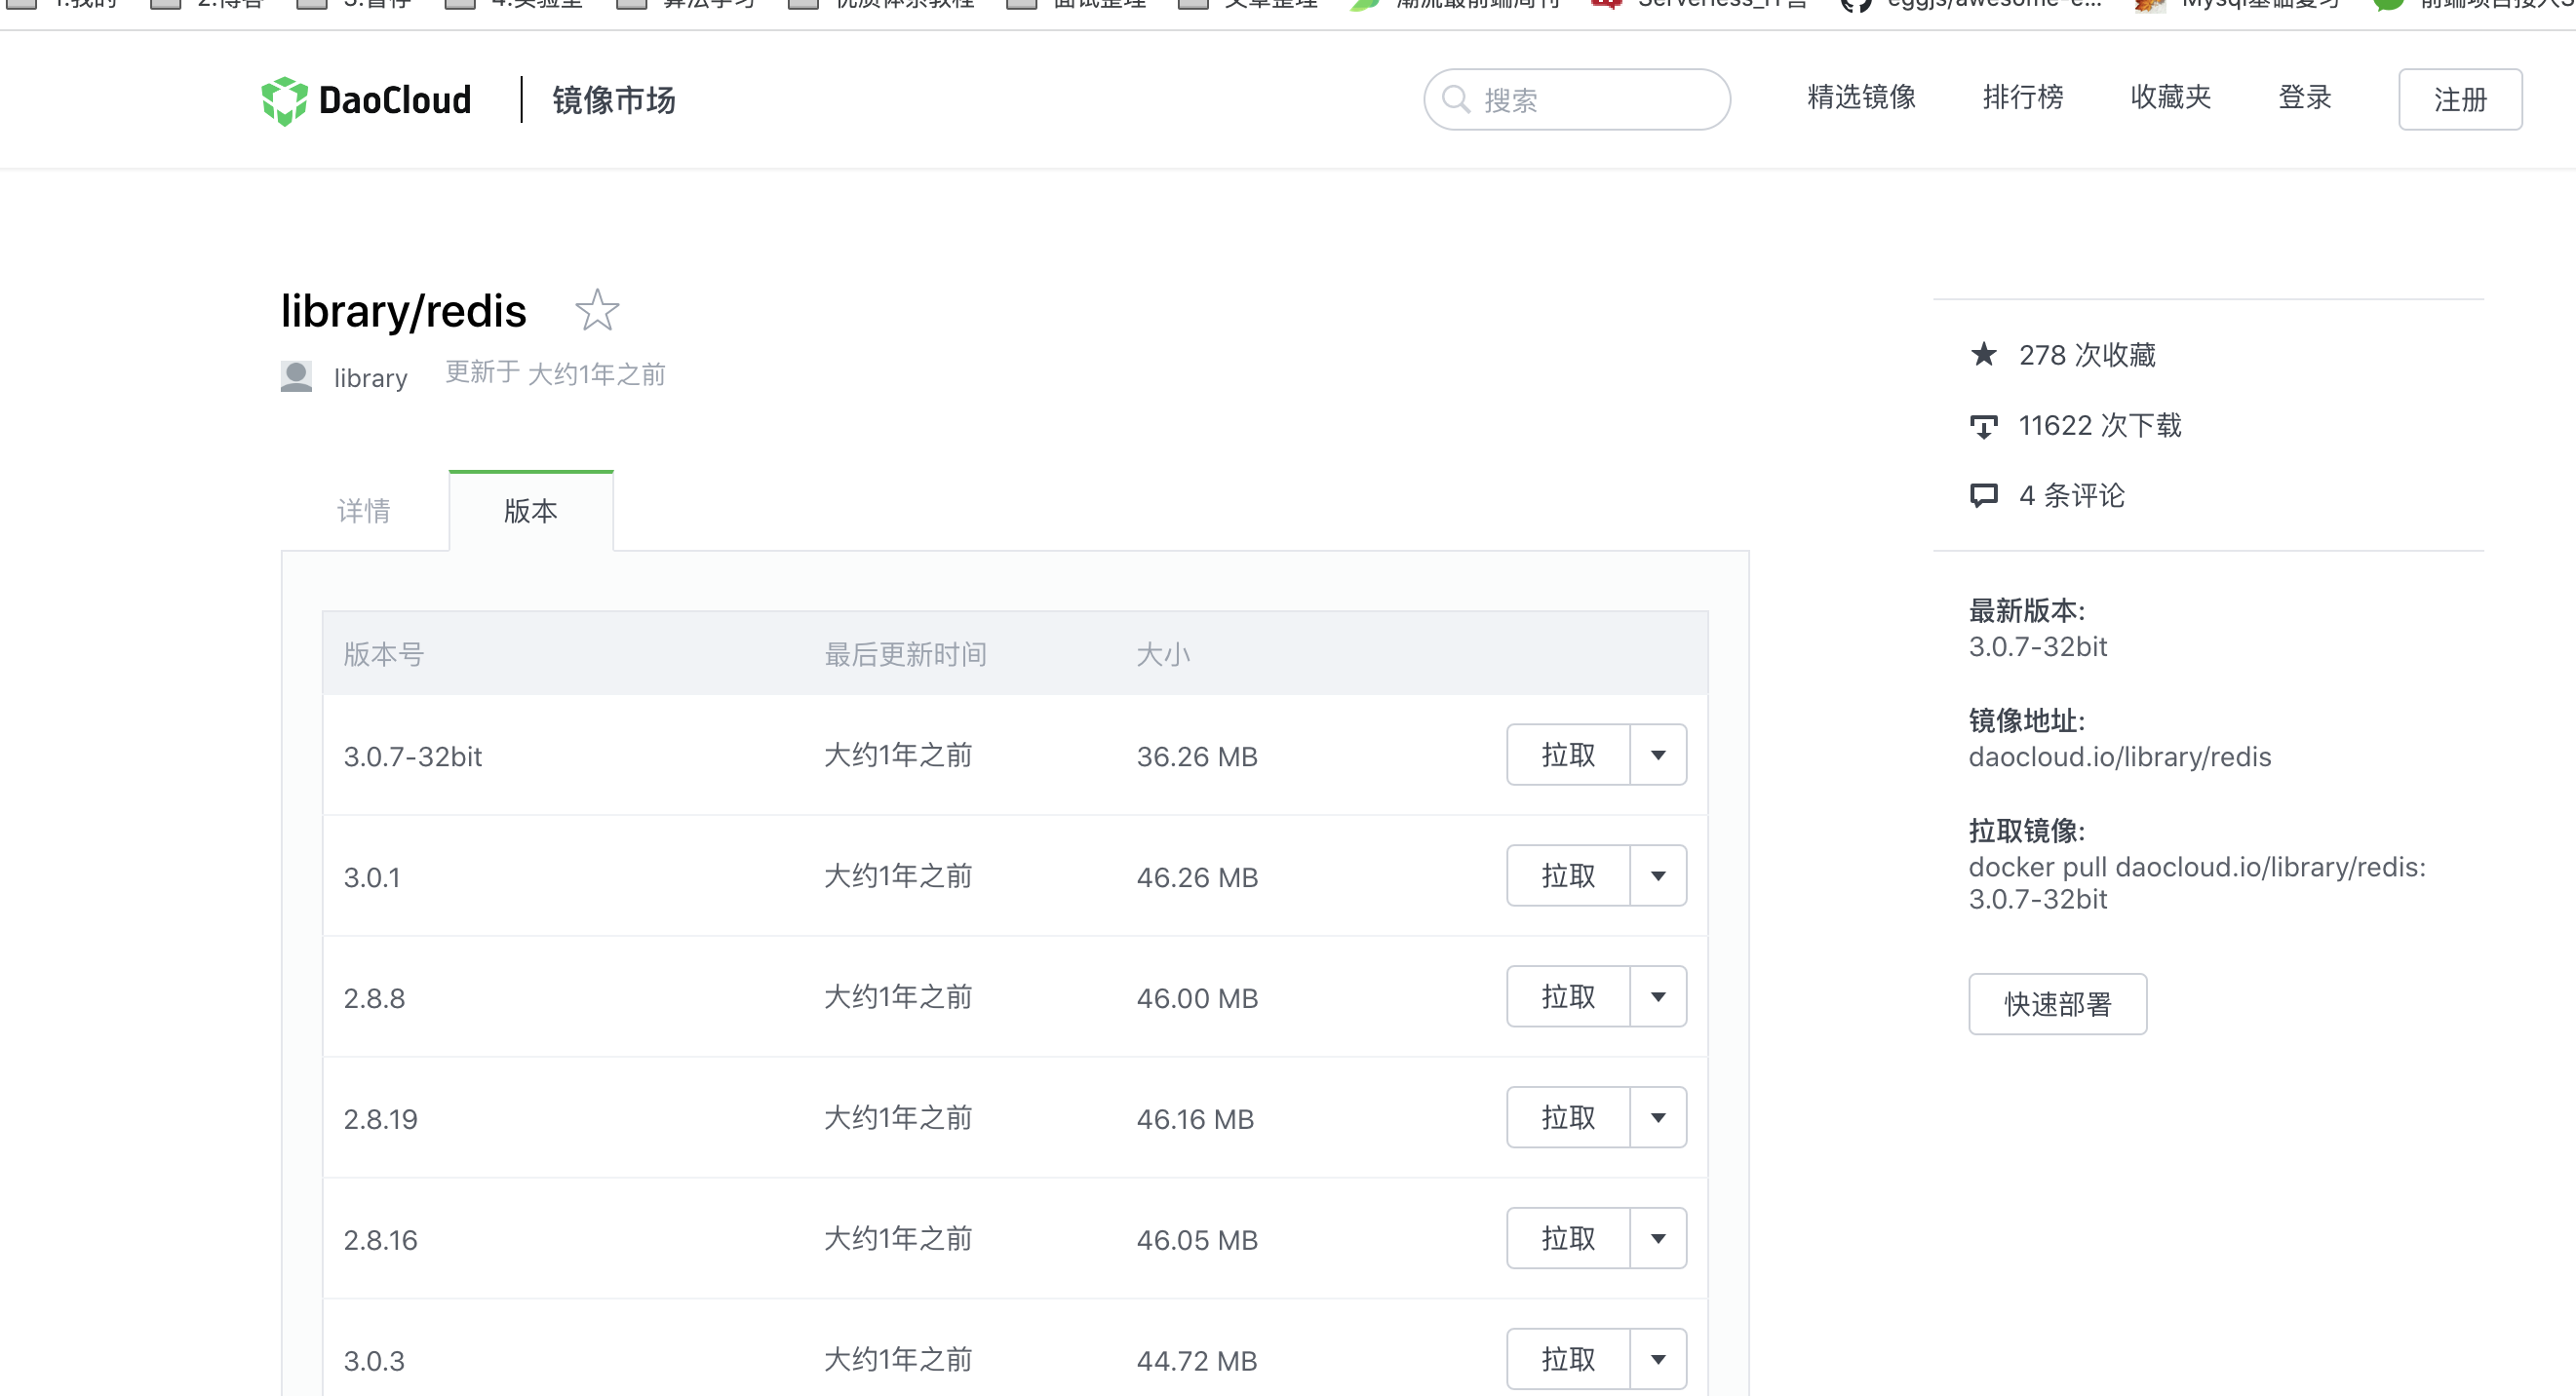
docker pull daocloud.io/library/redis:6.0.3-alpine3.11 |
启动Redis镜像
docker run -d -p 6380:6379 --name redis 29c713657d31(镜像ID) --requirepass 123456(redis登录密码) |
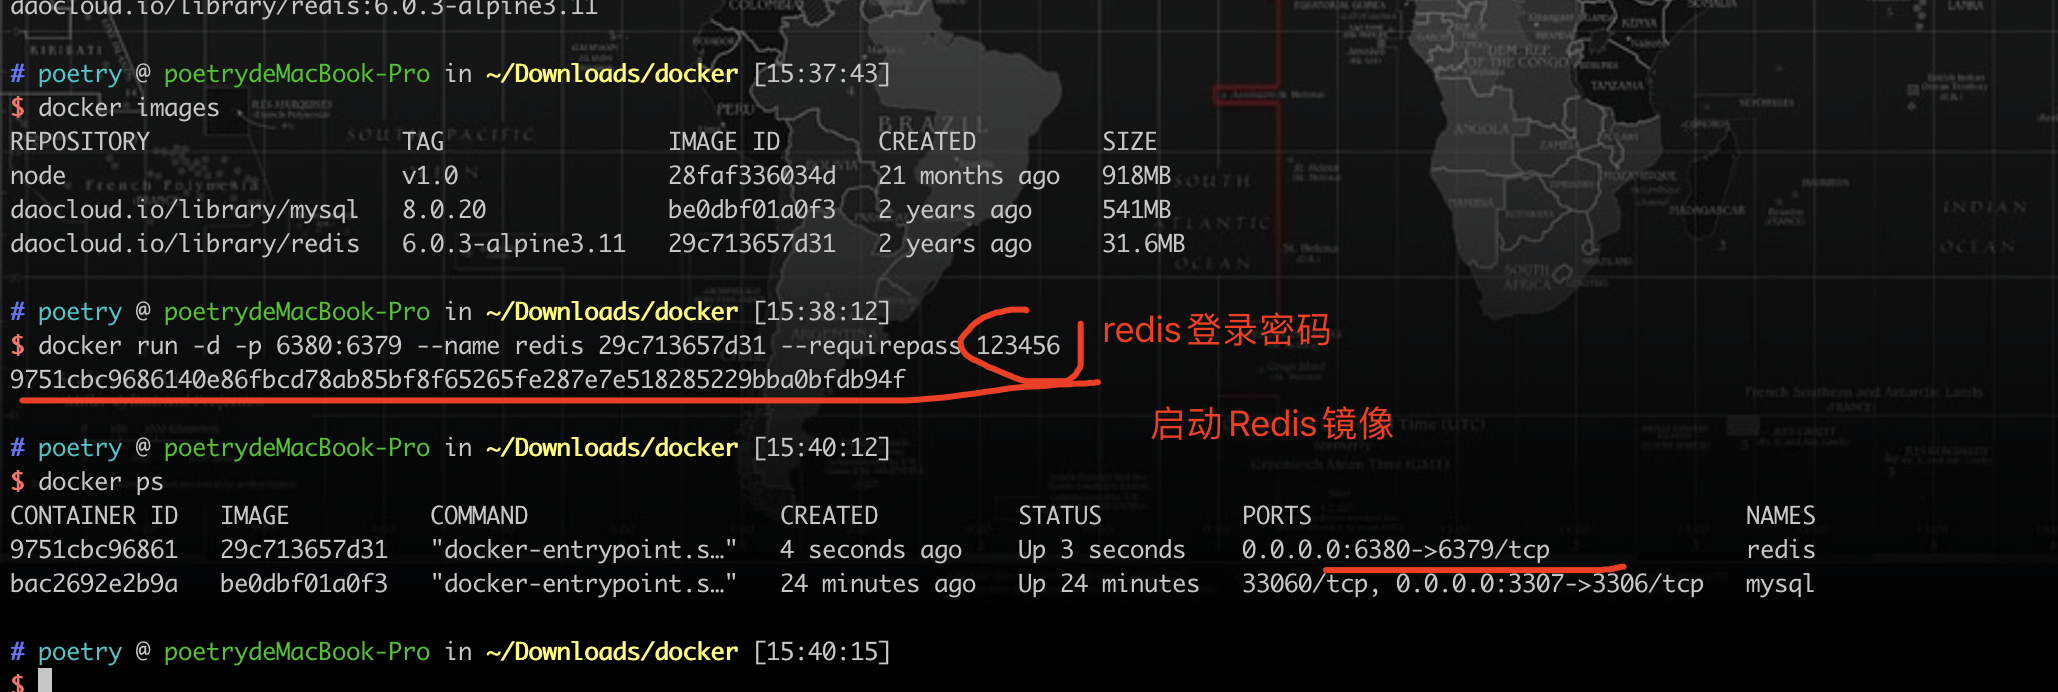
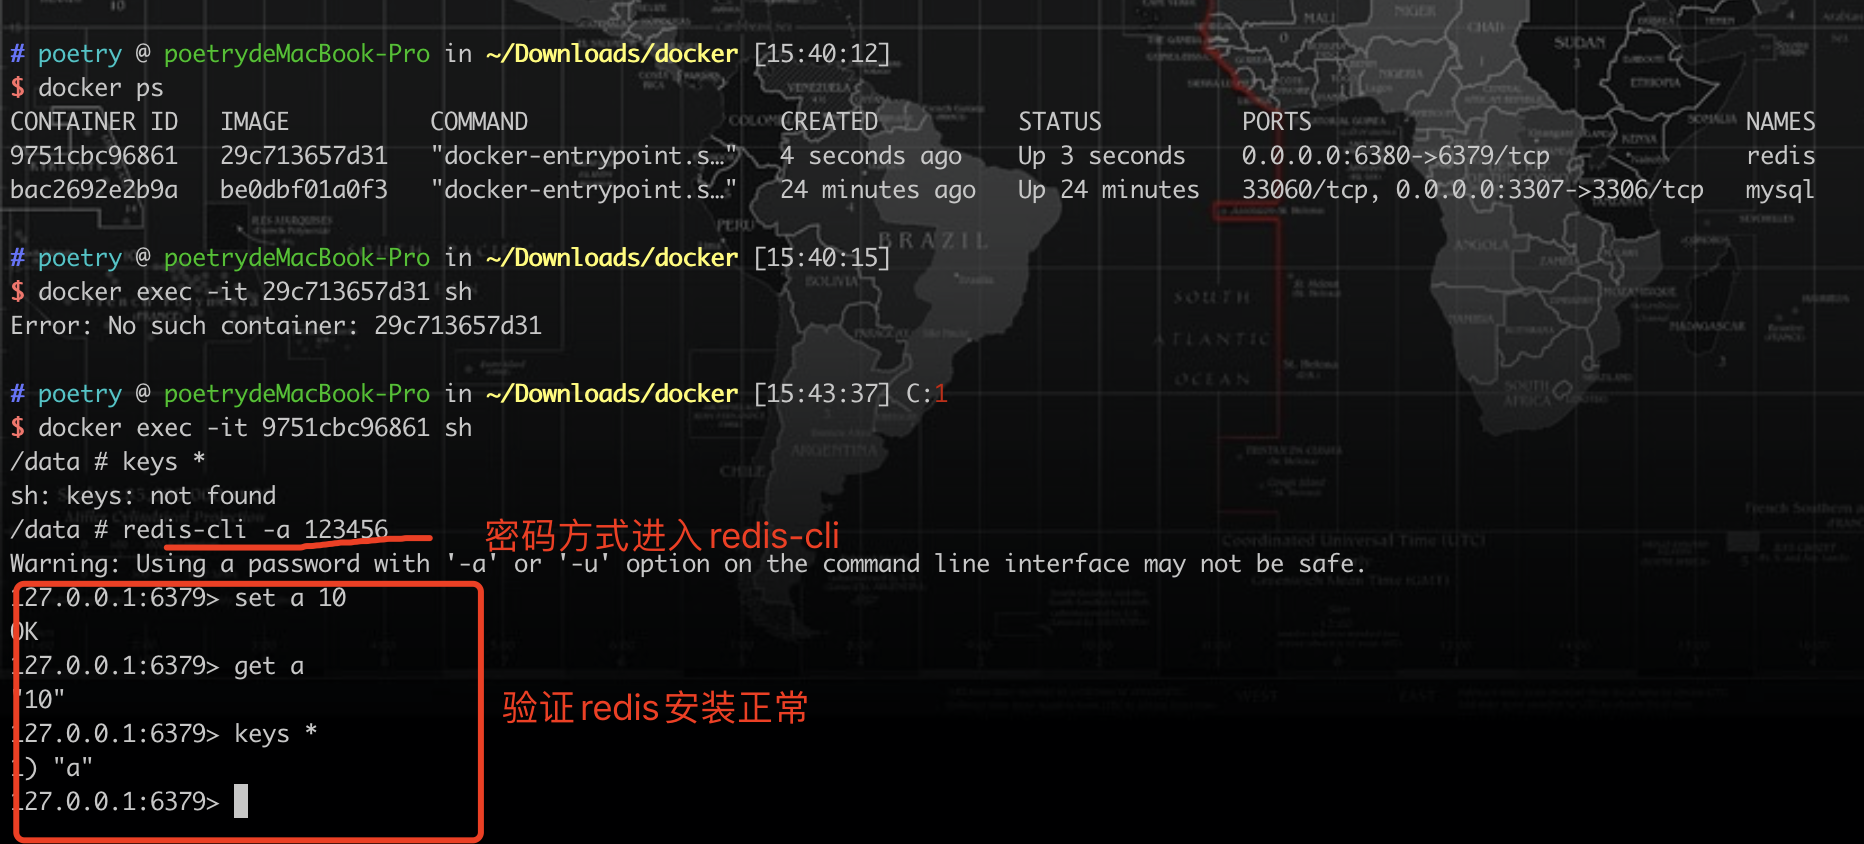
或进入redis镜像后在输入密码
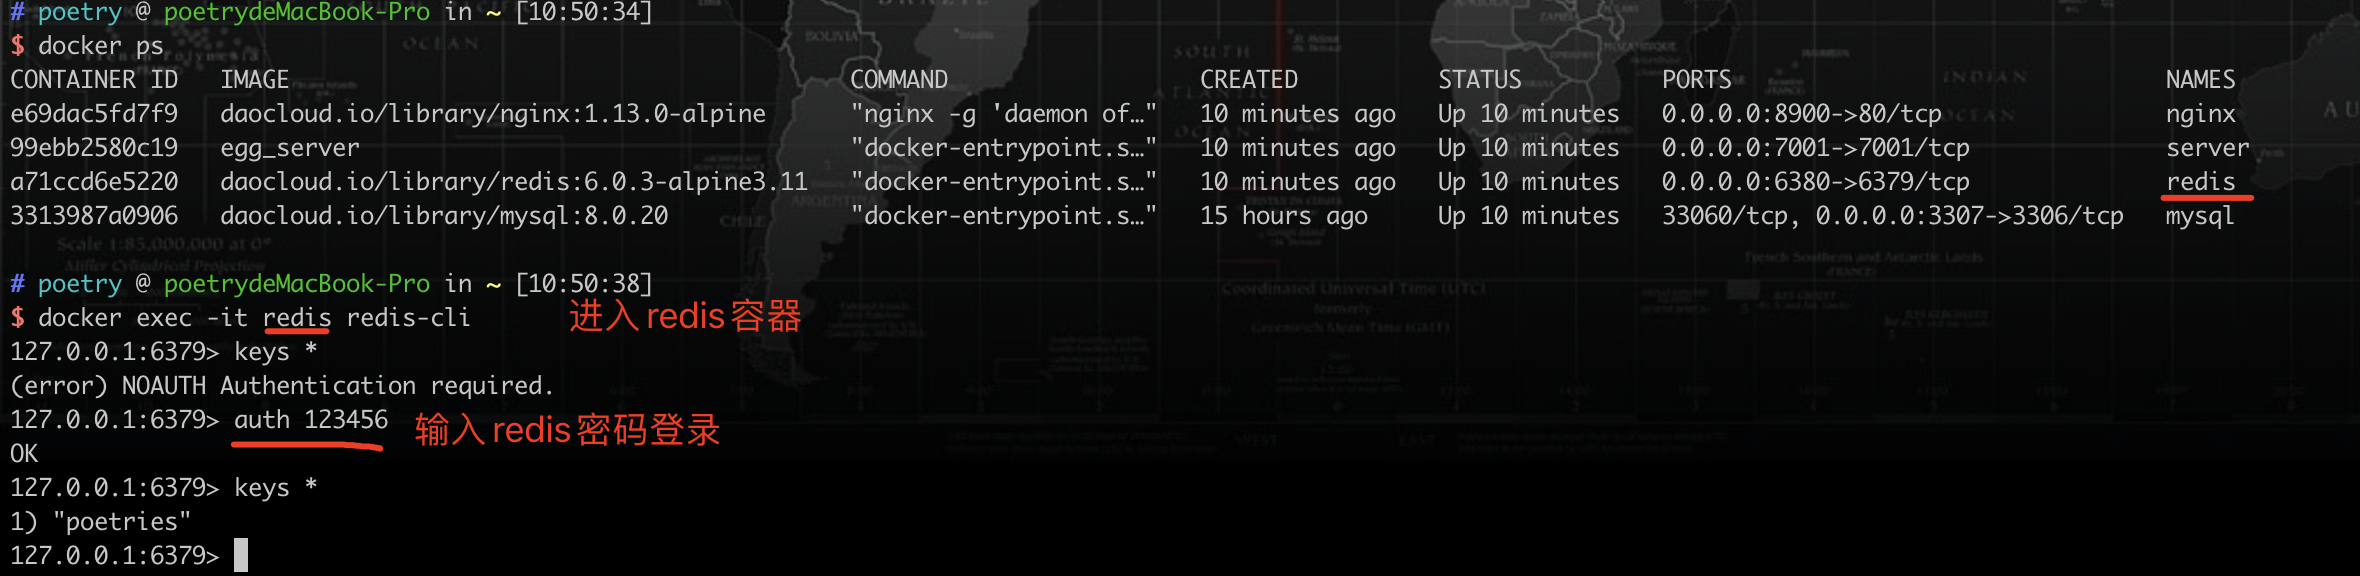
交互式进入redis容器
docker exec -it 9751cbc96861(容器ID) sh |
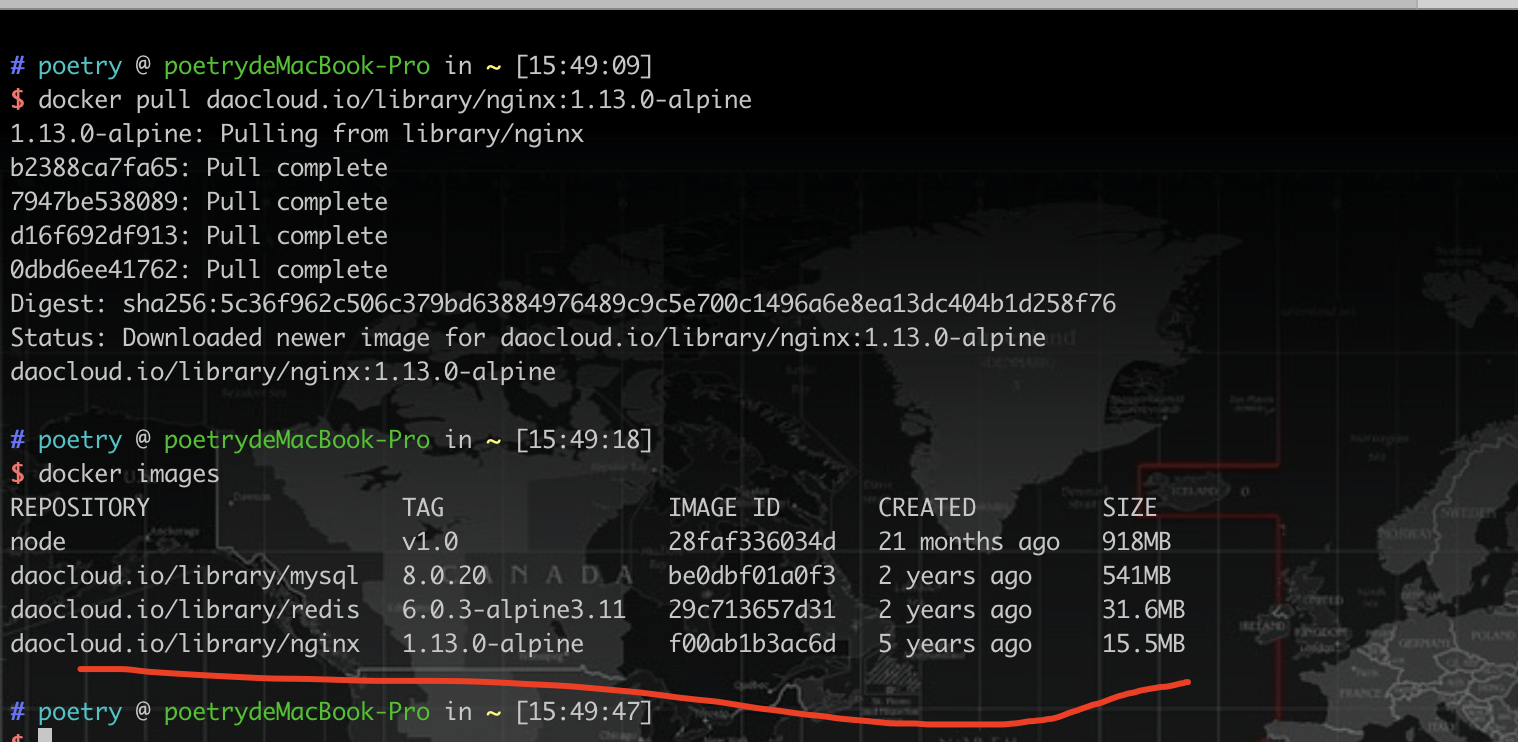
4、安装Nginx镜像
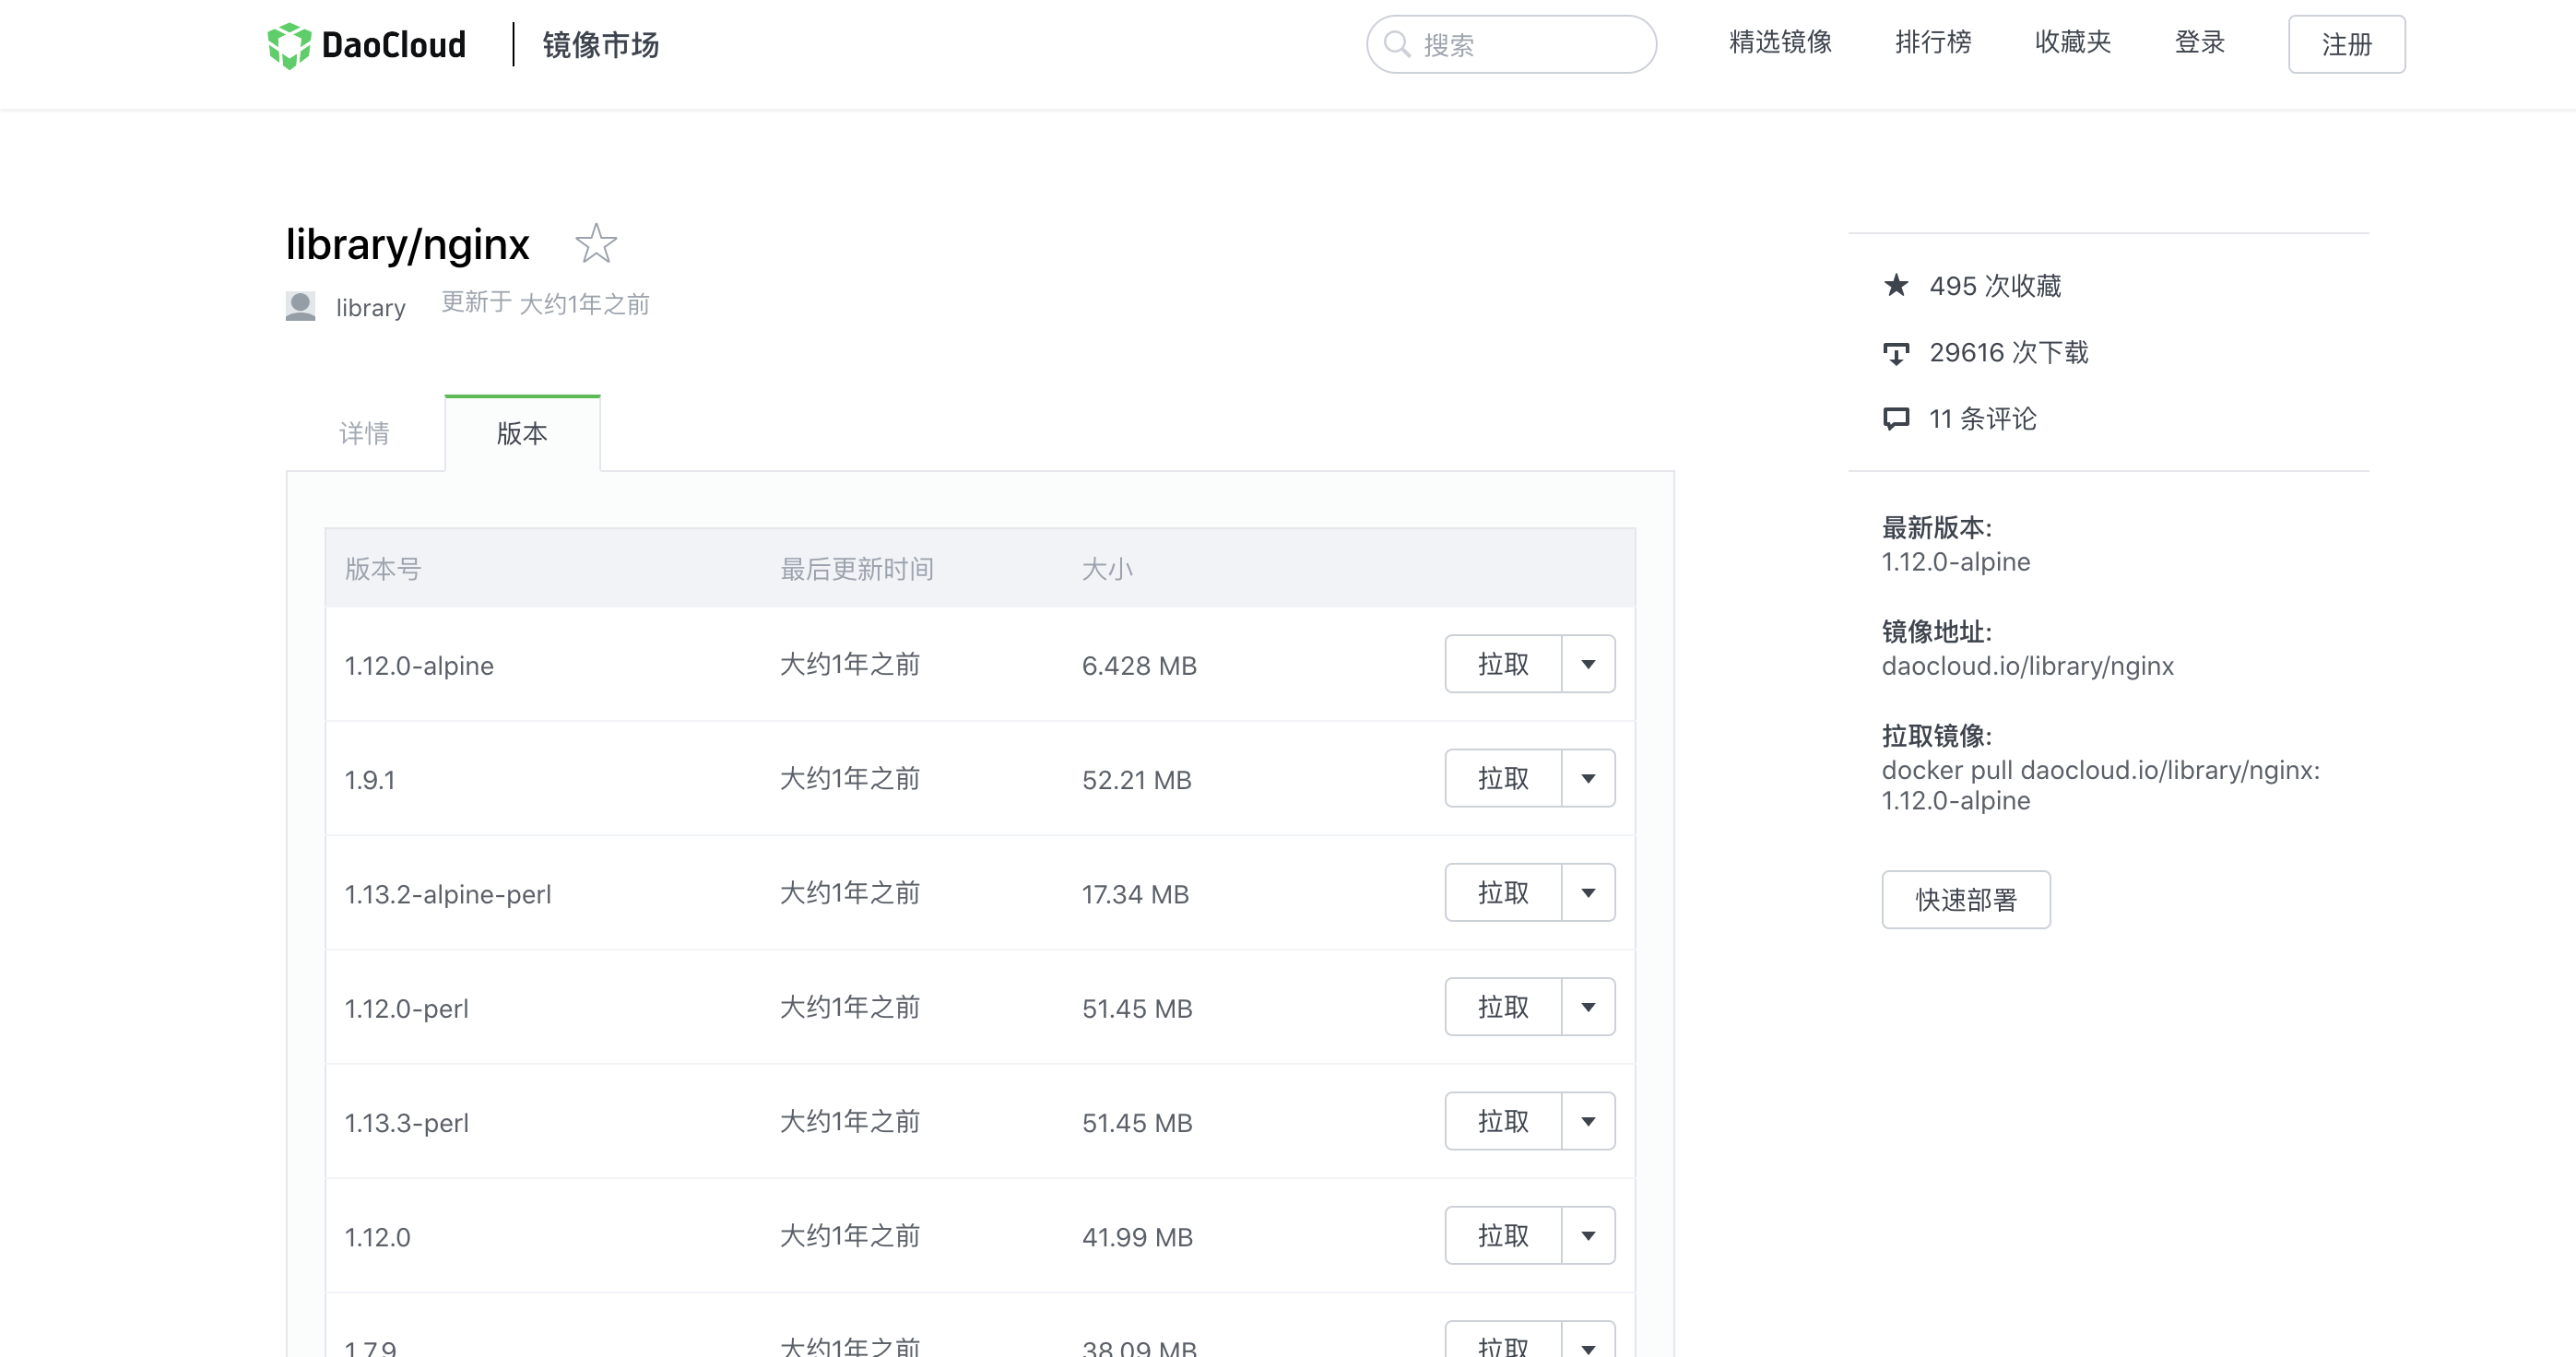
docker pull daocloud.io/library/nginx:1.13.0-alpine |
启动Nginx镜像
服务器上启动
docker run --name nginx(起一个容器名称) -d(后台运行) -p 80:80(本机:容器) -v(映射Nginx容器的运行目录本机) /root/nginx/log:/var/log/nginx(本机目录:容器目录) -v /root/nginx/conf/nginx.conf:/etc/nginx/nginx.conf(本机目录:容器内nginx配置所在目录) -v /root/nginx/conf.d:/etc/nginx/conf.d -v /root/nginx/html:/usr/share/nginx/html f00ab1b3ac6d(nginx镜像ID) |
本地电脑启动
docker run --name nginx -d -p 8666:80 -v /Users/poetry/Downloads/docker/nginx/log:/var/log/nginx -v /Users/poetry/Downloads/docker/nginx/conf/nginx.conf:/etc/nginx/nginx.conf -v /Users/poetry/Downloads/docker/nginx/conf.d:/etc/nginx/conf.d -v /Users/poetry/Downloads/docker/nginx/html:/usr/share/nginx/html f00ab1b3ac6d |
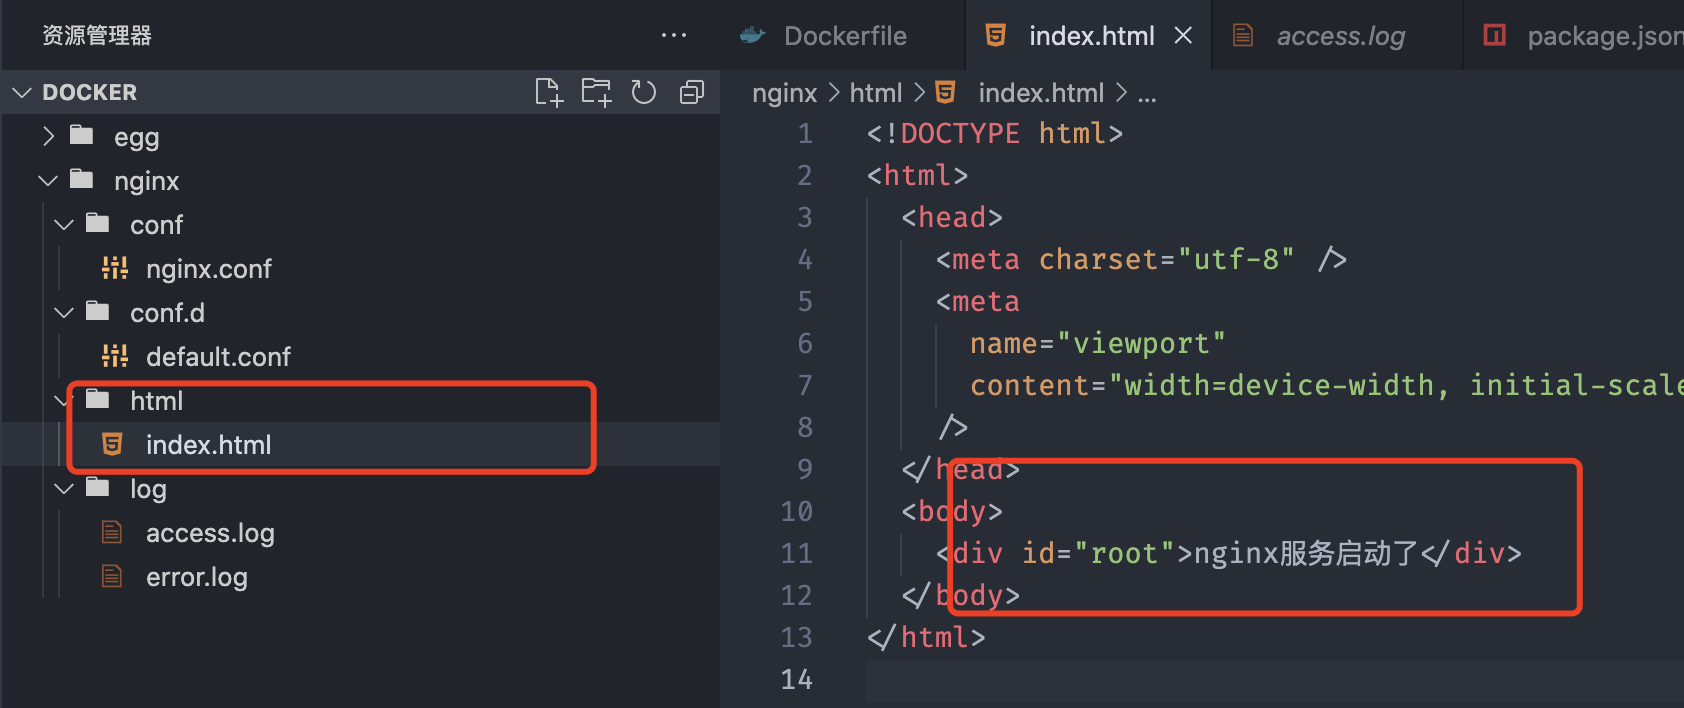
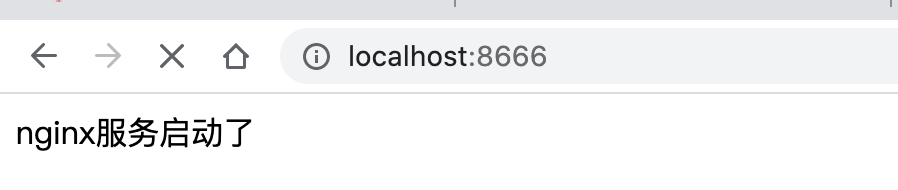
把docker容器中的Nginx服务配置映射本地方便管理
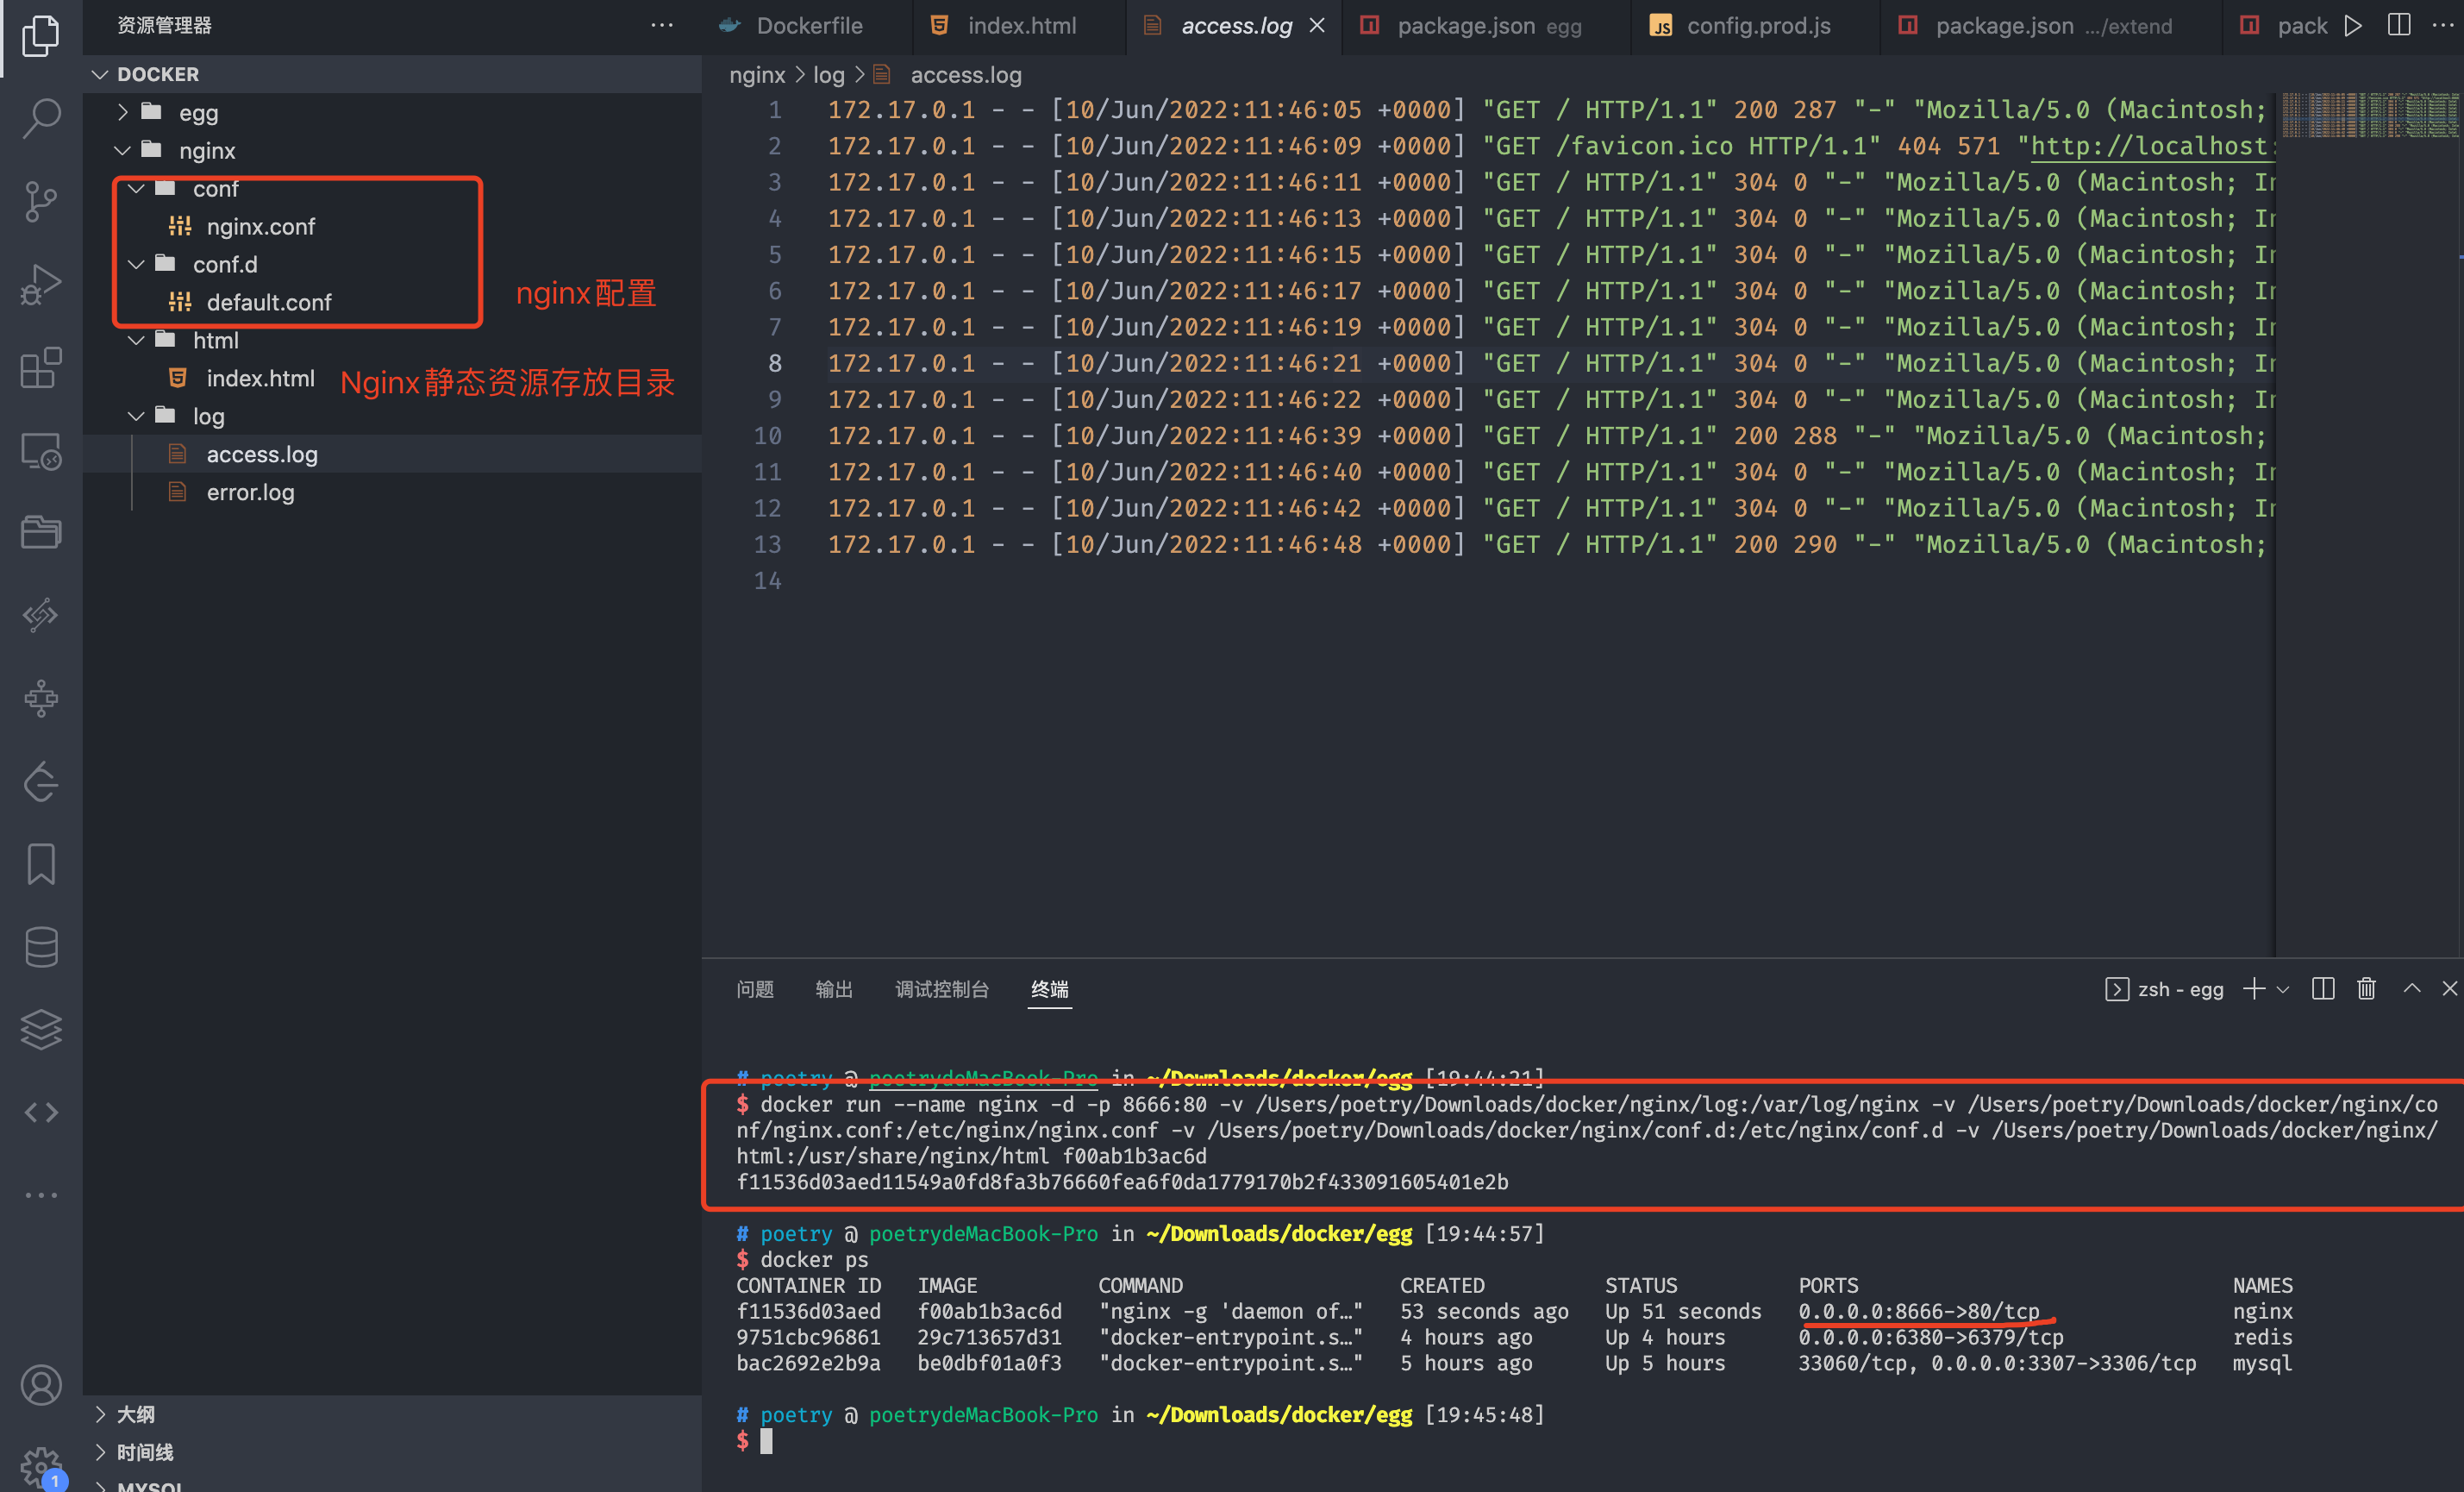
访问docker暴露的8666端口即可
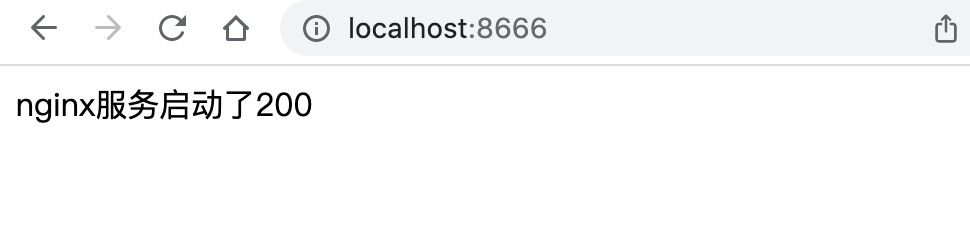
当我们修改了html中的文件,无需重启容器即可看到效果
1.4 部署egg代码
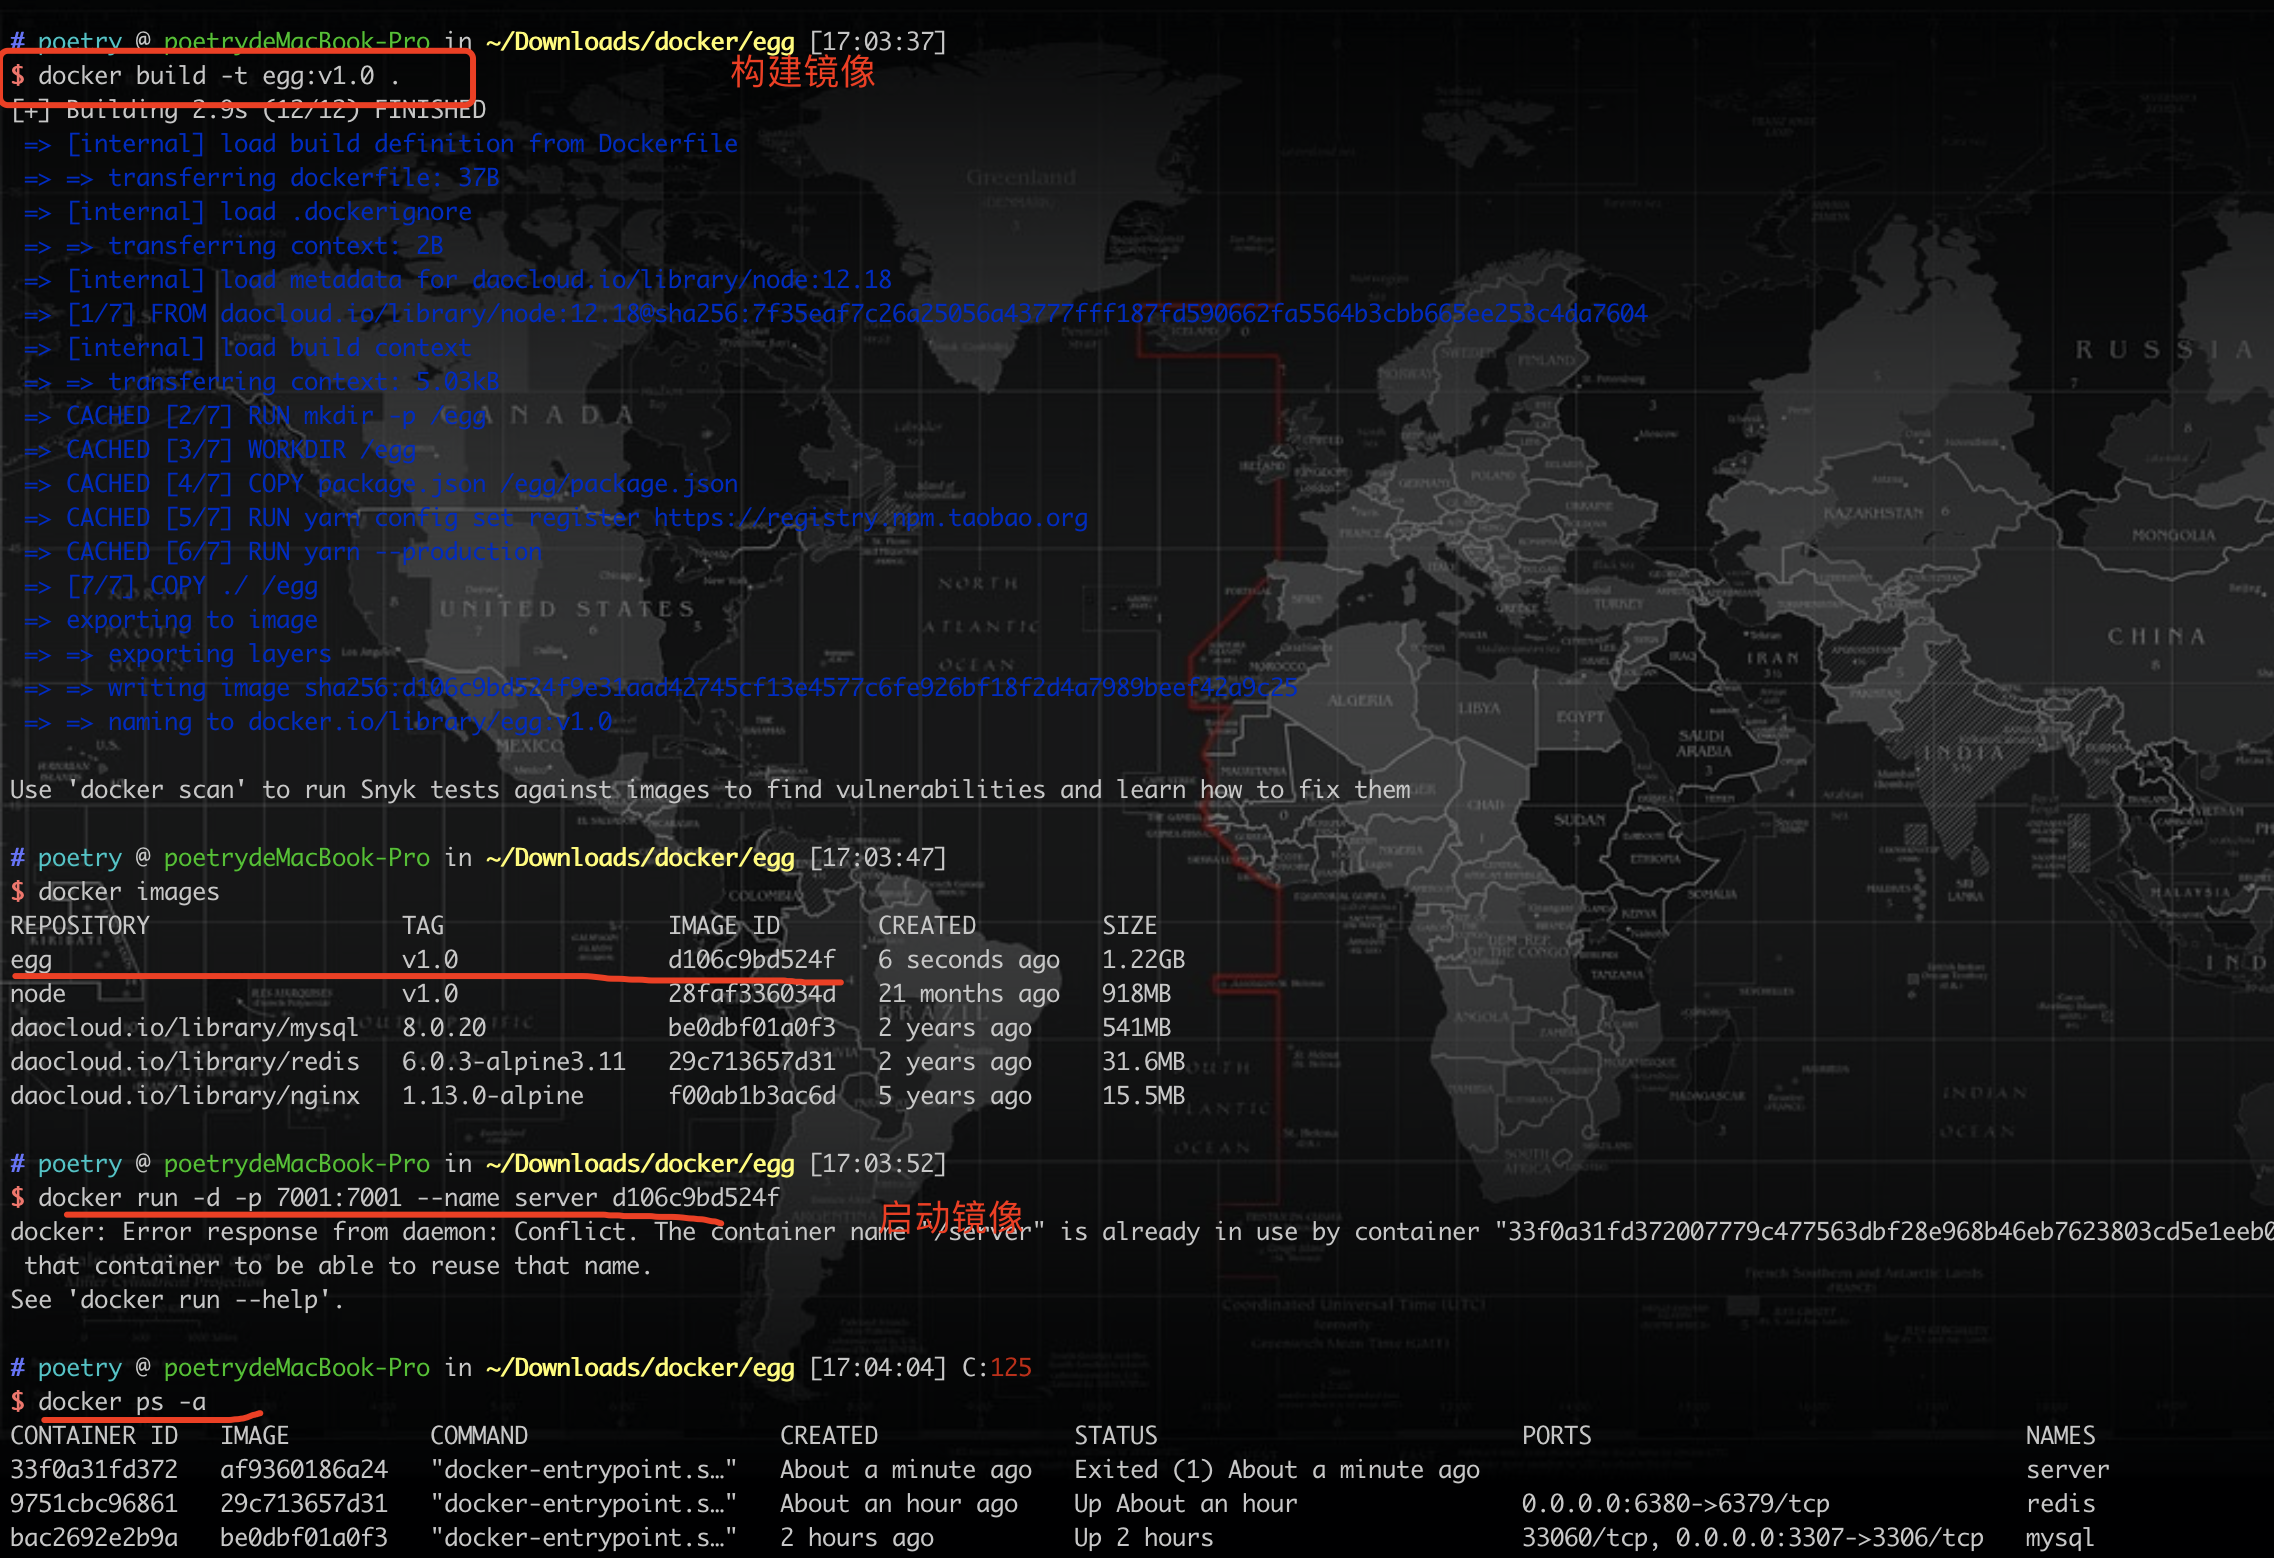
构建egg镜像,进入到egg目录
# 构建egg镜像,版本v1.0 |
Dockerfile文件如下
# 使用node镜像 |
启动egg镜像
docker run -d(后台启动) -p 7001:7001(本机:容器) --name server(容器名称) af9360186a24(镜像ID) |
二、docker-compose部署
2.1 编写docker-compose.yml文件
version: "3.0" |
2.2 启动服务
修改egg服务代码
常用命令
docker-compose -h查看命令
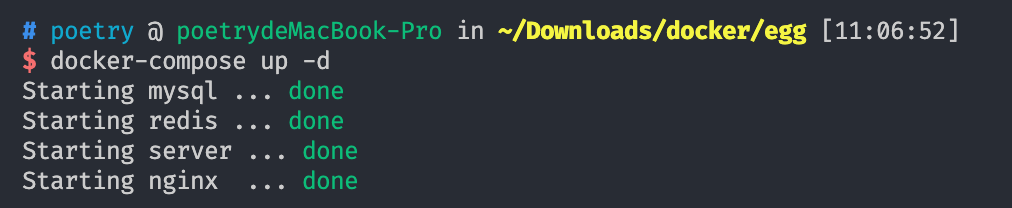
docker-compose up启动服务,控制台可见日志docker-compose up -d后台启动服务docker-compose build --no-cache重新构建镜像不使用缓存(最后docker-compose up -d启动)- 停止服务
docker-compose down - 下载镜像过程
docker-compose pull - 重启服务
docker-compose restart
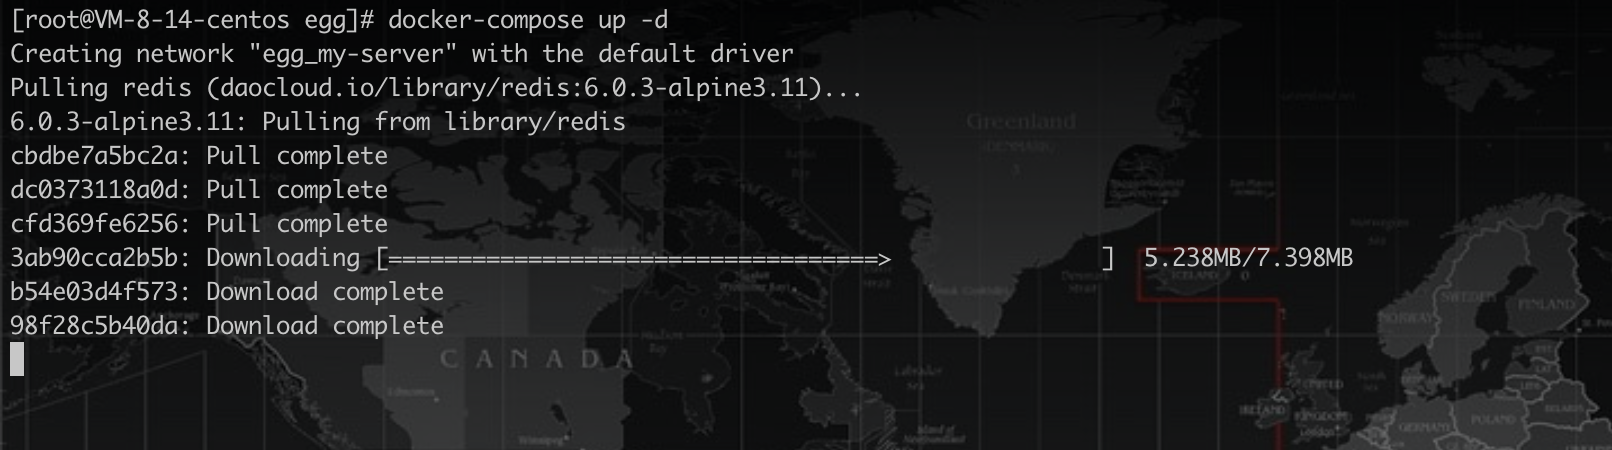
后台启动服务 docker-compose up -d
查看应用状态 docker-compose ps

停止服务 docker-compose down
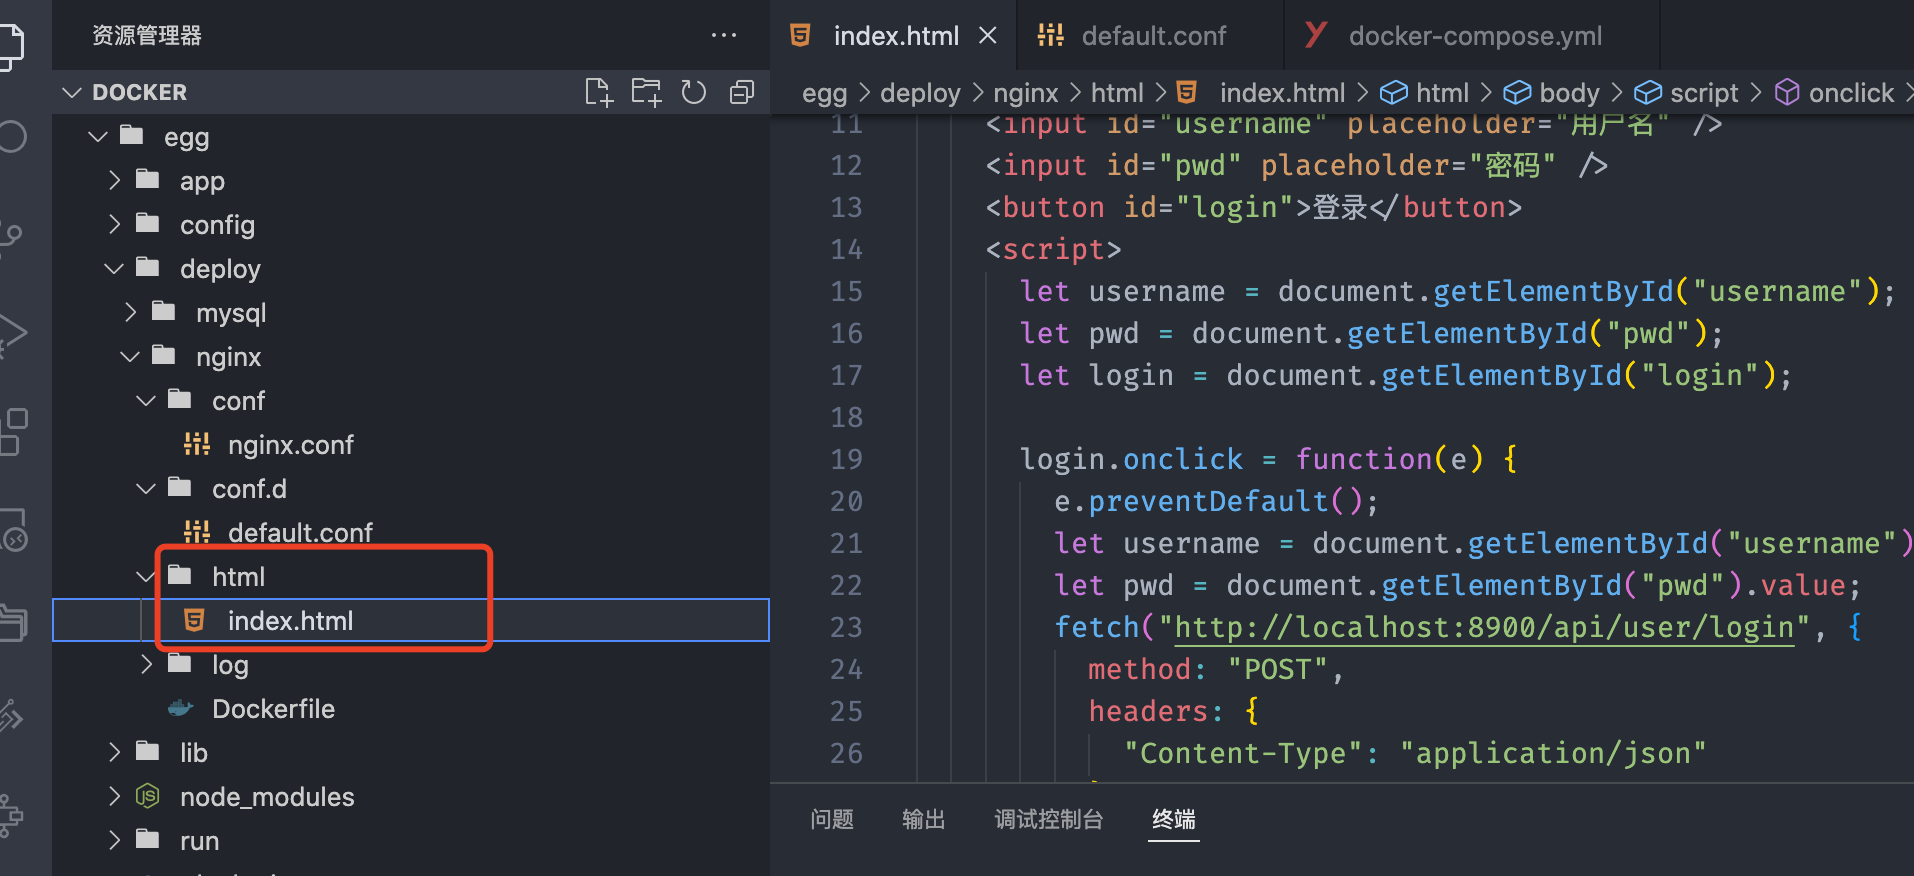
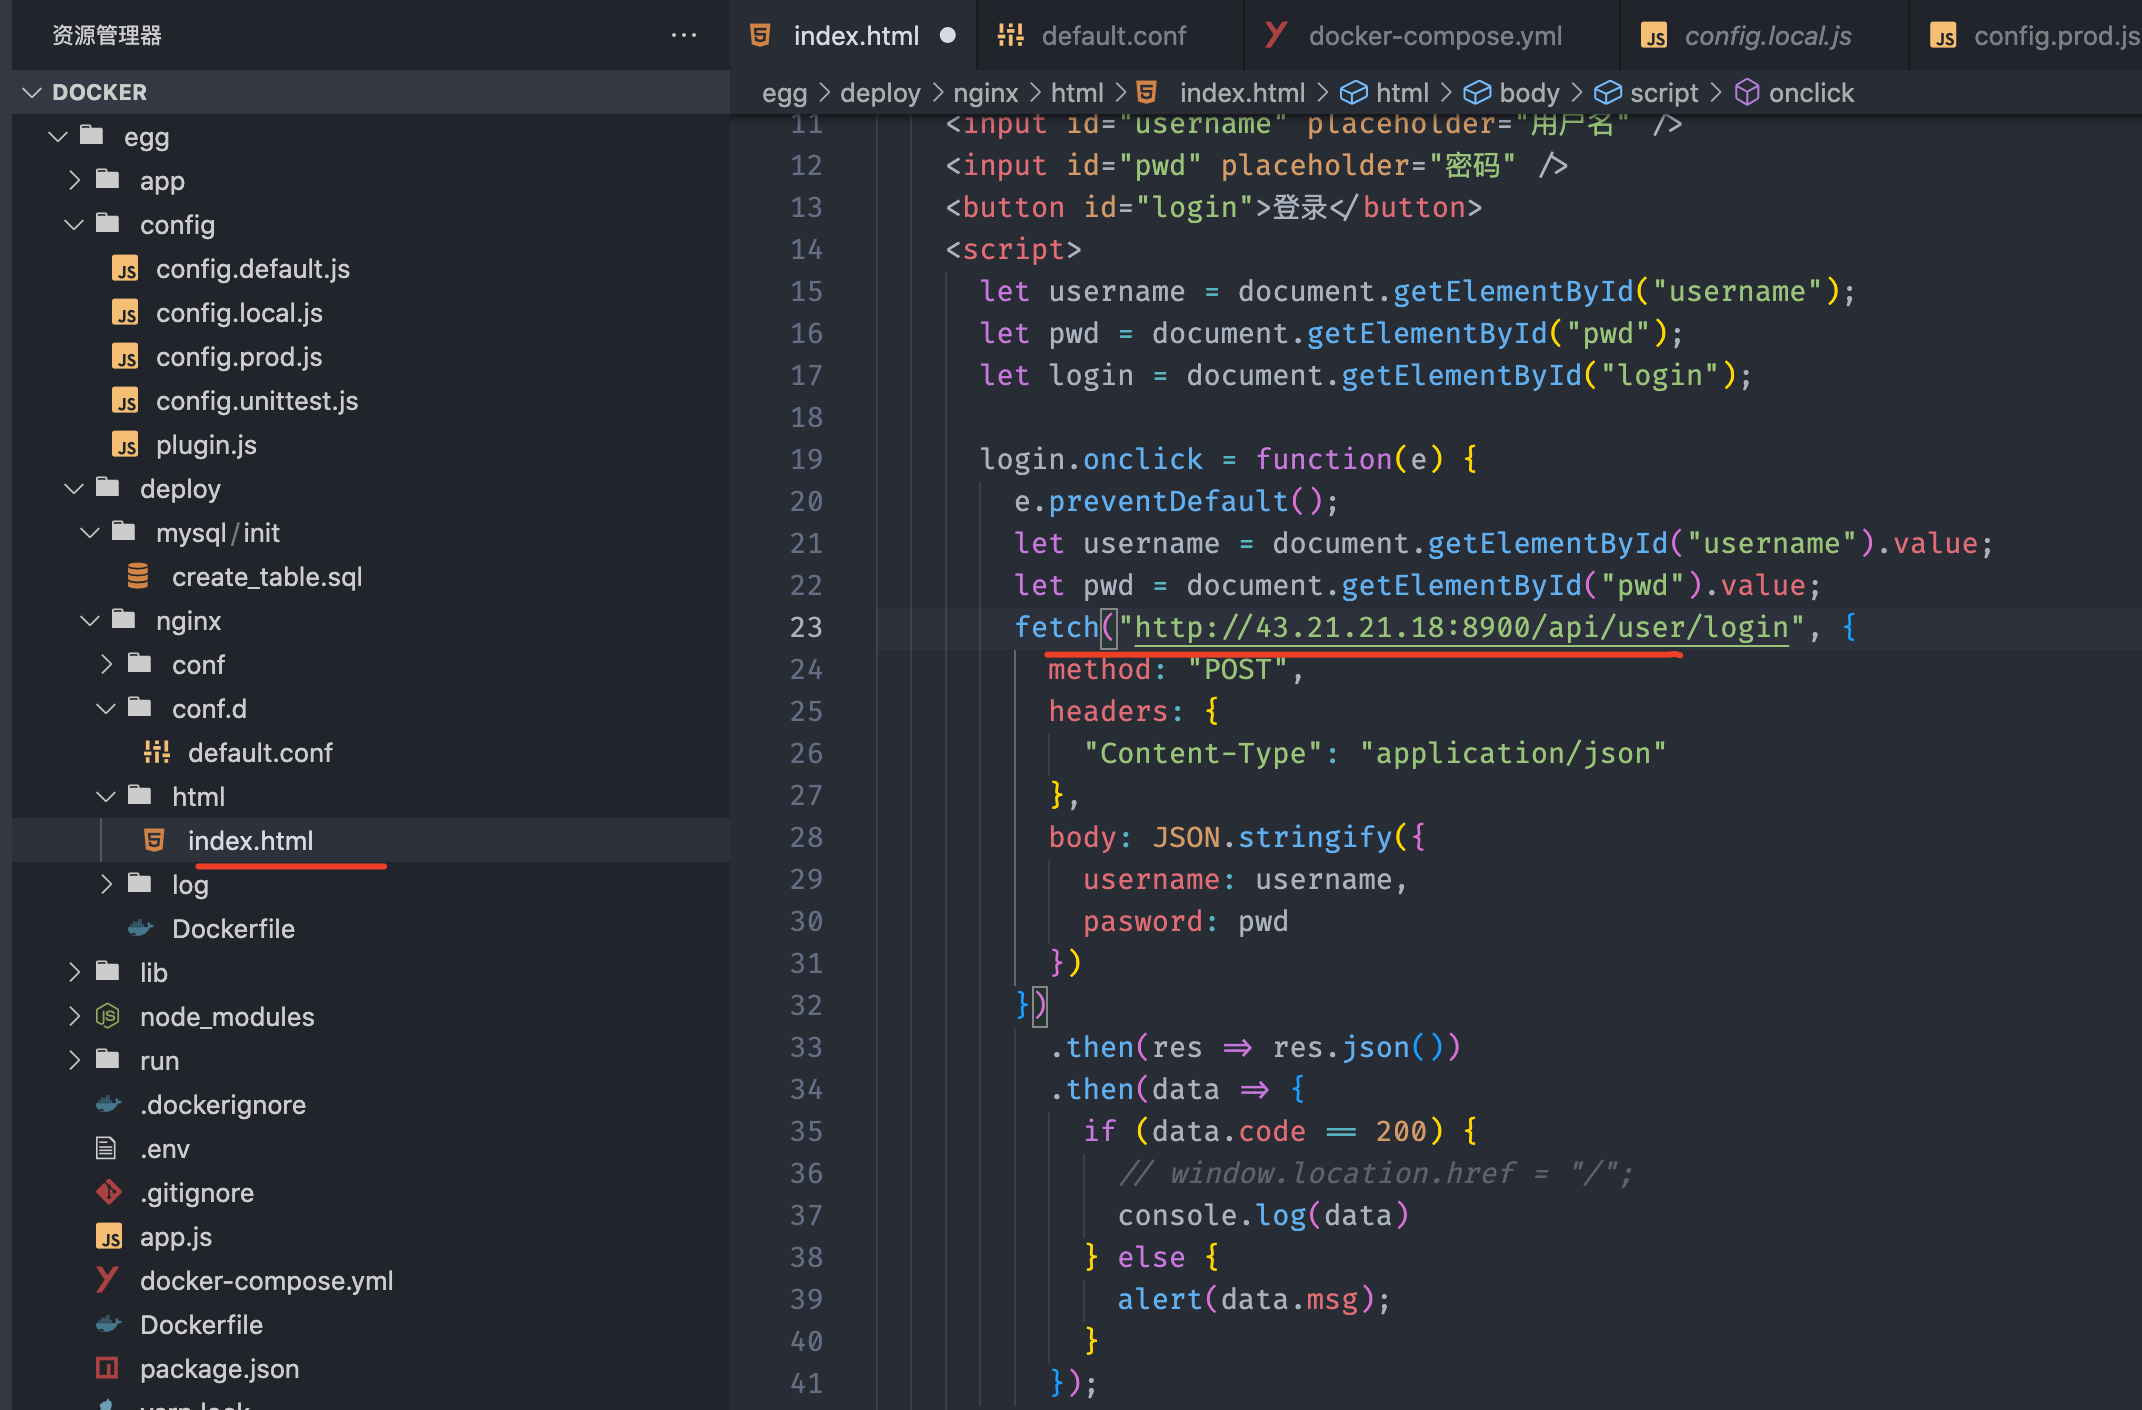
三、Nginx容器内部署前端
把前端打包的文件放到Nginx目录下访问

四、docker部署到云服务器
4.1 安装docker环境
安装工具包
yum install yum-utils device-mapper-persistent-data lvm2 -y |

设置阿里镜像源
yum-config-manager --add-repo https://mirrors.aliyun.com/docker-ce/linux/centos/docker-ce.repo |

安装docker
yum install docker-ce docker-ce-cli containerd.io -y |
启动docker
systemctl start docker |
设置docker镜像源
vi /etc/docker/daemon.json |
{ |
后续拉取镜像直接从 https://hub.docker.com 网站拉取速度更快
重启docker
systemctl restart docker |
安装mysql镜像测试
docker pull daocloud.io/library/mysql:8.0.20 |

运行mysql镜像
docker run -d -p 3307:3306 --name mysql -e MYSQL_ROOT_PASSWORD=123456(设置登录密码) be0dbf01a0f3(镜像ID) |

进入mysql容器内部
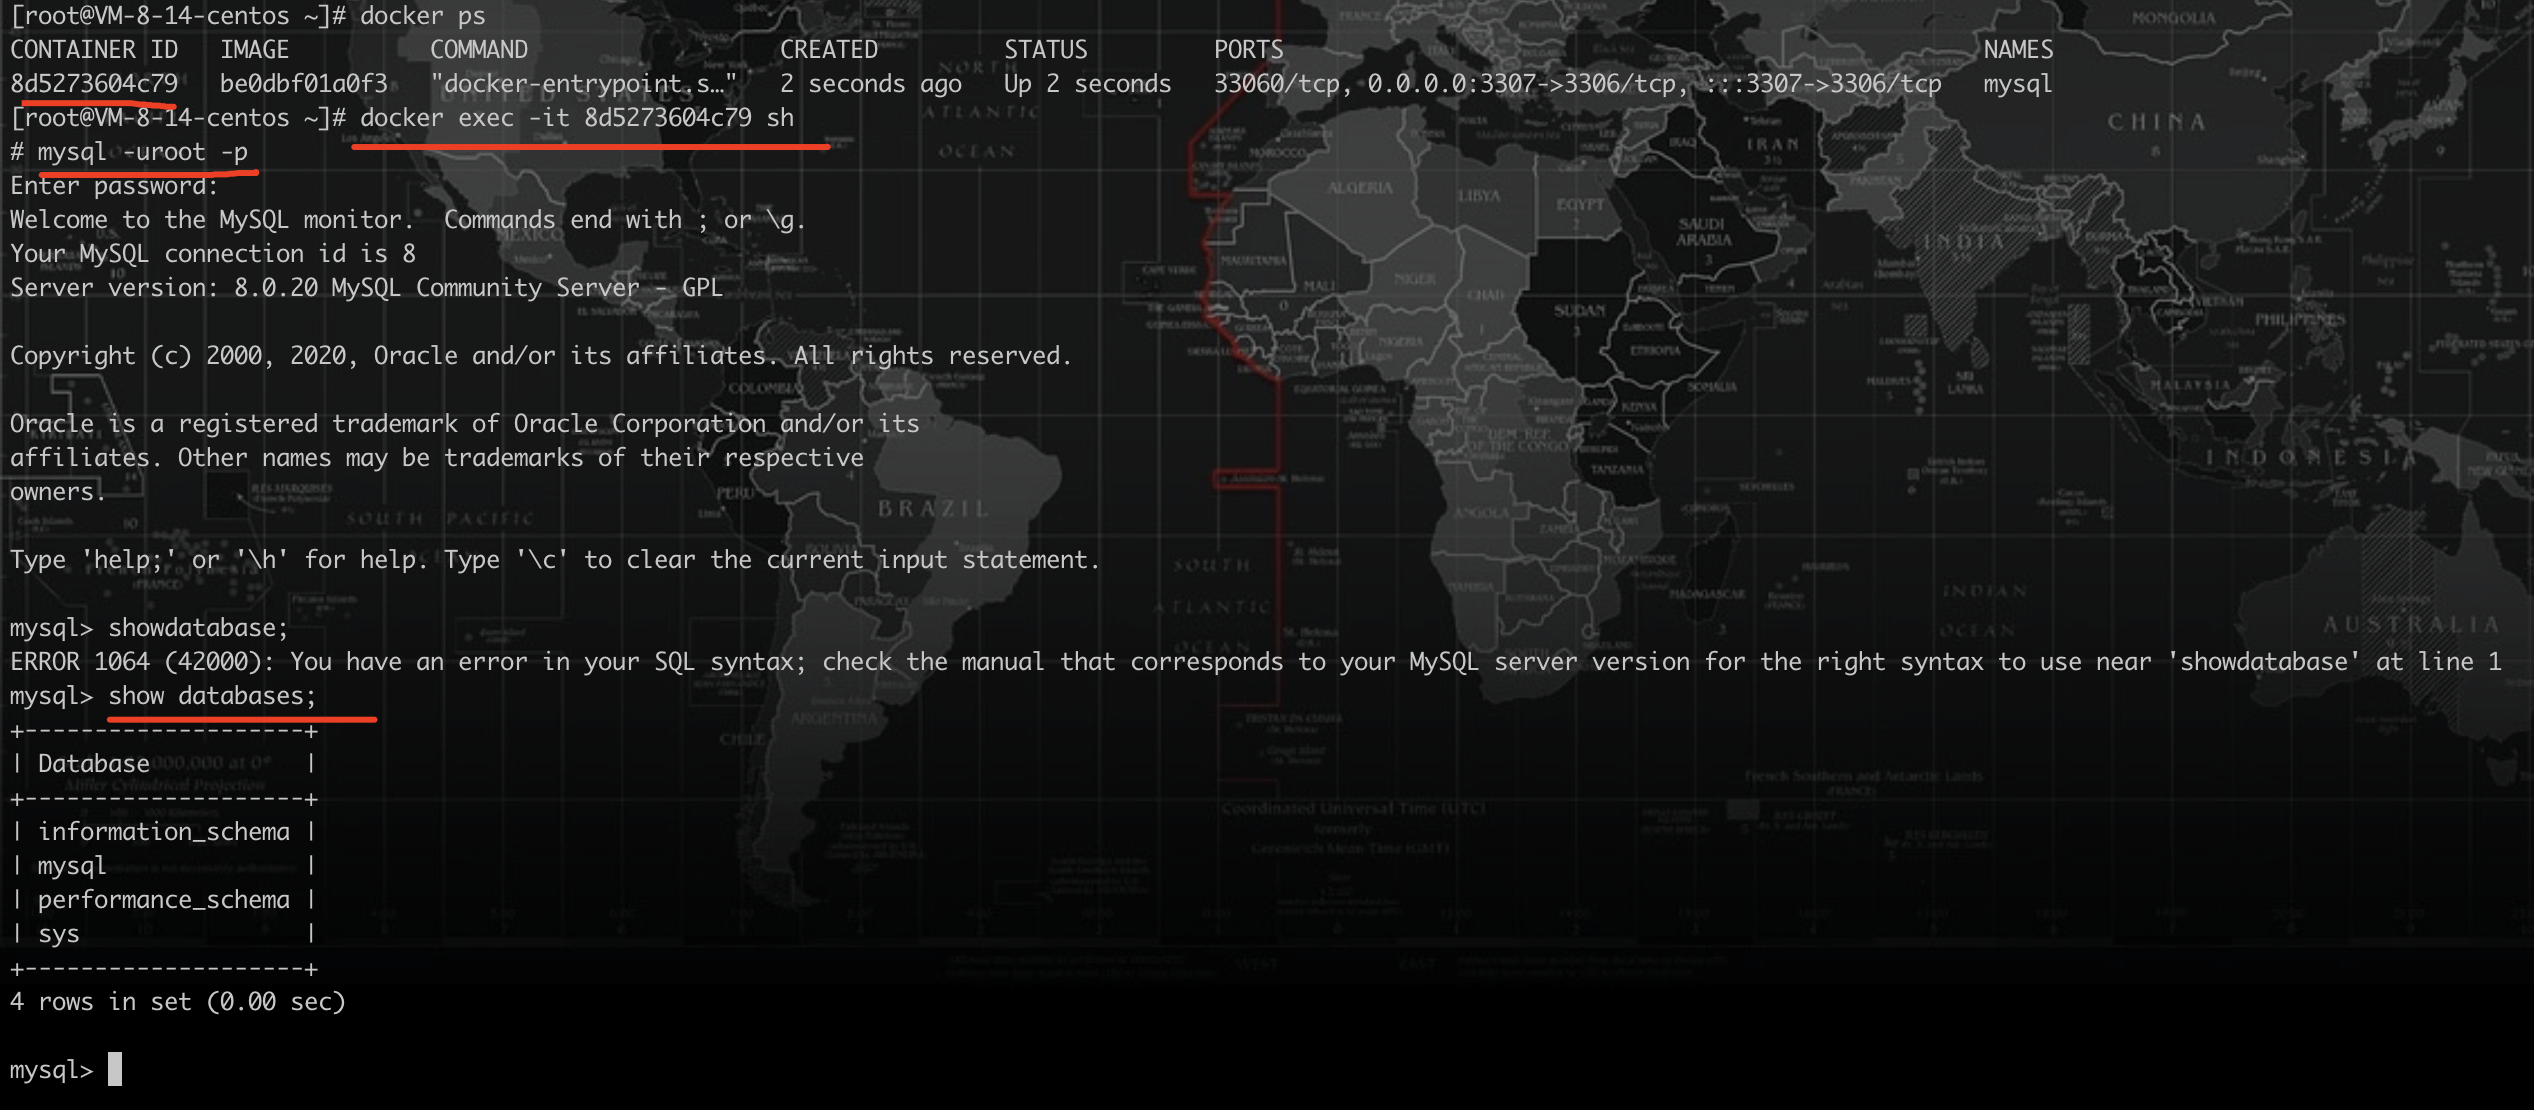
至此mysql镜像搭建成功,下面我们使用
docker-compose来管理docker容器,不在单独一个个安装MySQL、redis、nginx
4.2 安装docker-compose
# 使用国内源安装 |
设置docker-compose执行权限
chmod +x /usr/local/bin/docker-compose |
创建软链
sudo ln -s /usr/local/bin/docker-compose /usr/bin/docker-compose |
测试是否安装成功:
$ docker-compose --version |
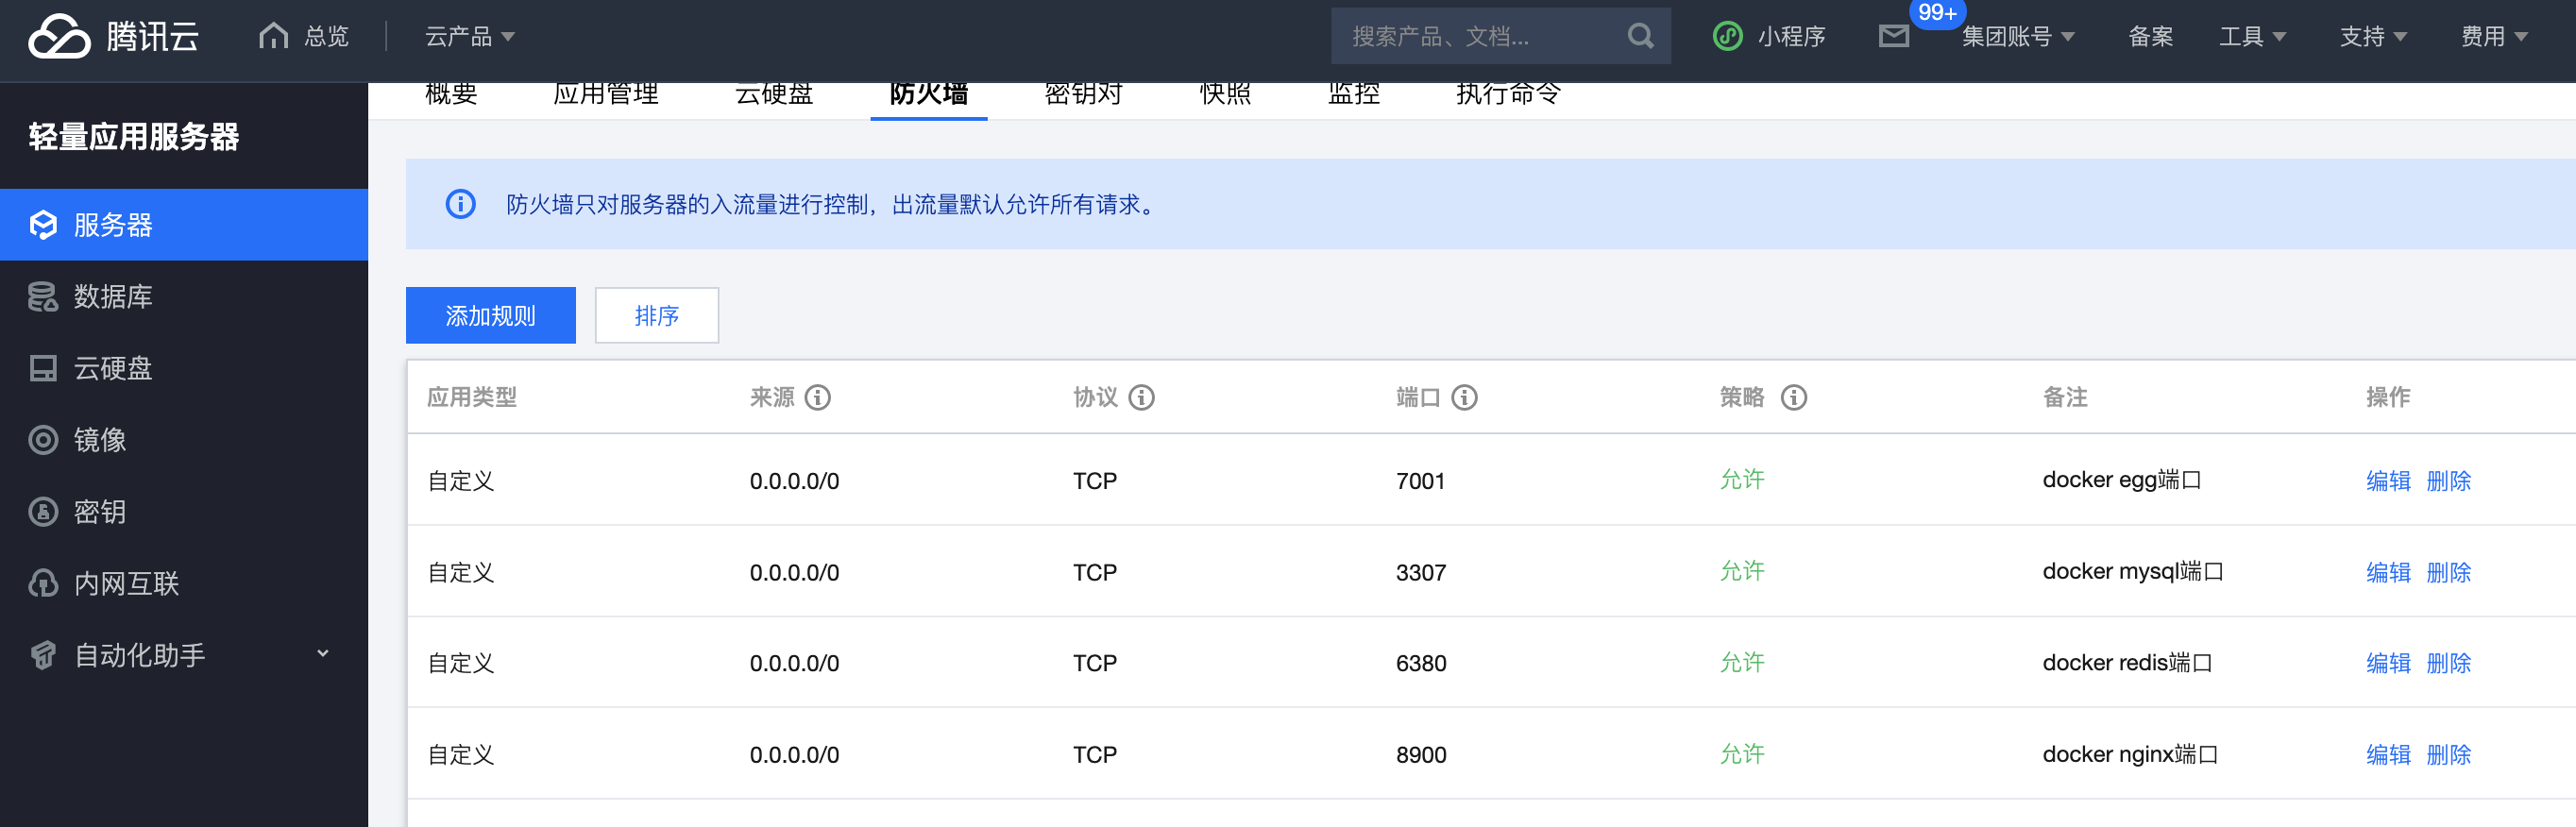
4.3 开放服务器端口
登录服务器后台放行对应端口
4.4 部署egg项目
修改代码和配置
修改Nginx配置

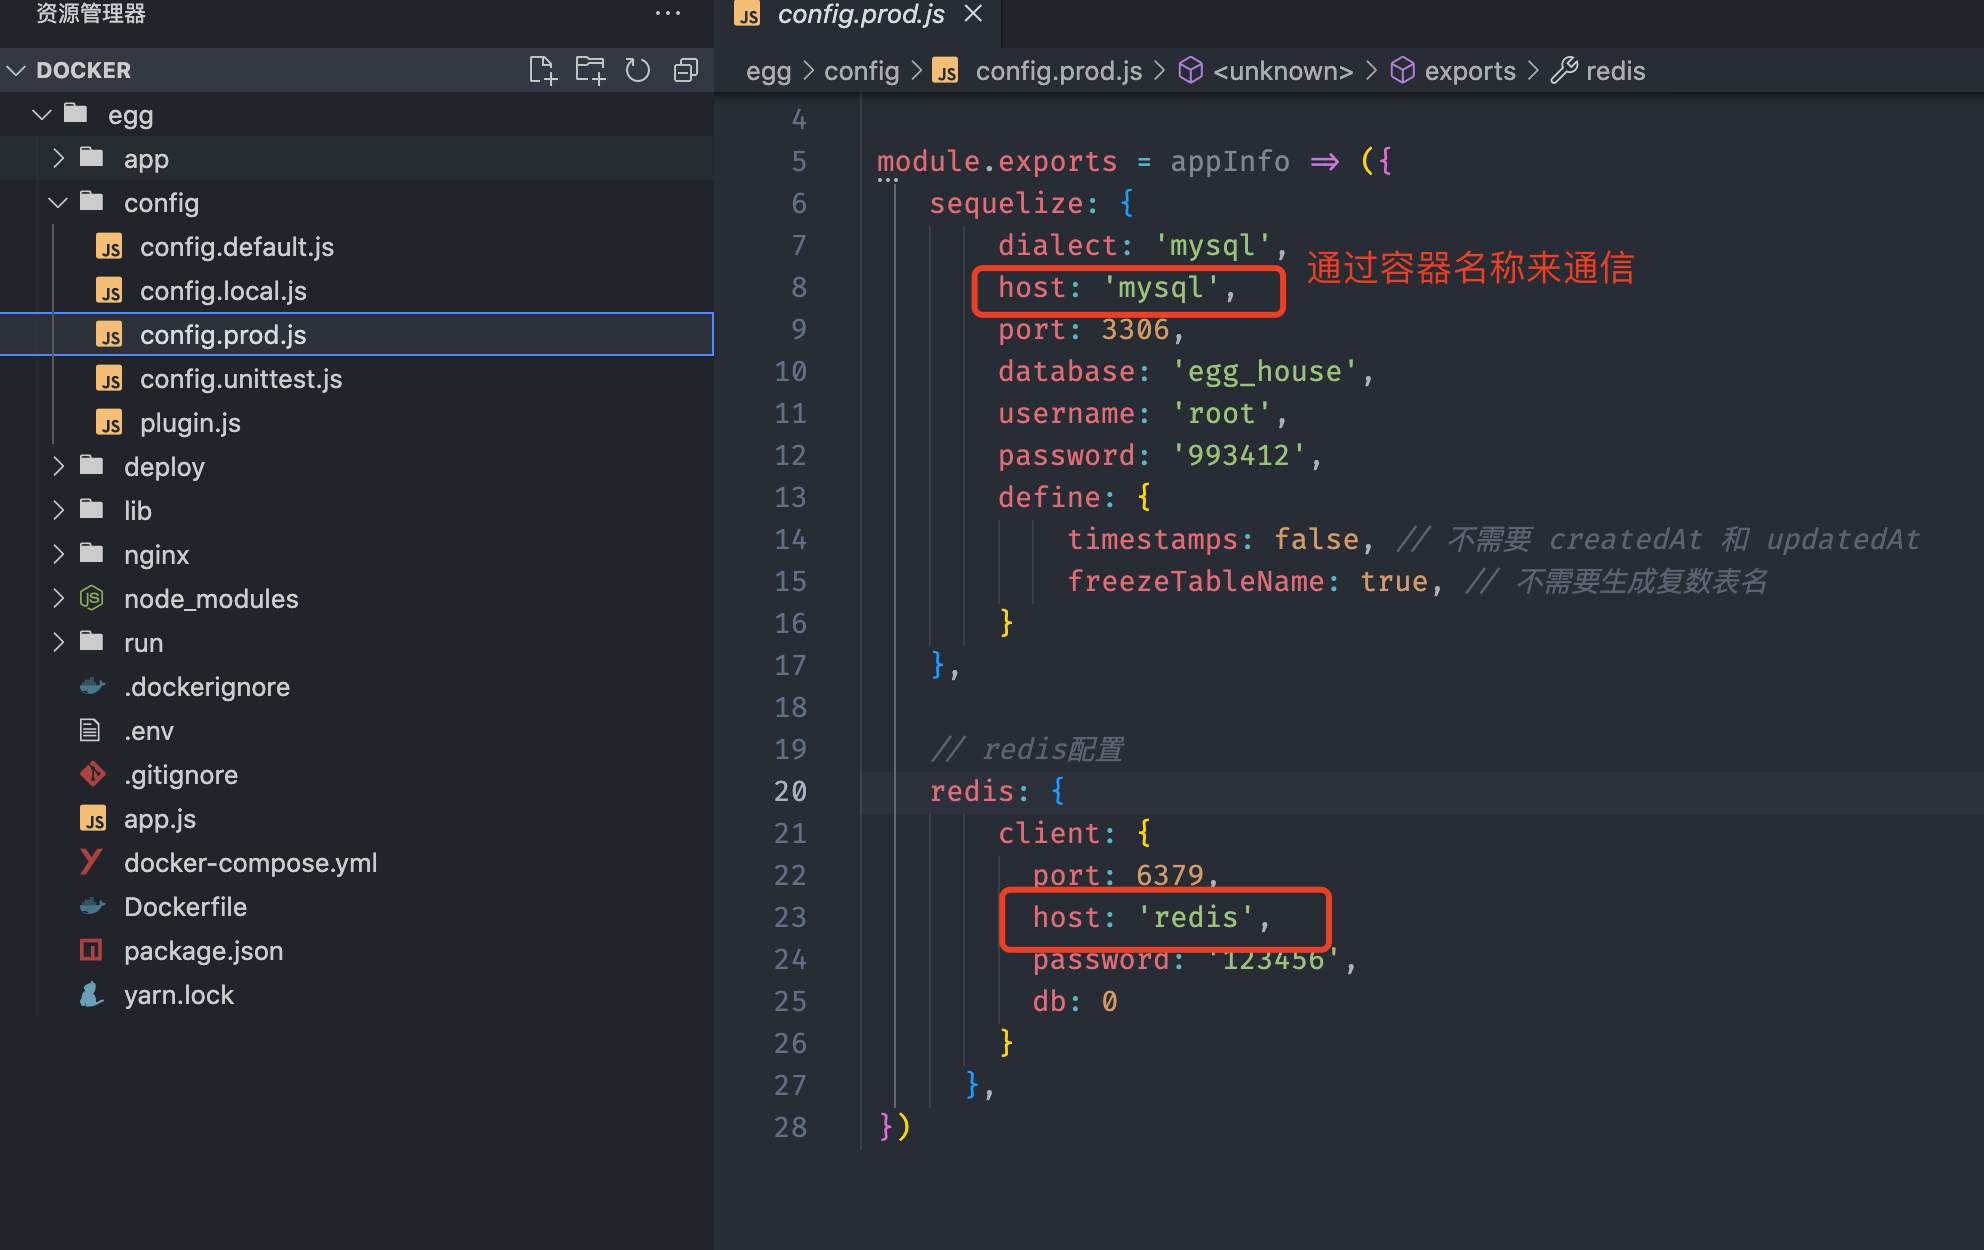
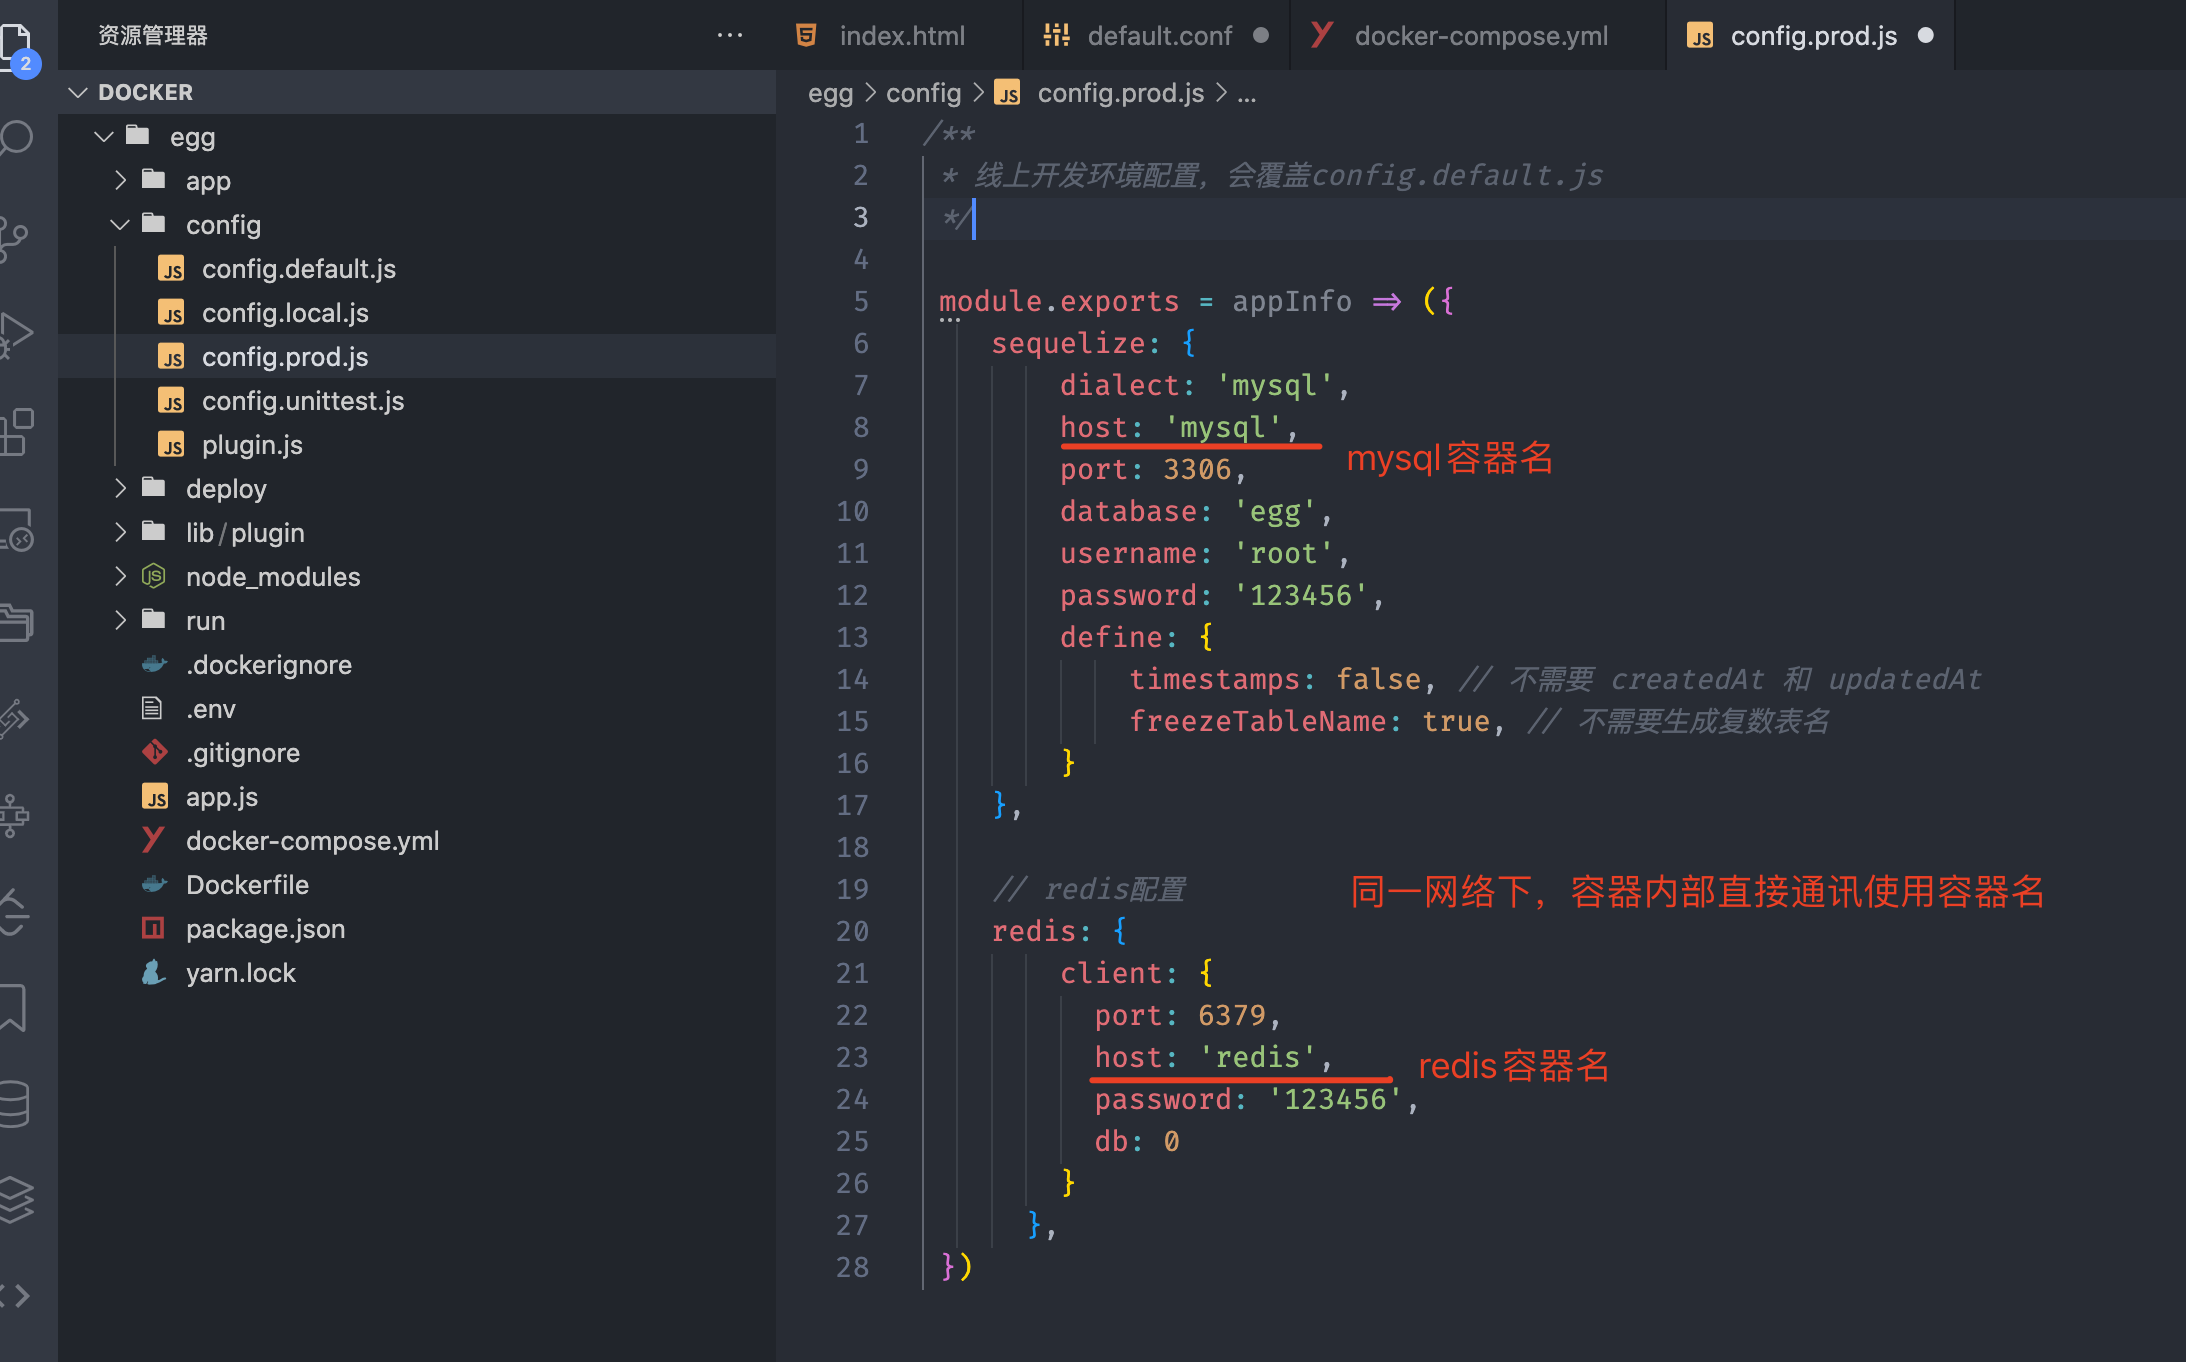
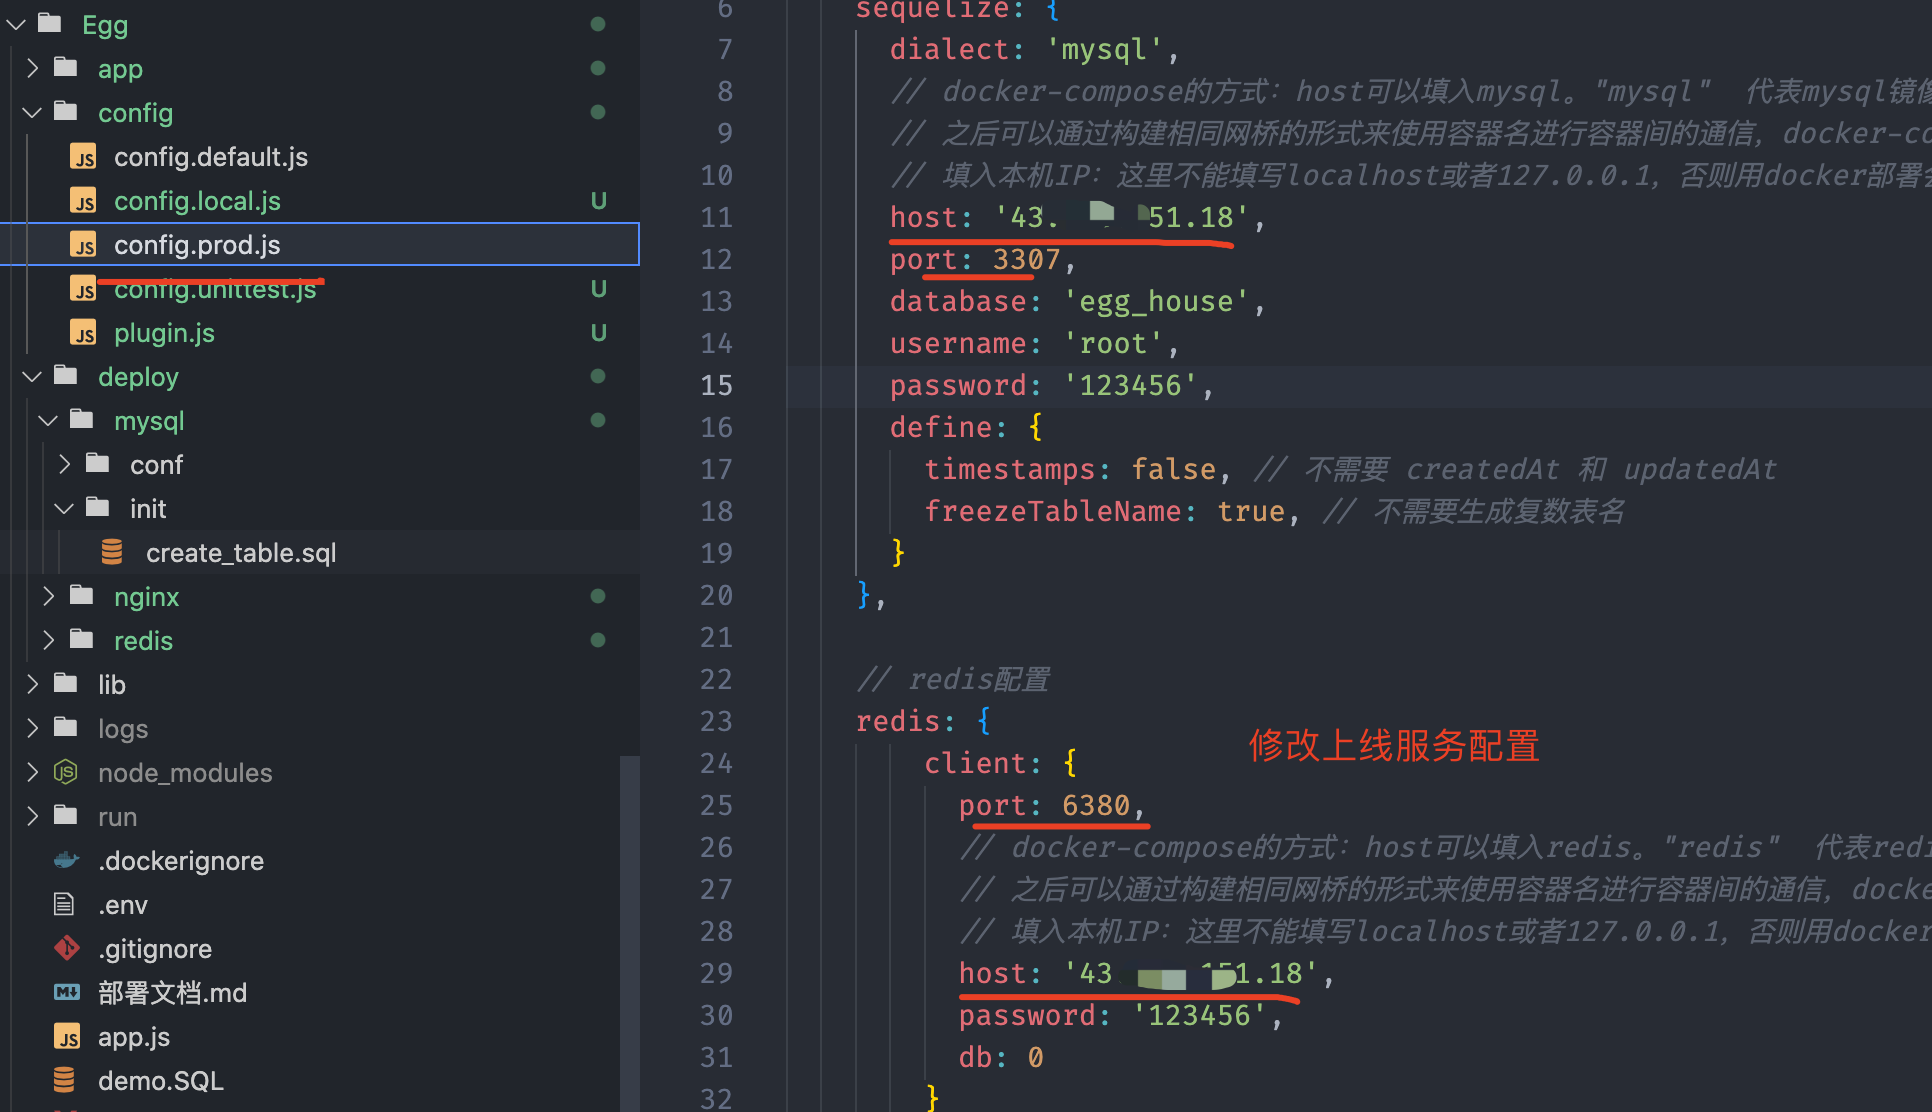
修改config/config.prod.js
docker-compose.yml
version: "3.0" |
egg Dockerfile
# 使用node镜像 |
./deploy/redis/conf/redis.conf
需要设置的地方
#指定日志级别,notice适用于生产环境 |
全部配置
# Redis configuration file example. |
上传本地egg服务端代码到服务器
scp -rp egg.zip root@43.138.12.18:/home |

解压
unzip -u -d server egg.zip |
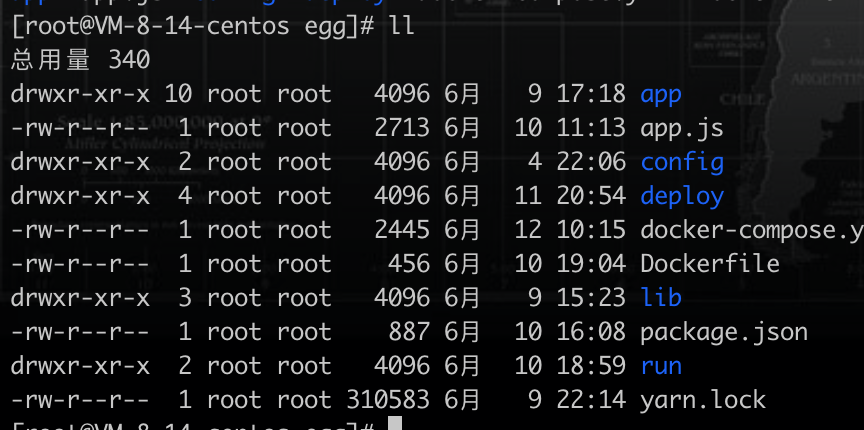
启动egg服务
# cd egg |

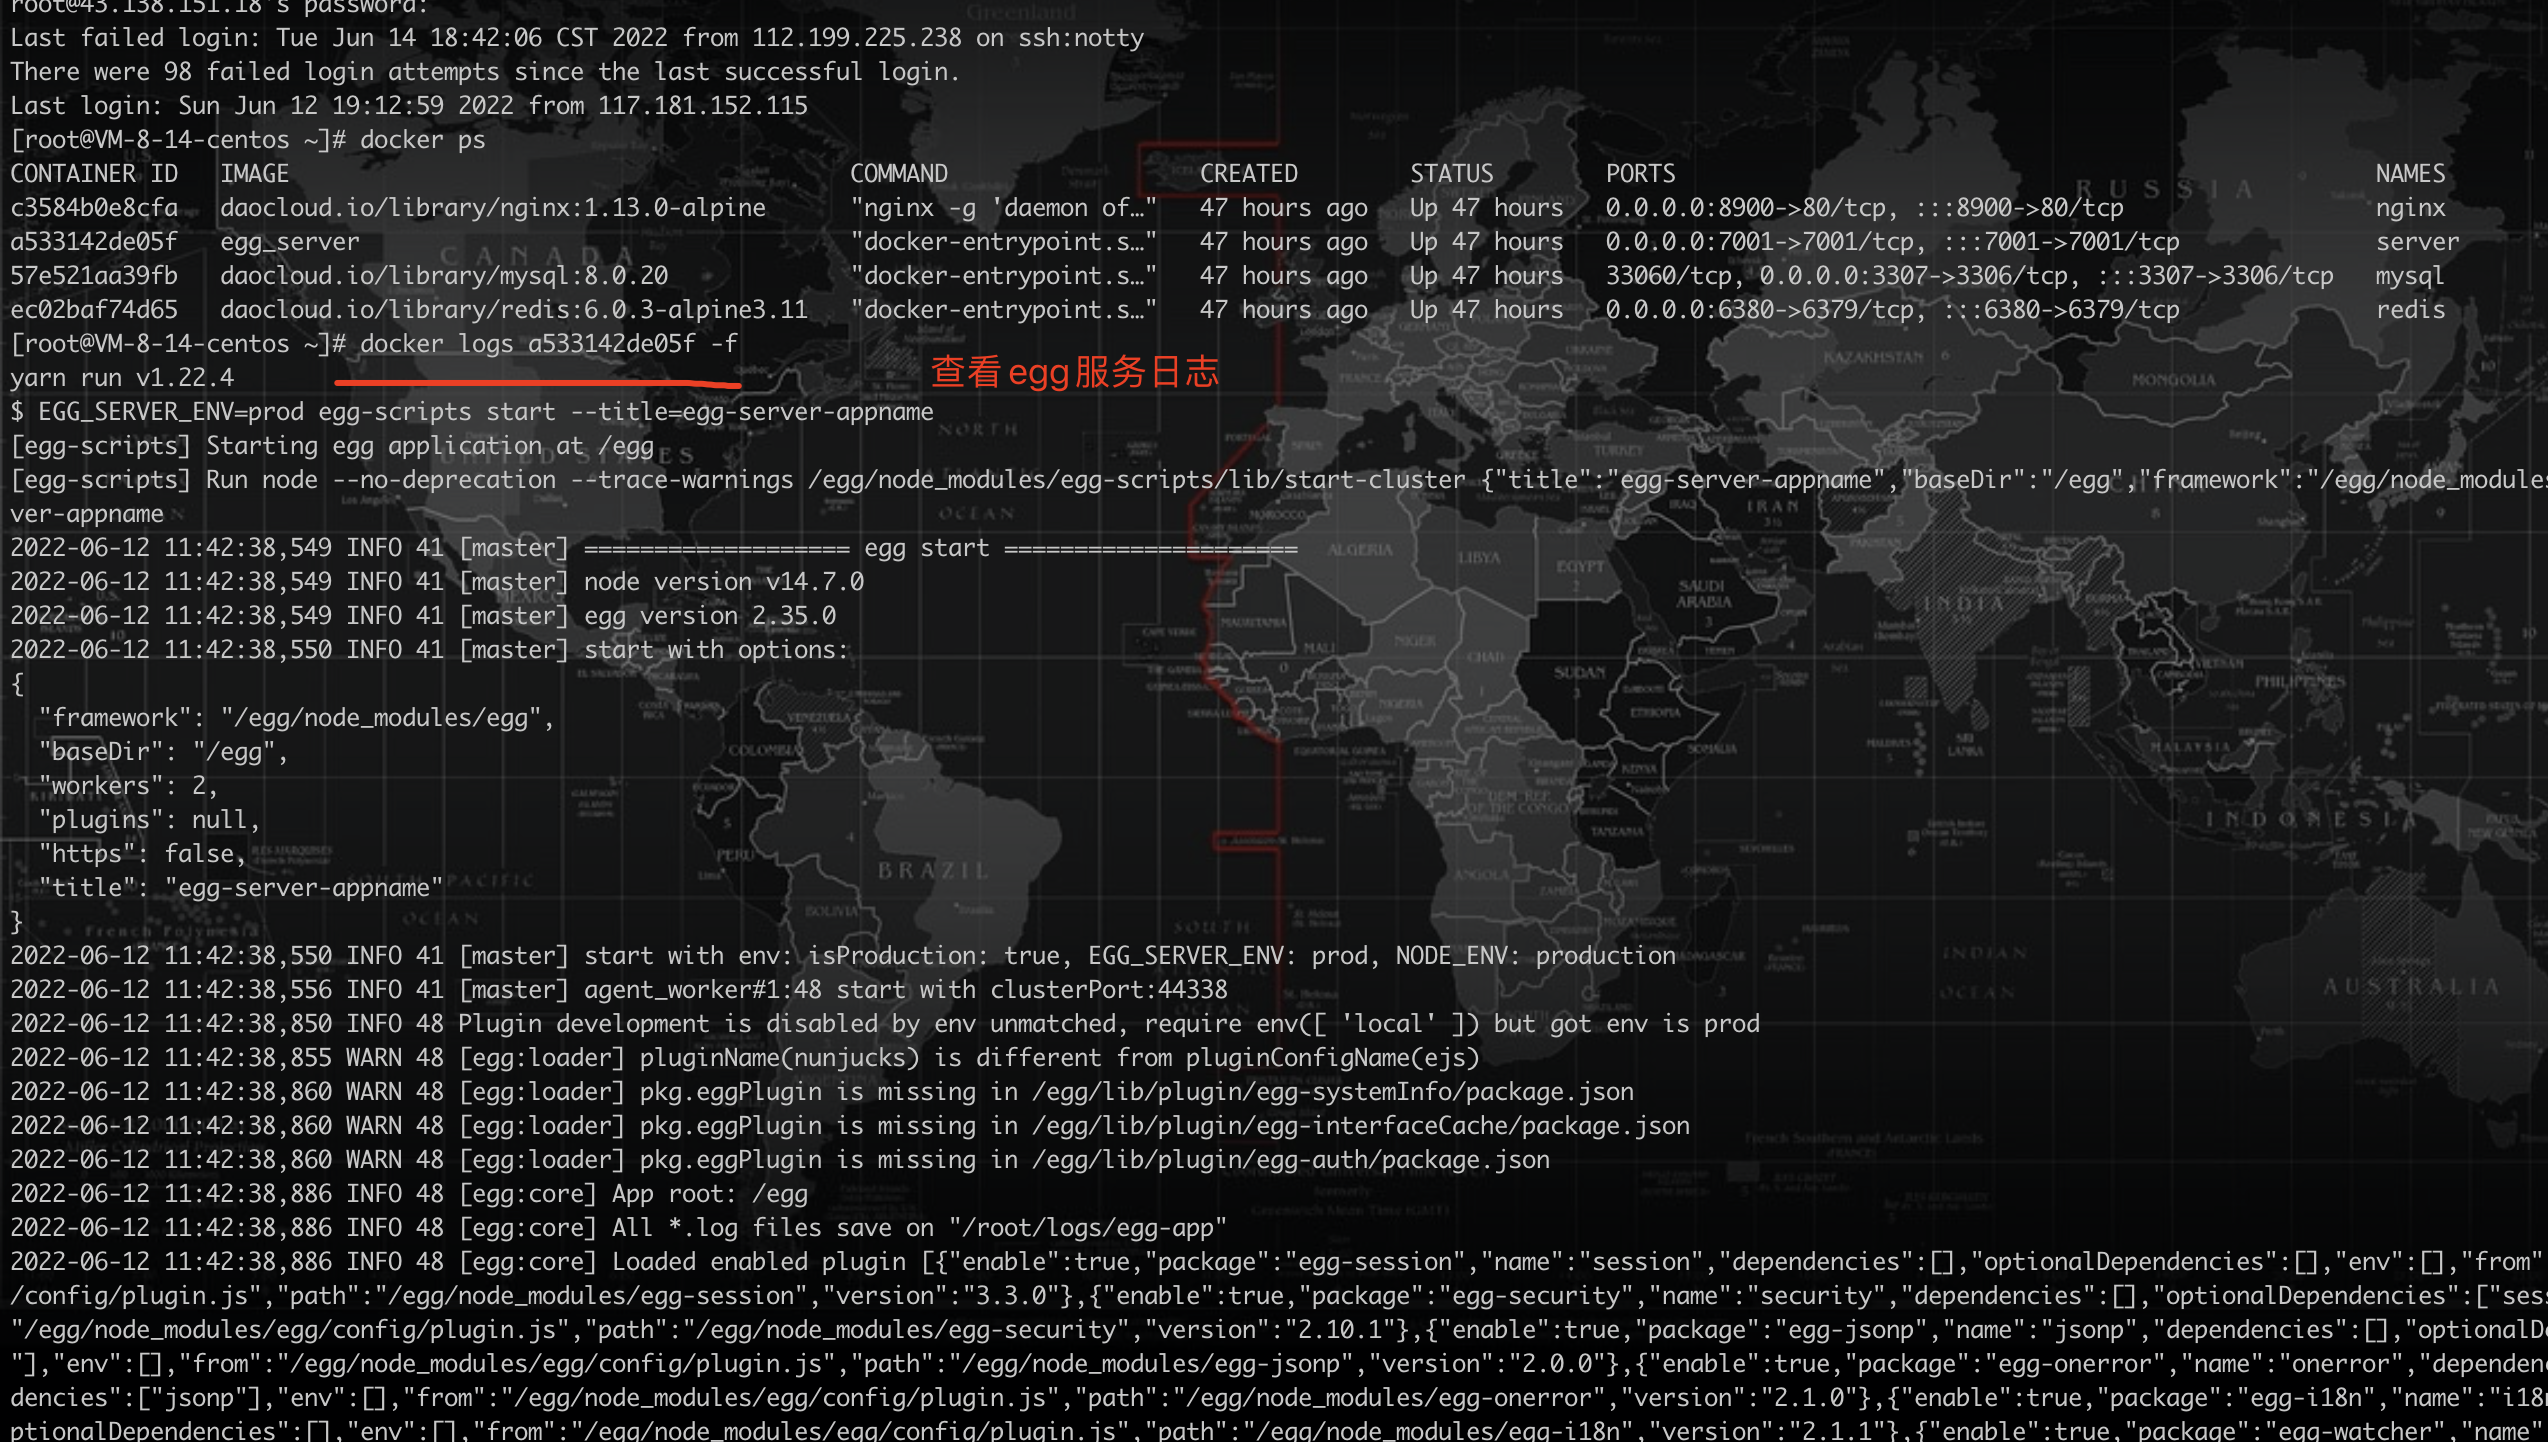
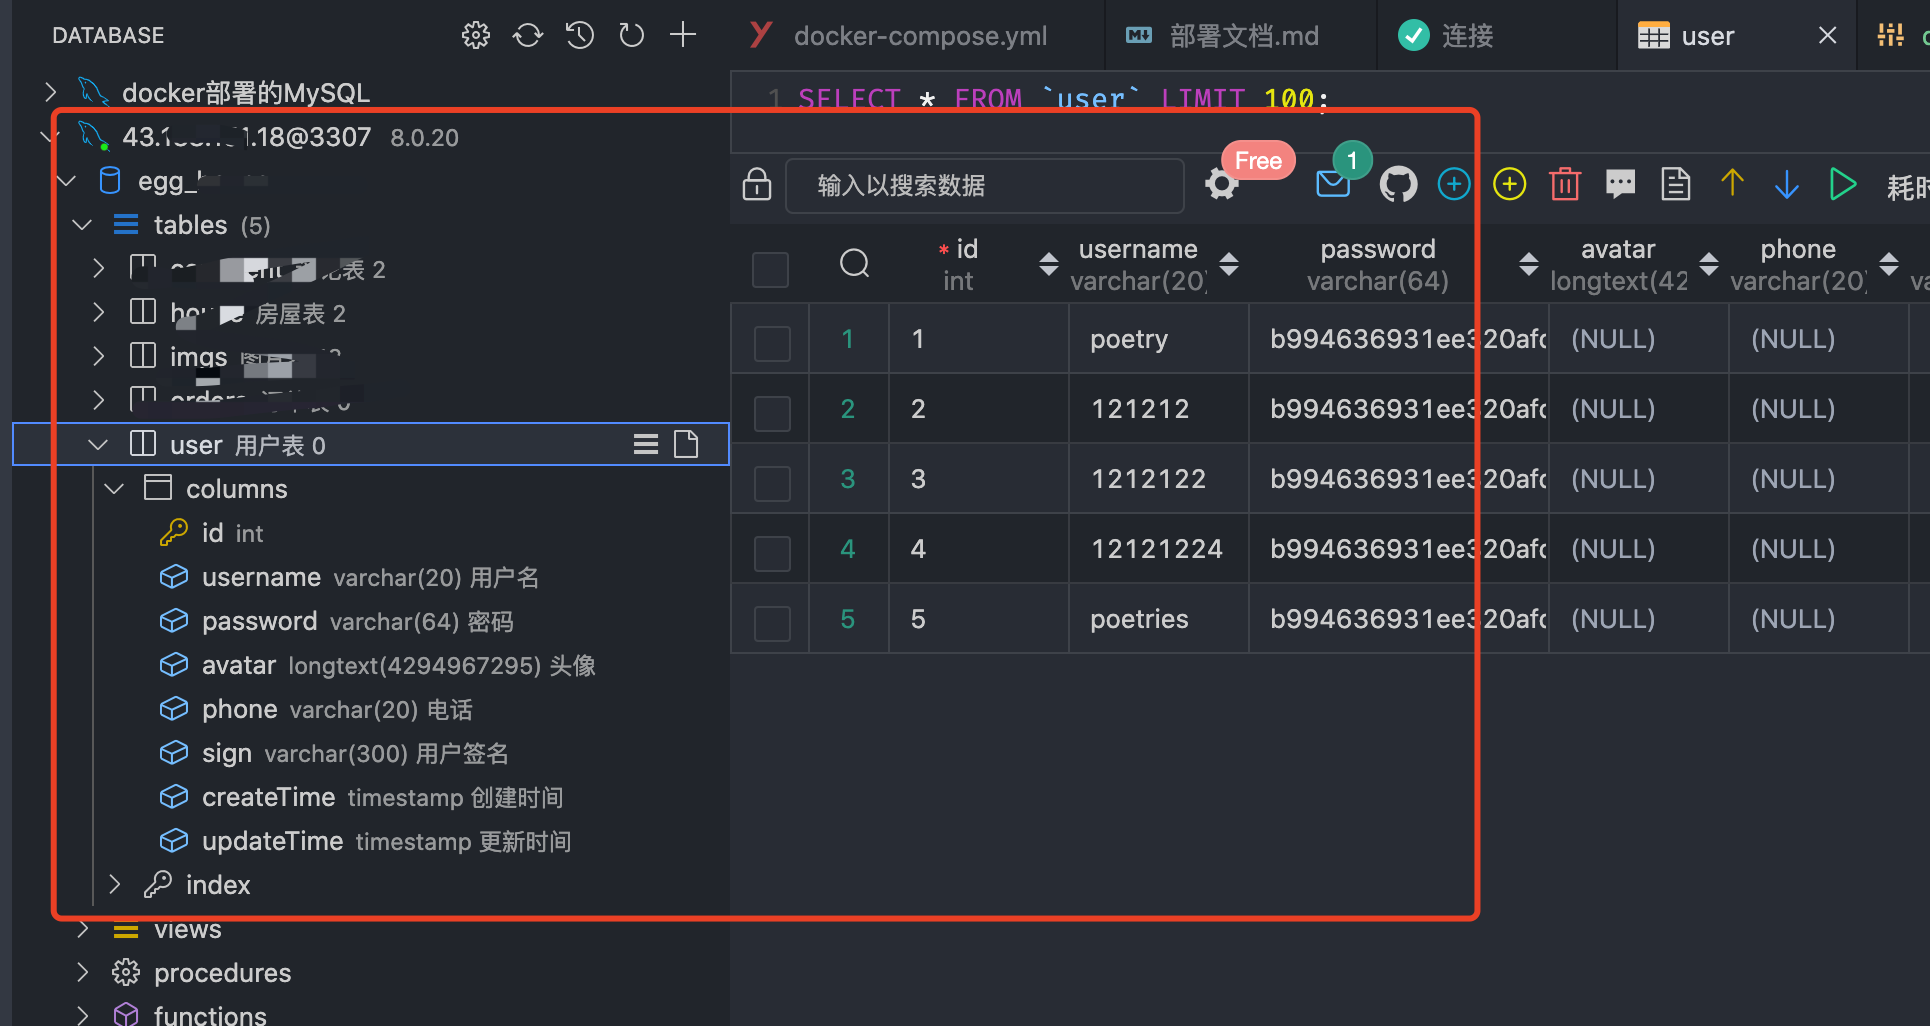
测试服务
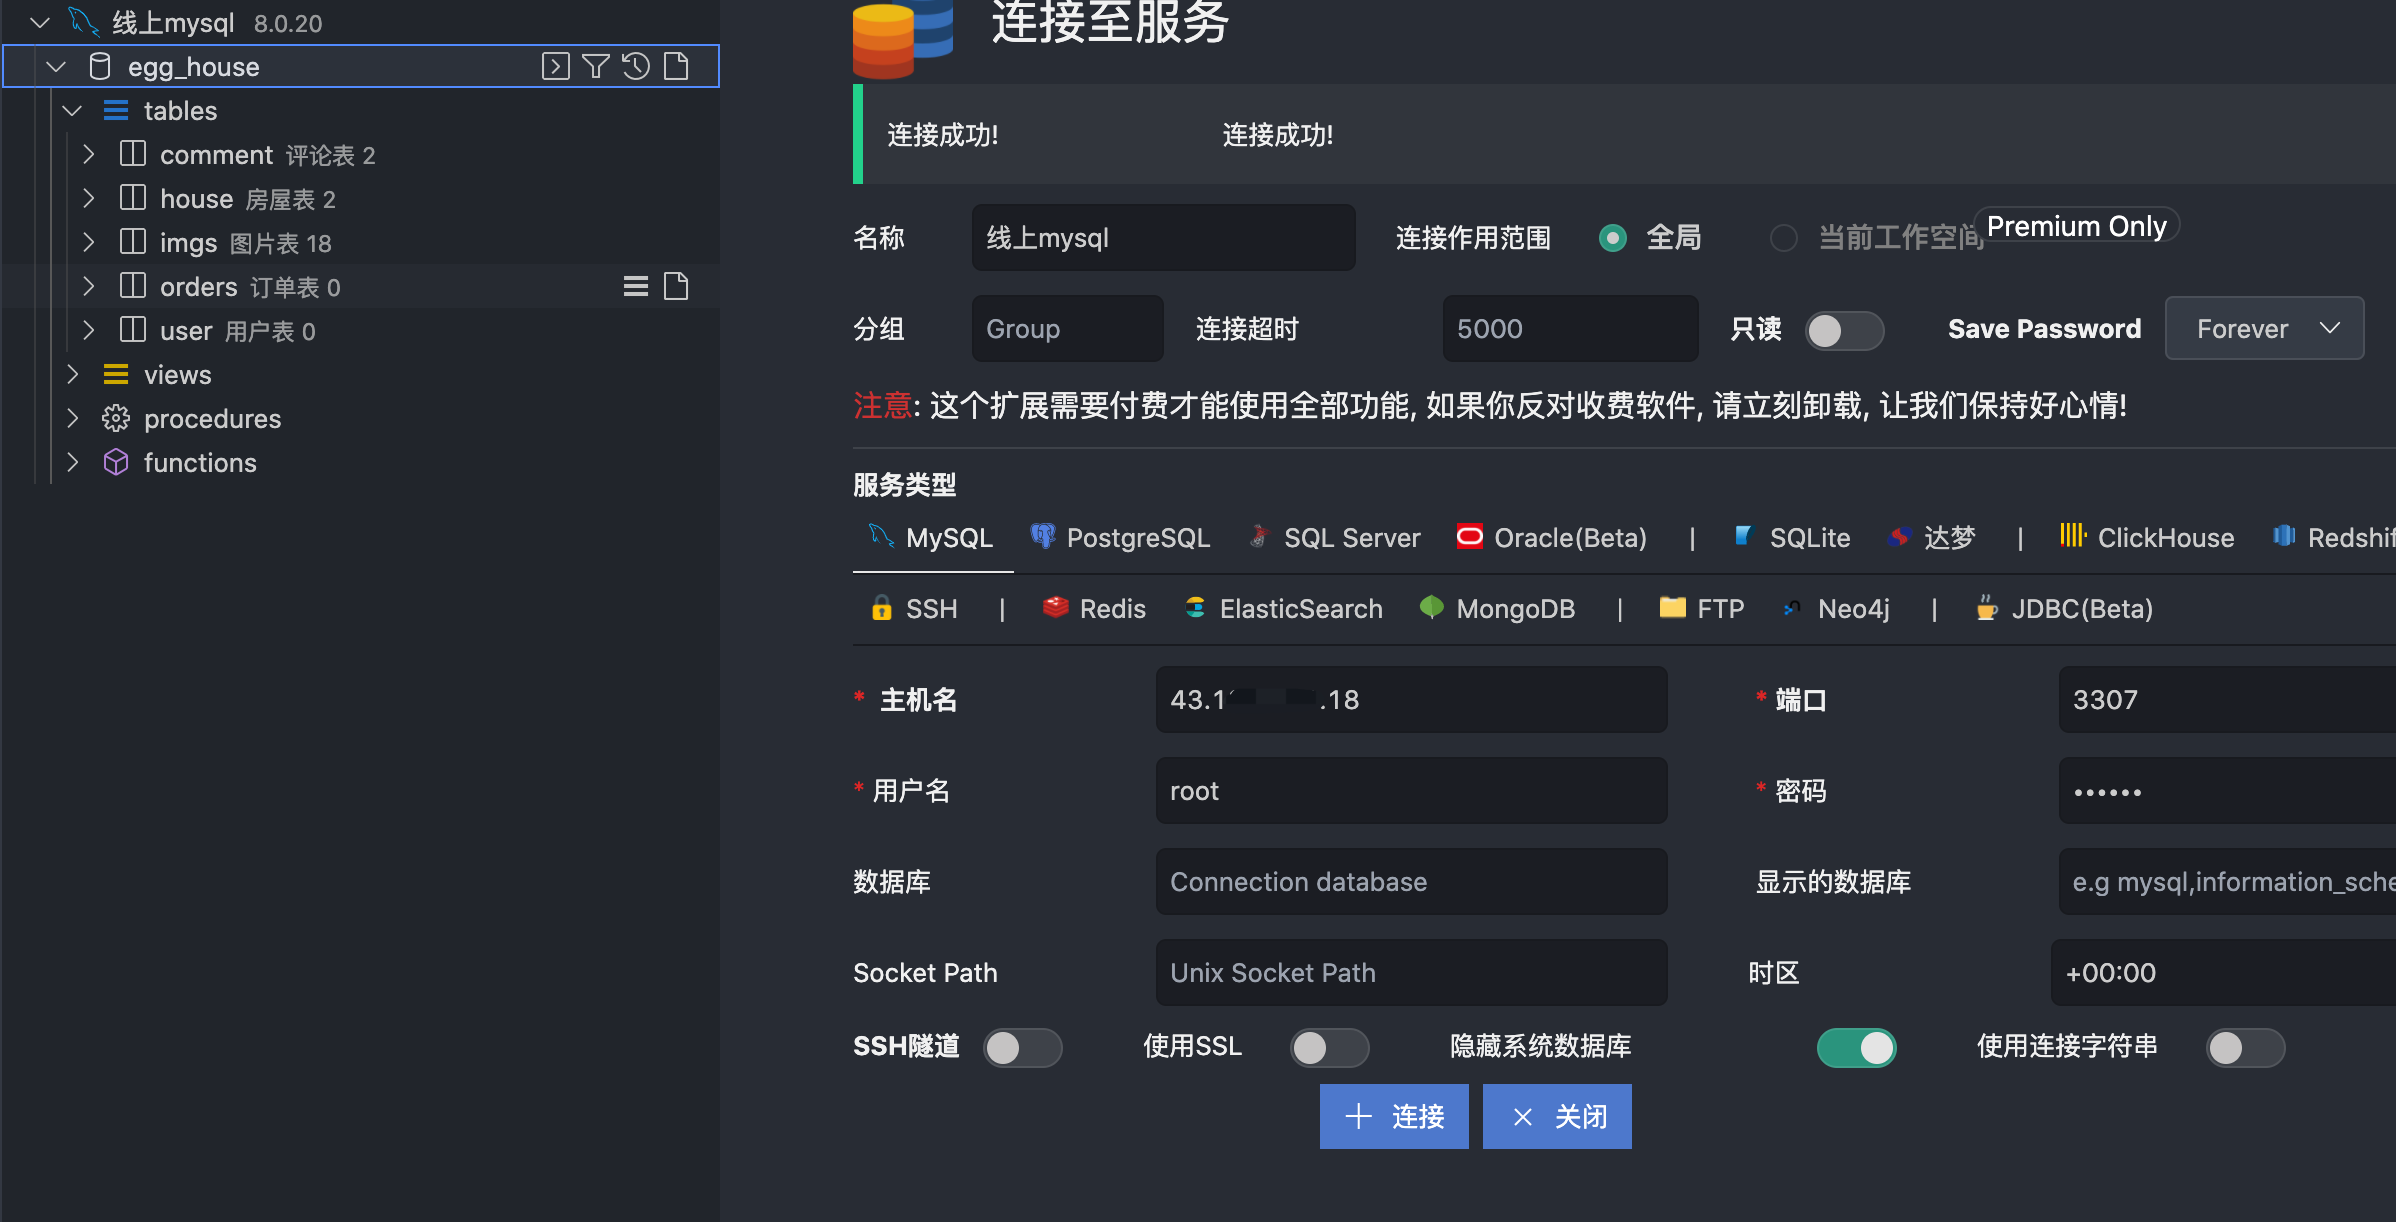
vscode本地连接线上数据库测试
redis服务连接测试
无需密码登录
redis-cli -h 43.23.121.12 -p 6380 |
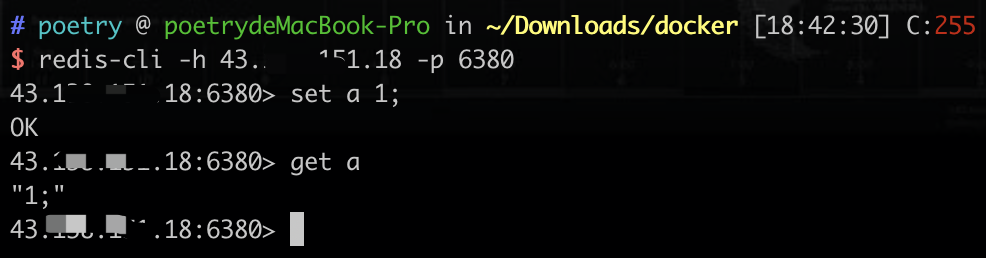
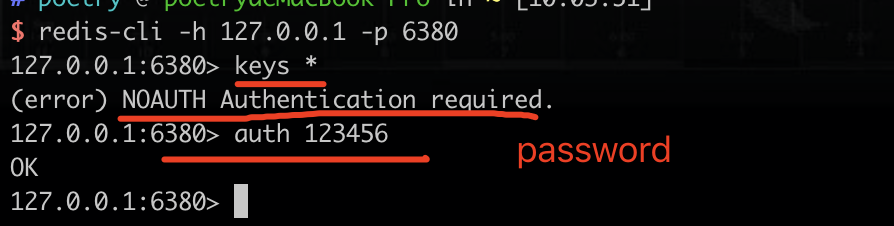
设置密码后的登录方式
redis-cli -h 43.31.121.12 -p 6380 |
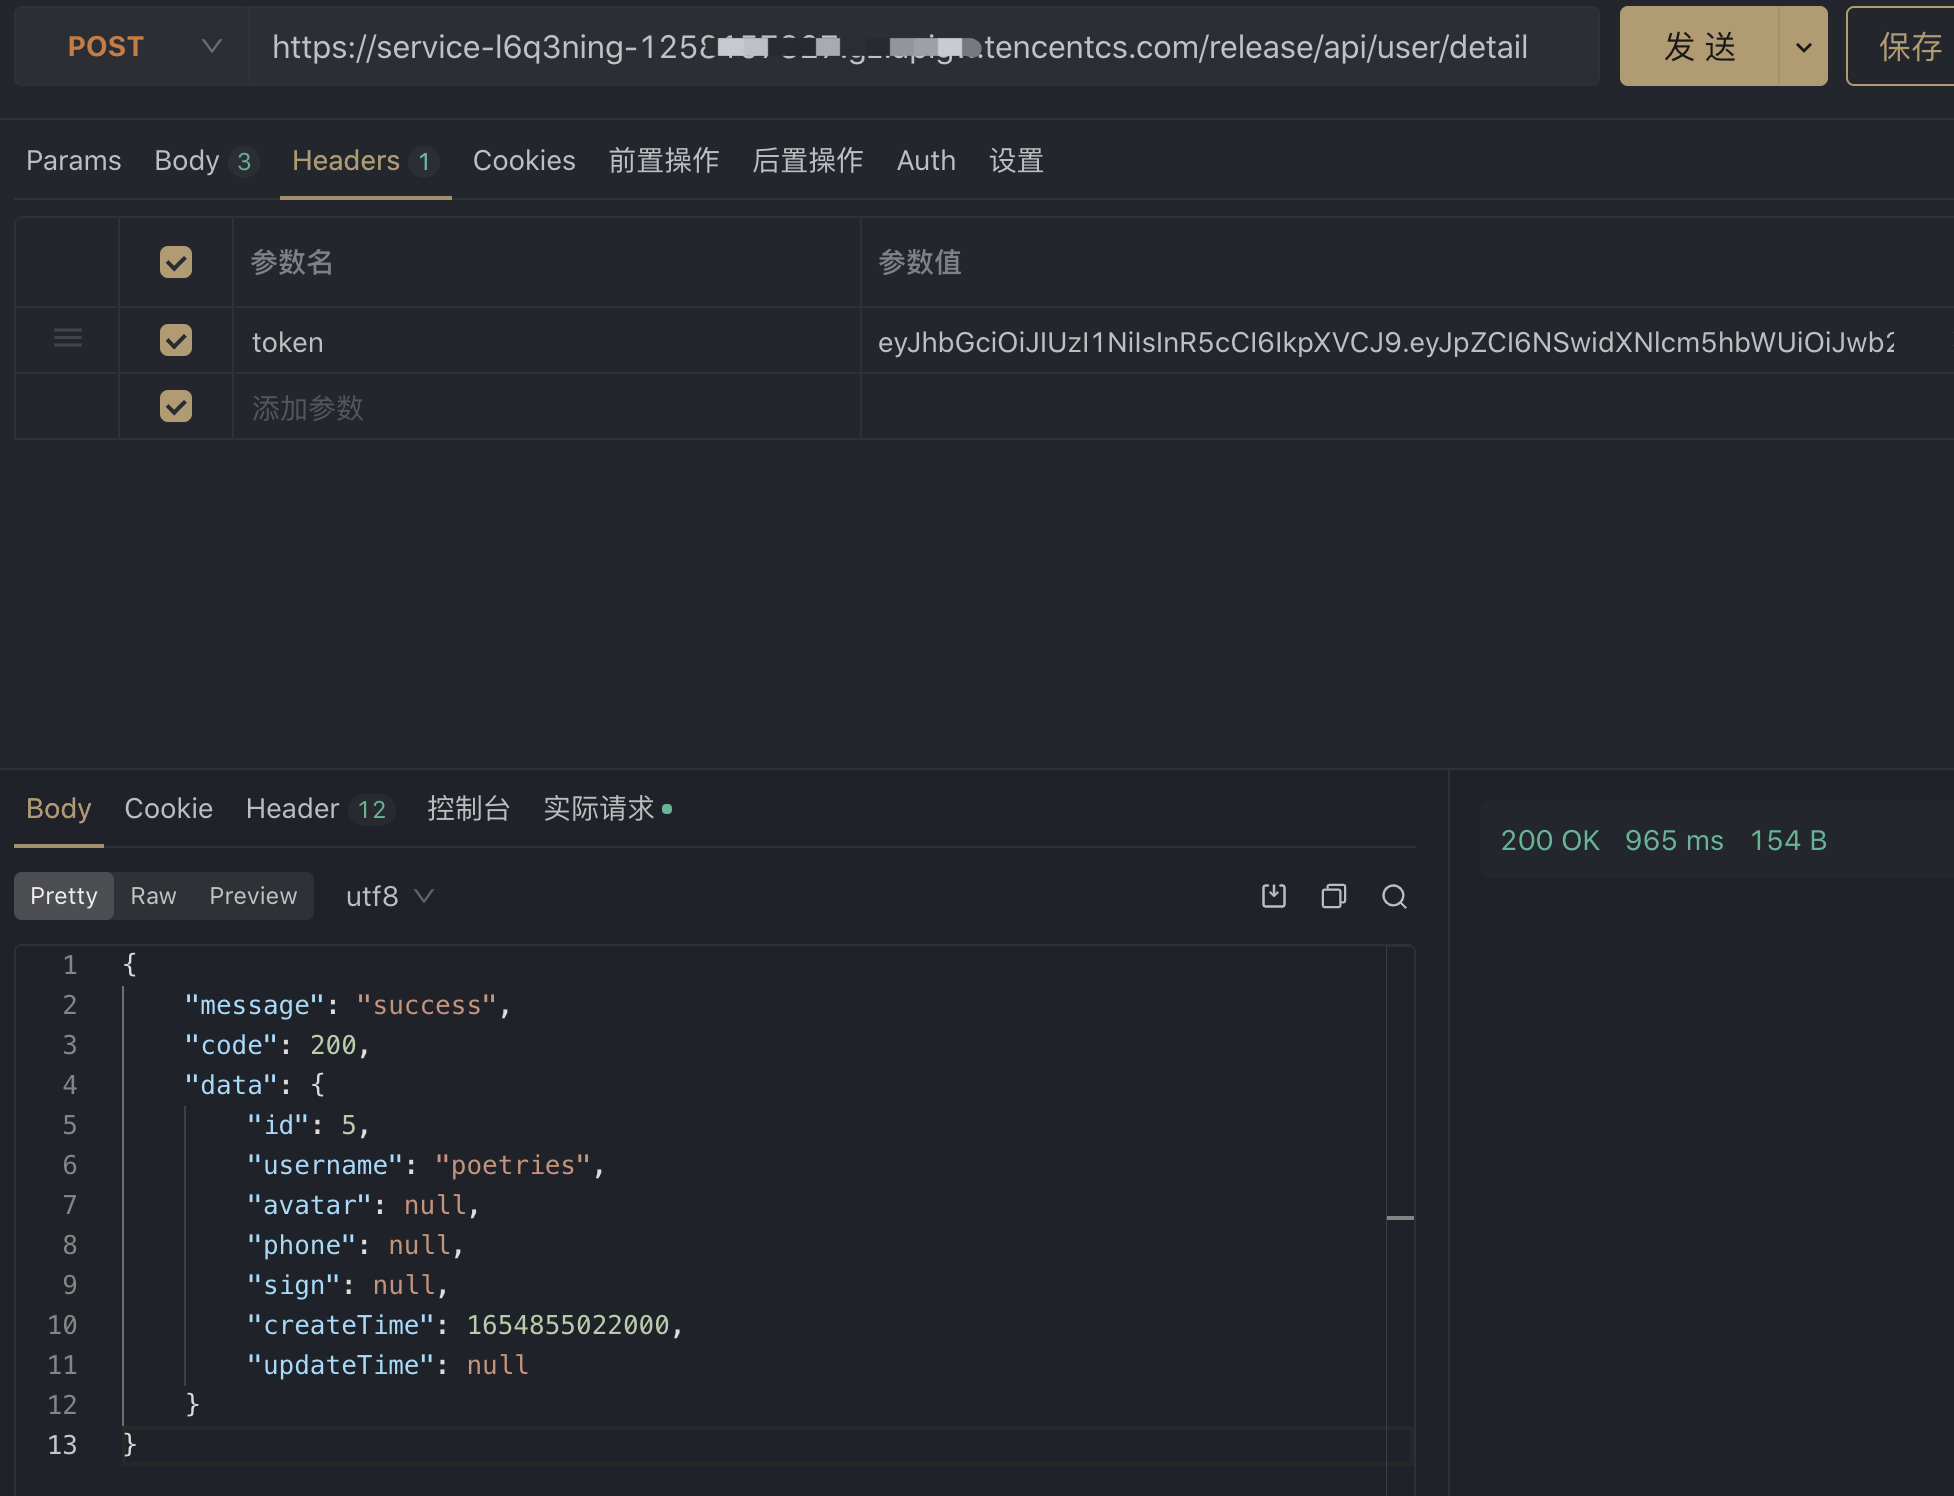
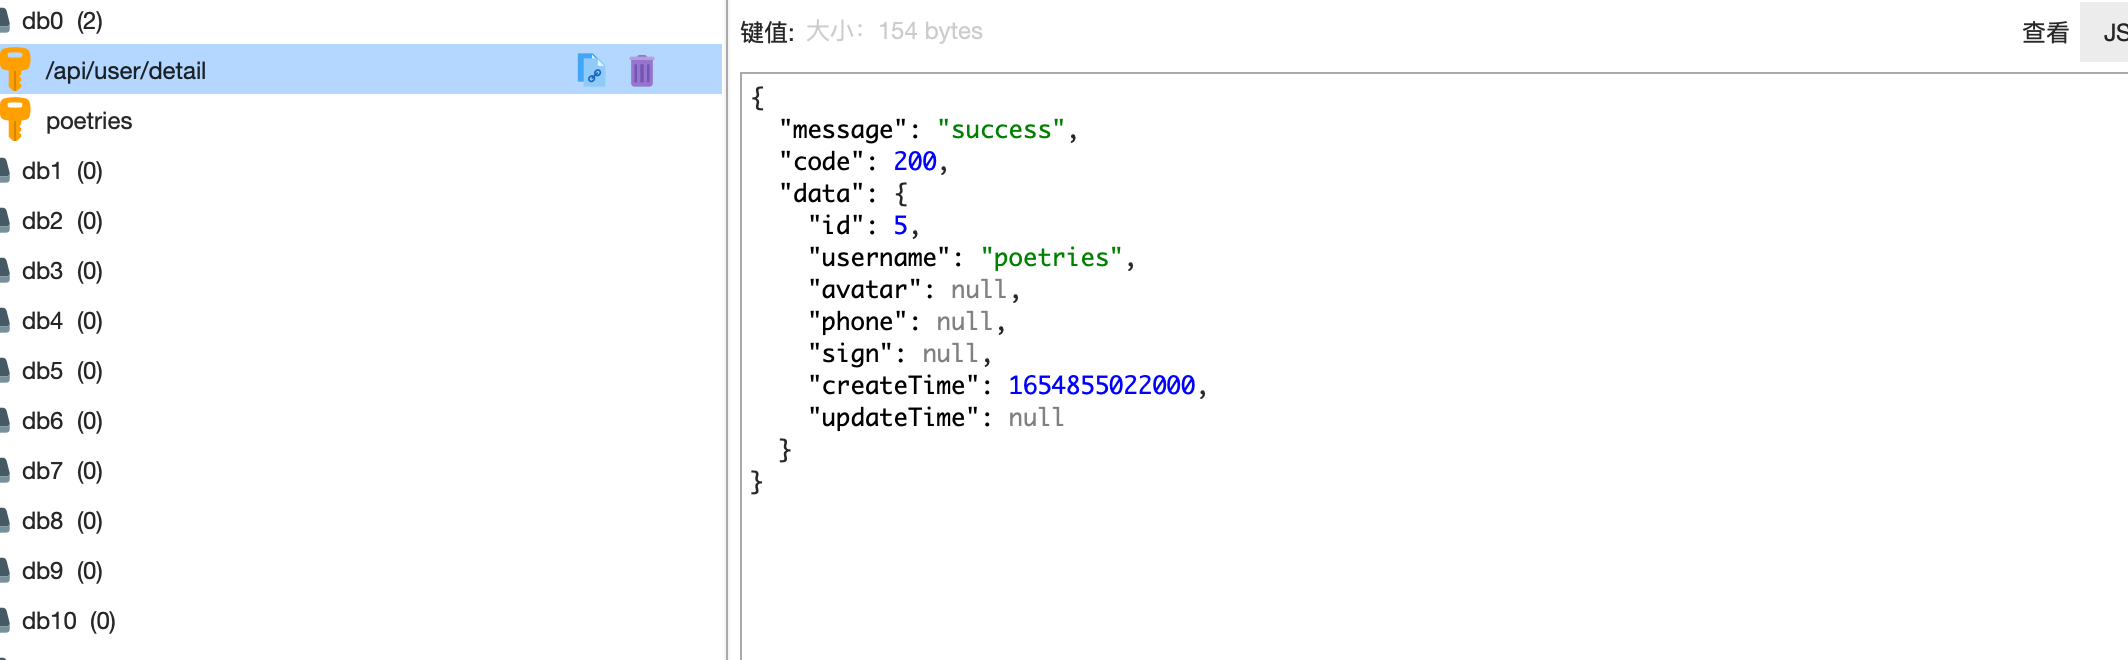
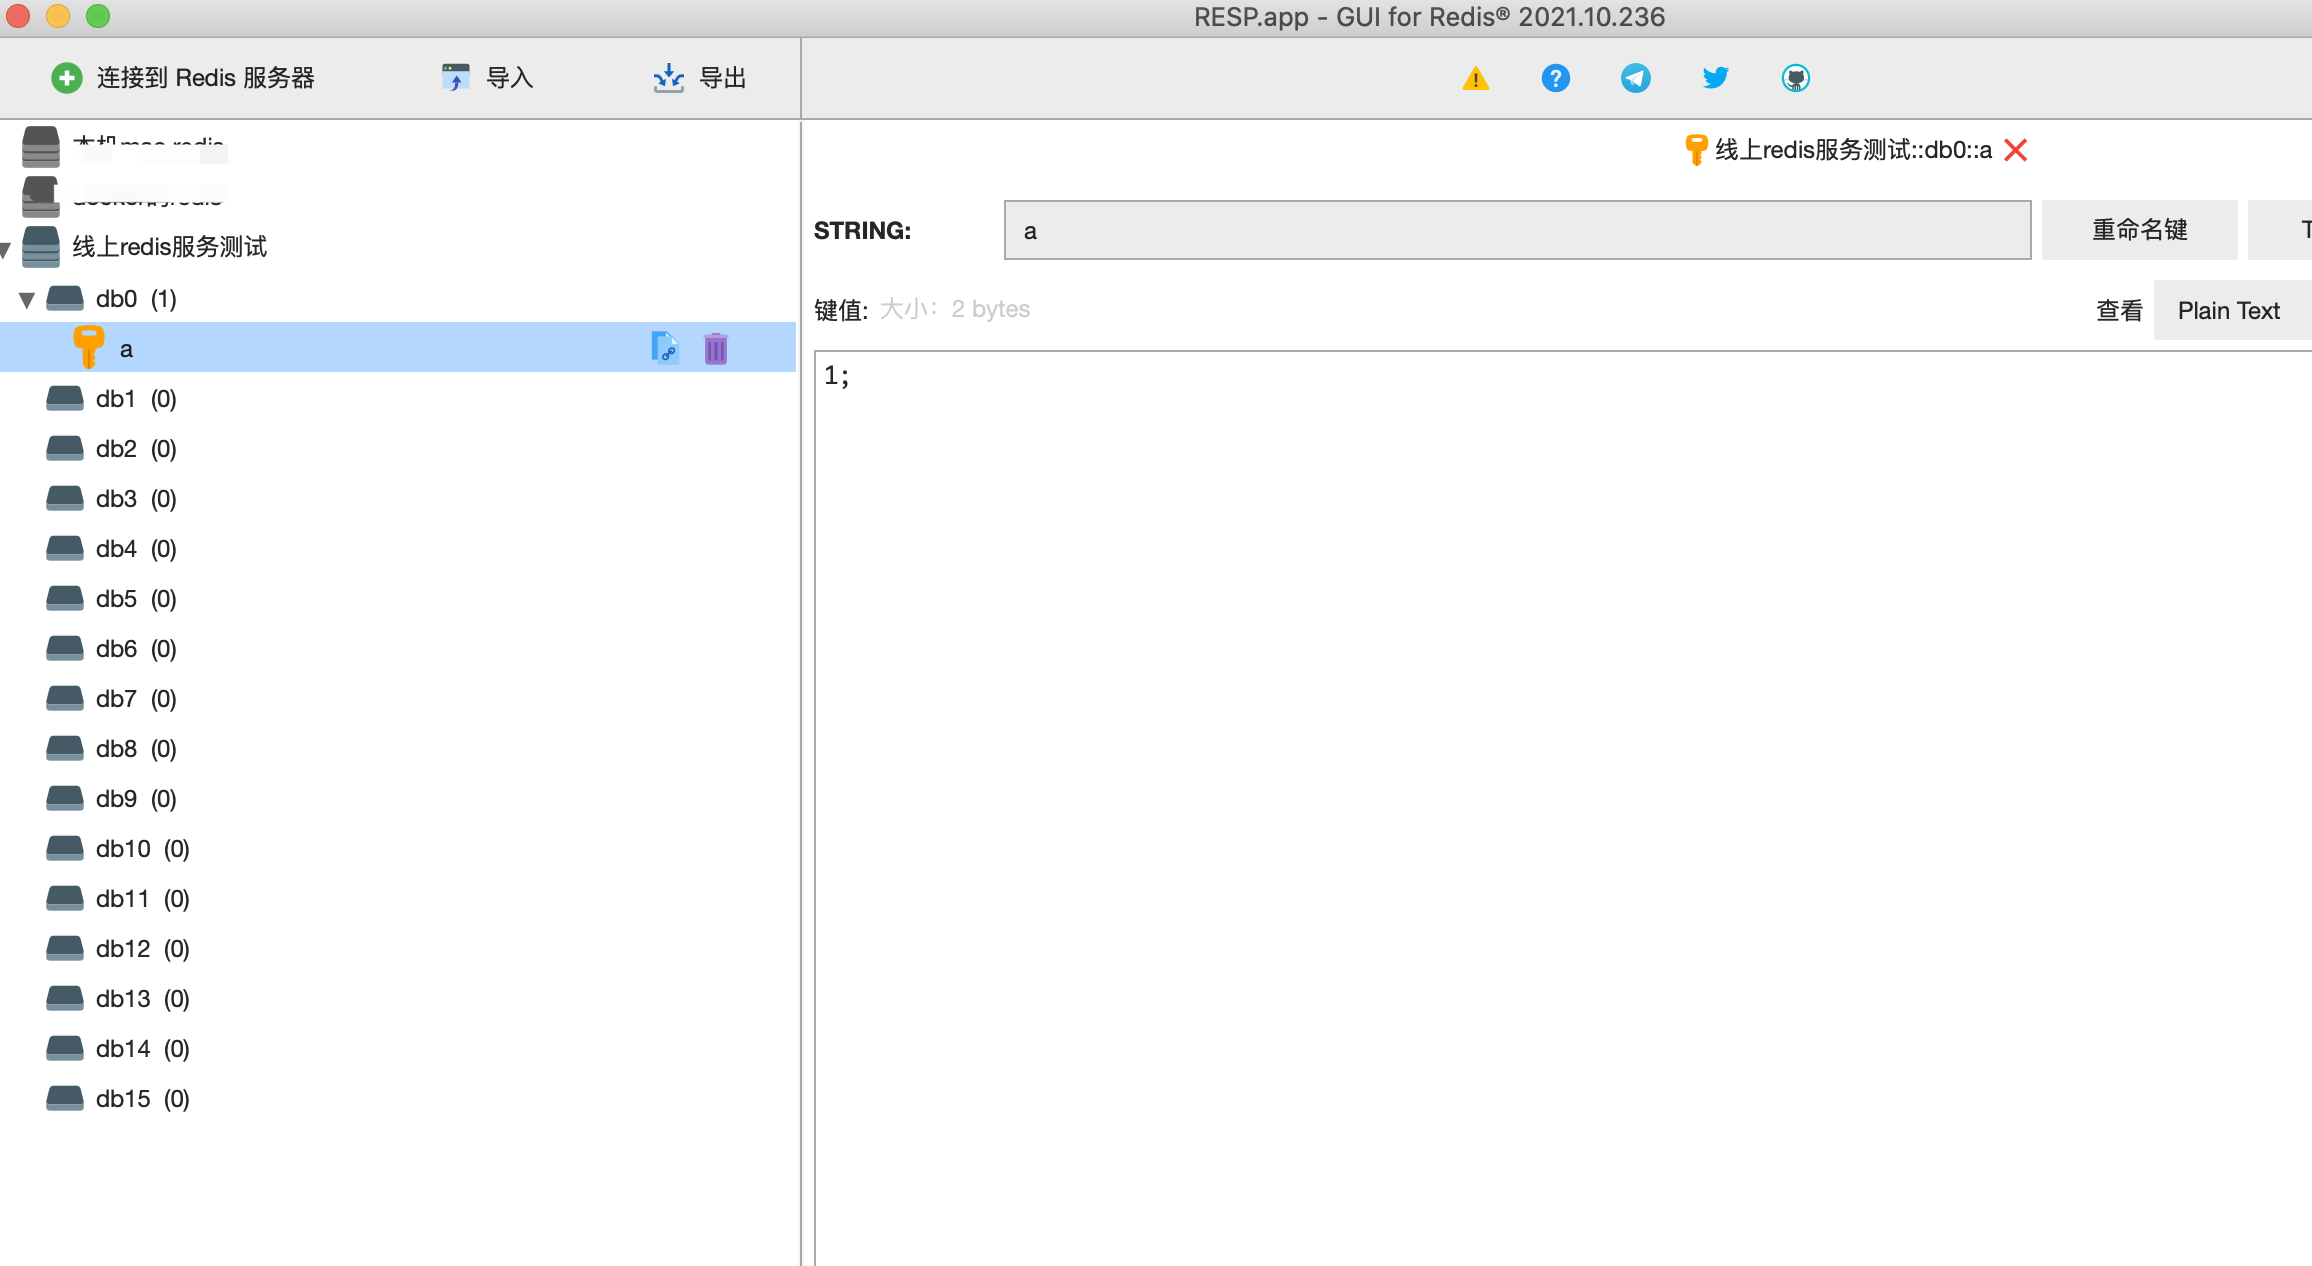
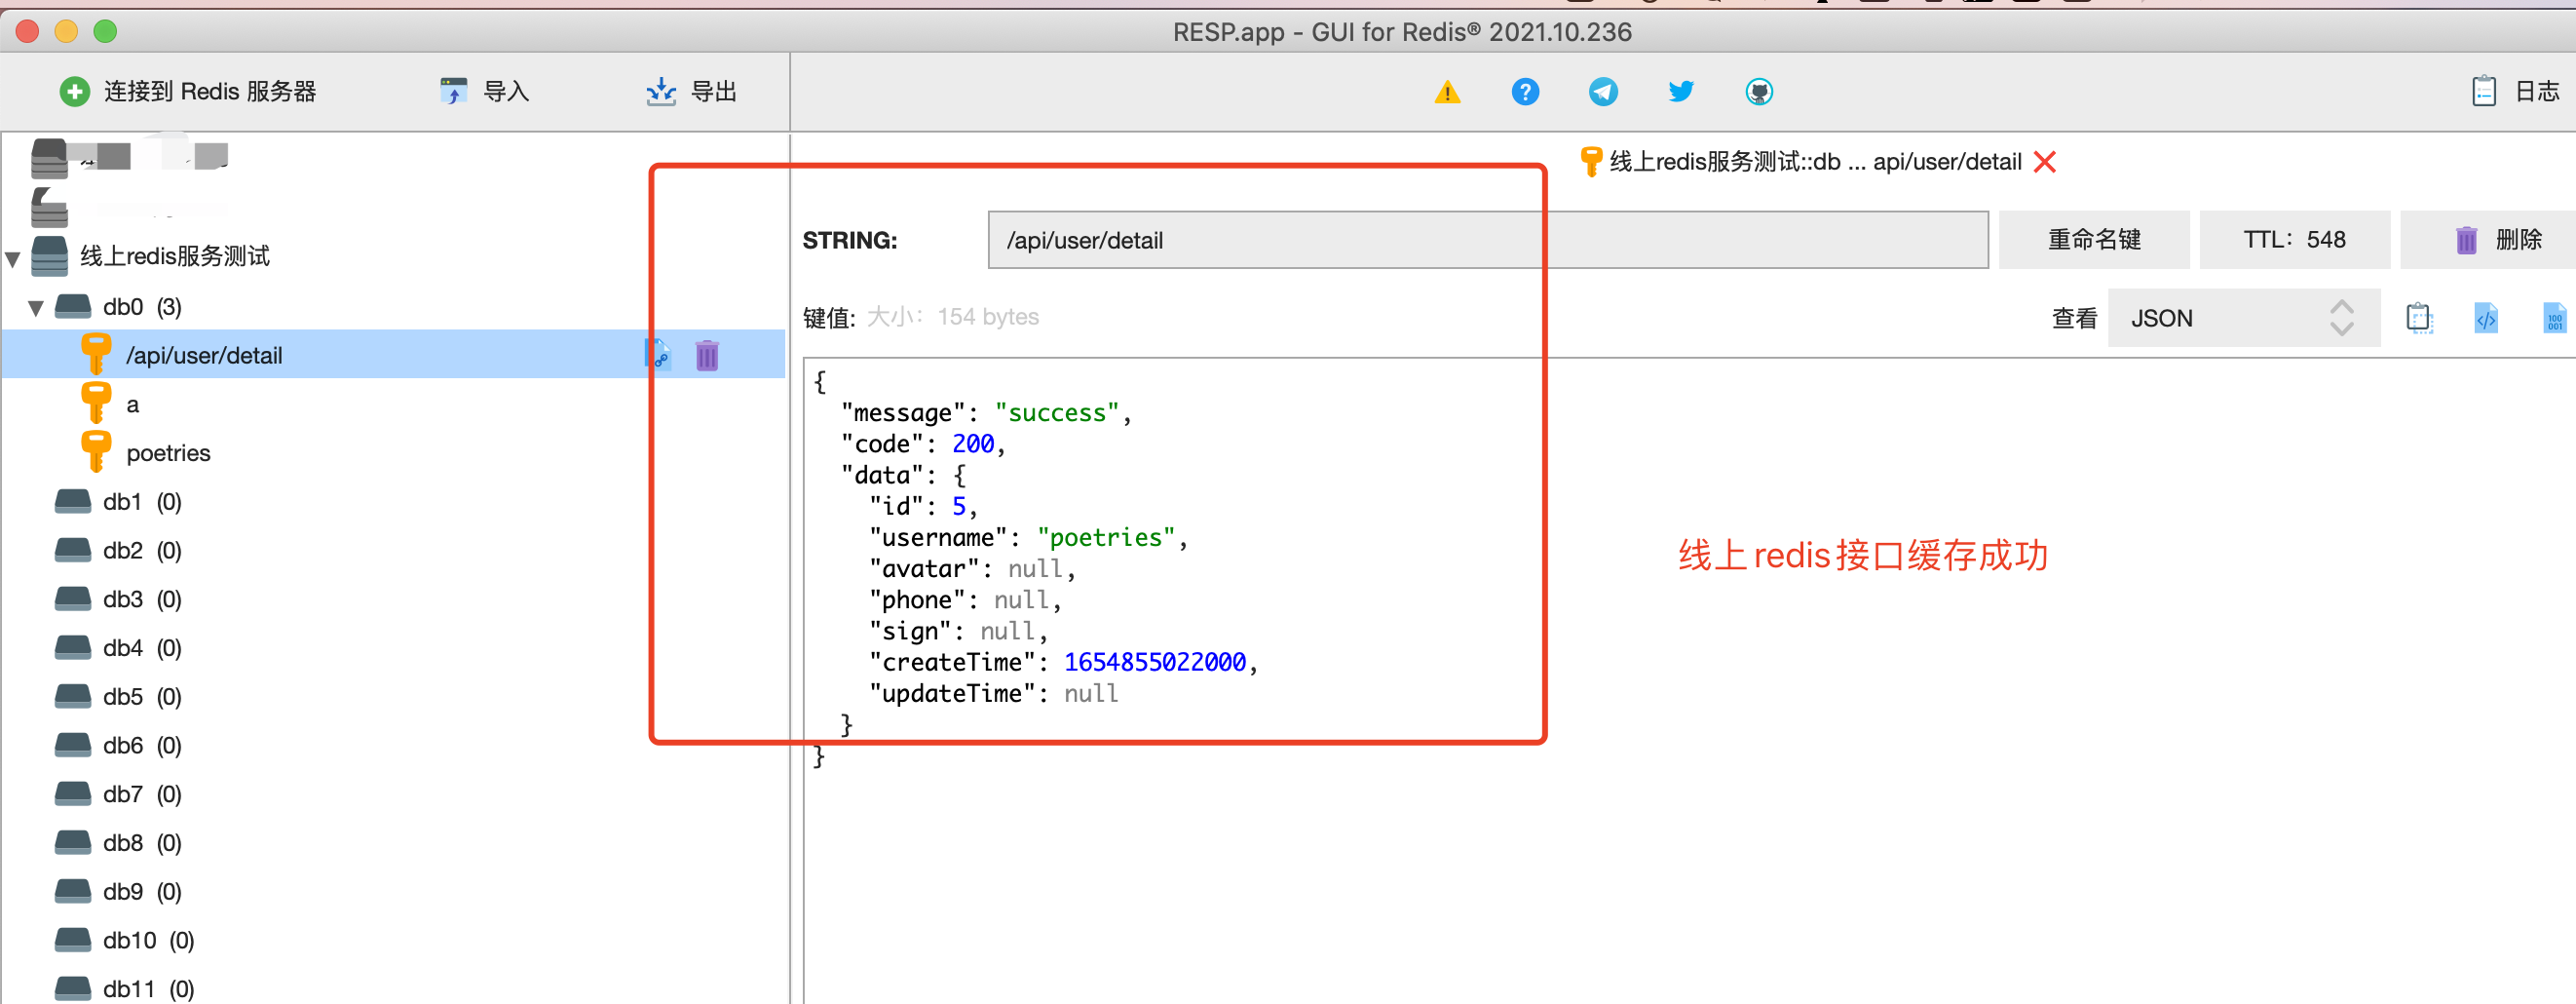
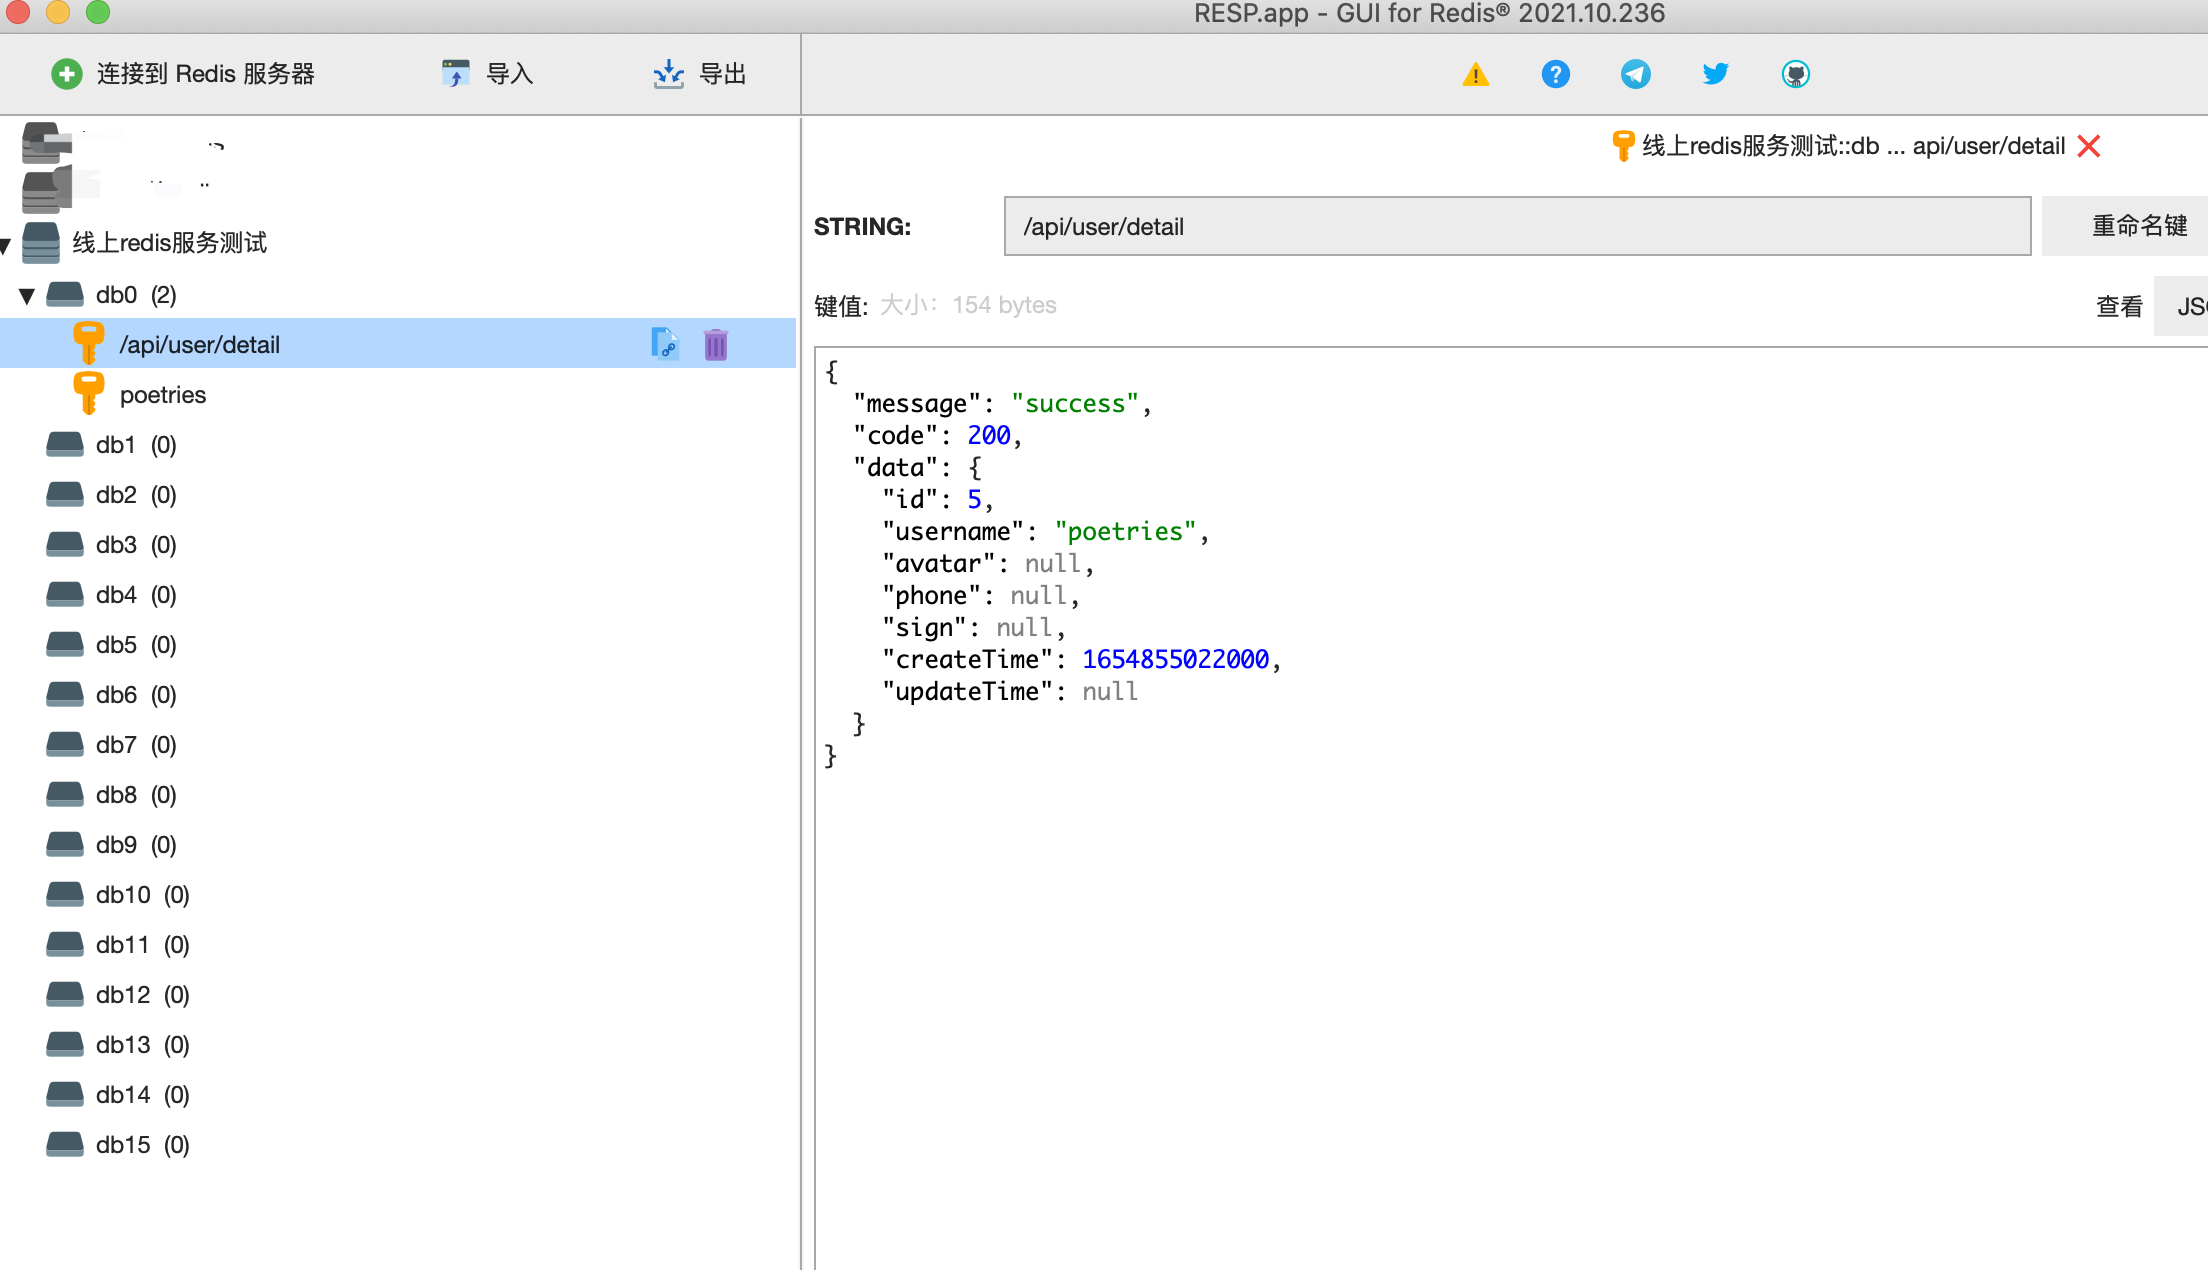
缓存服务测试
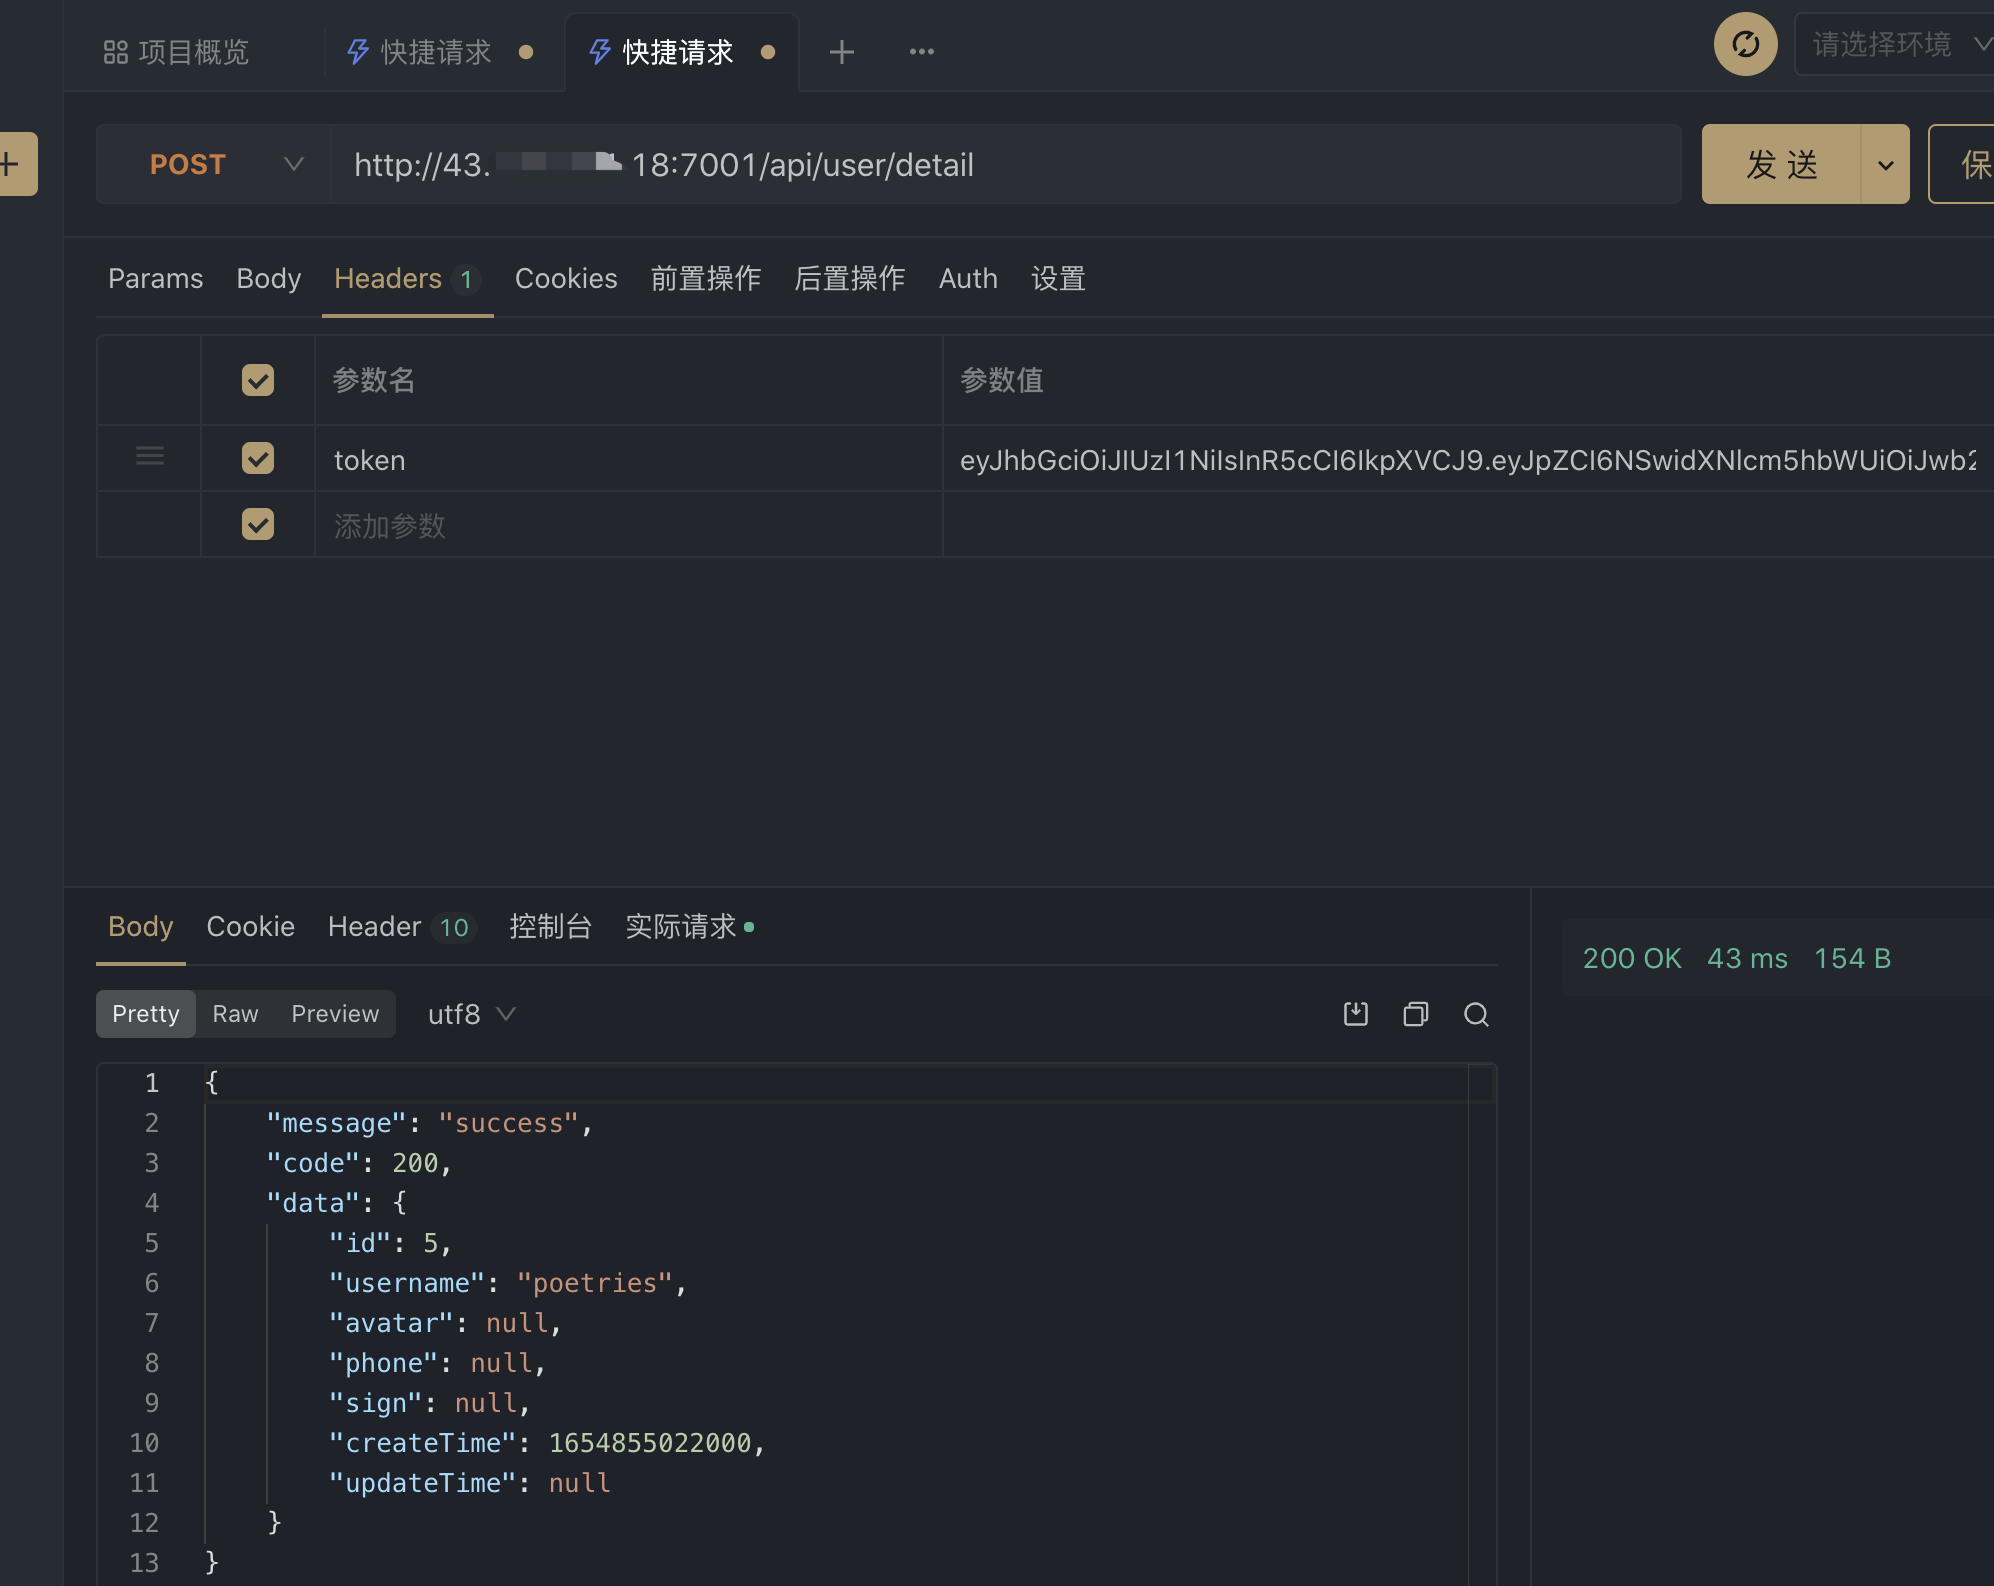
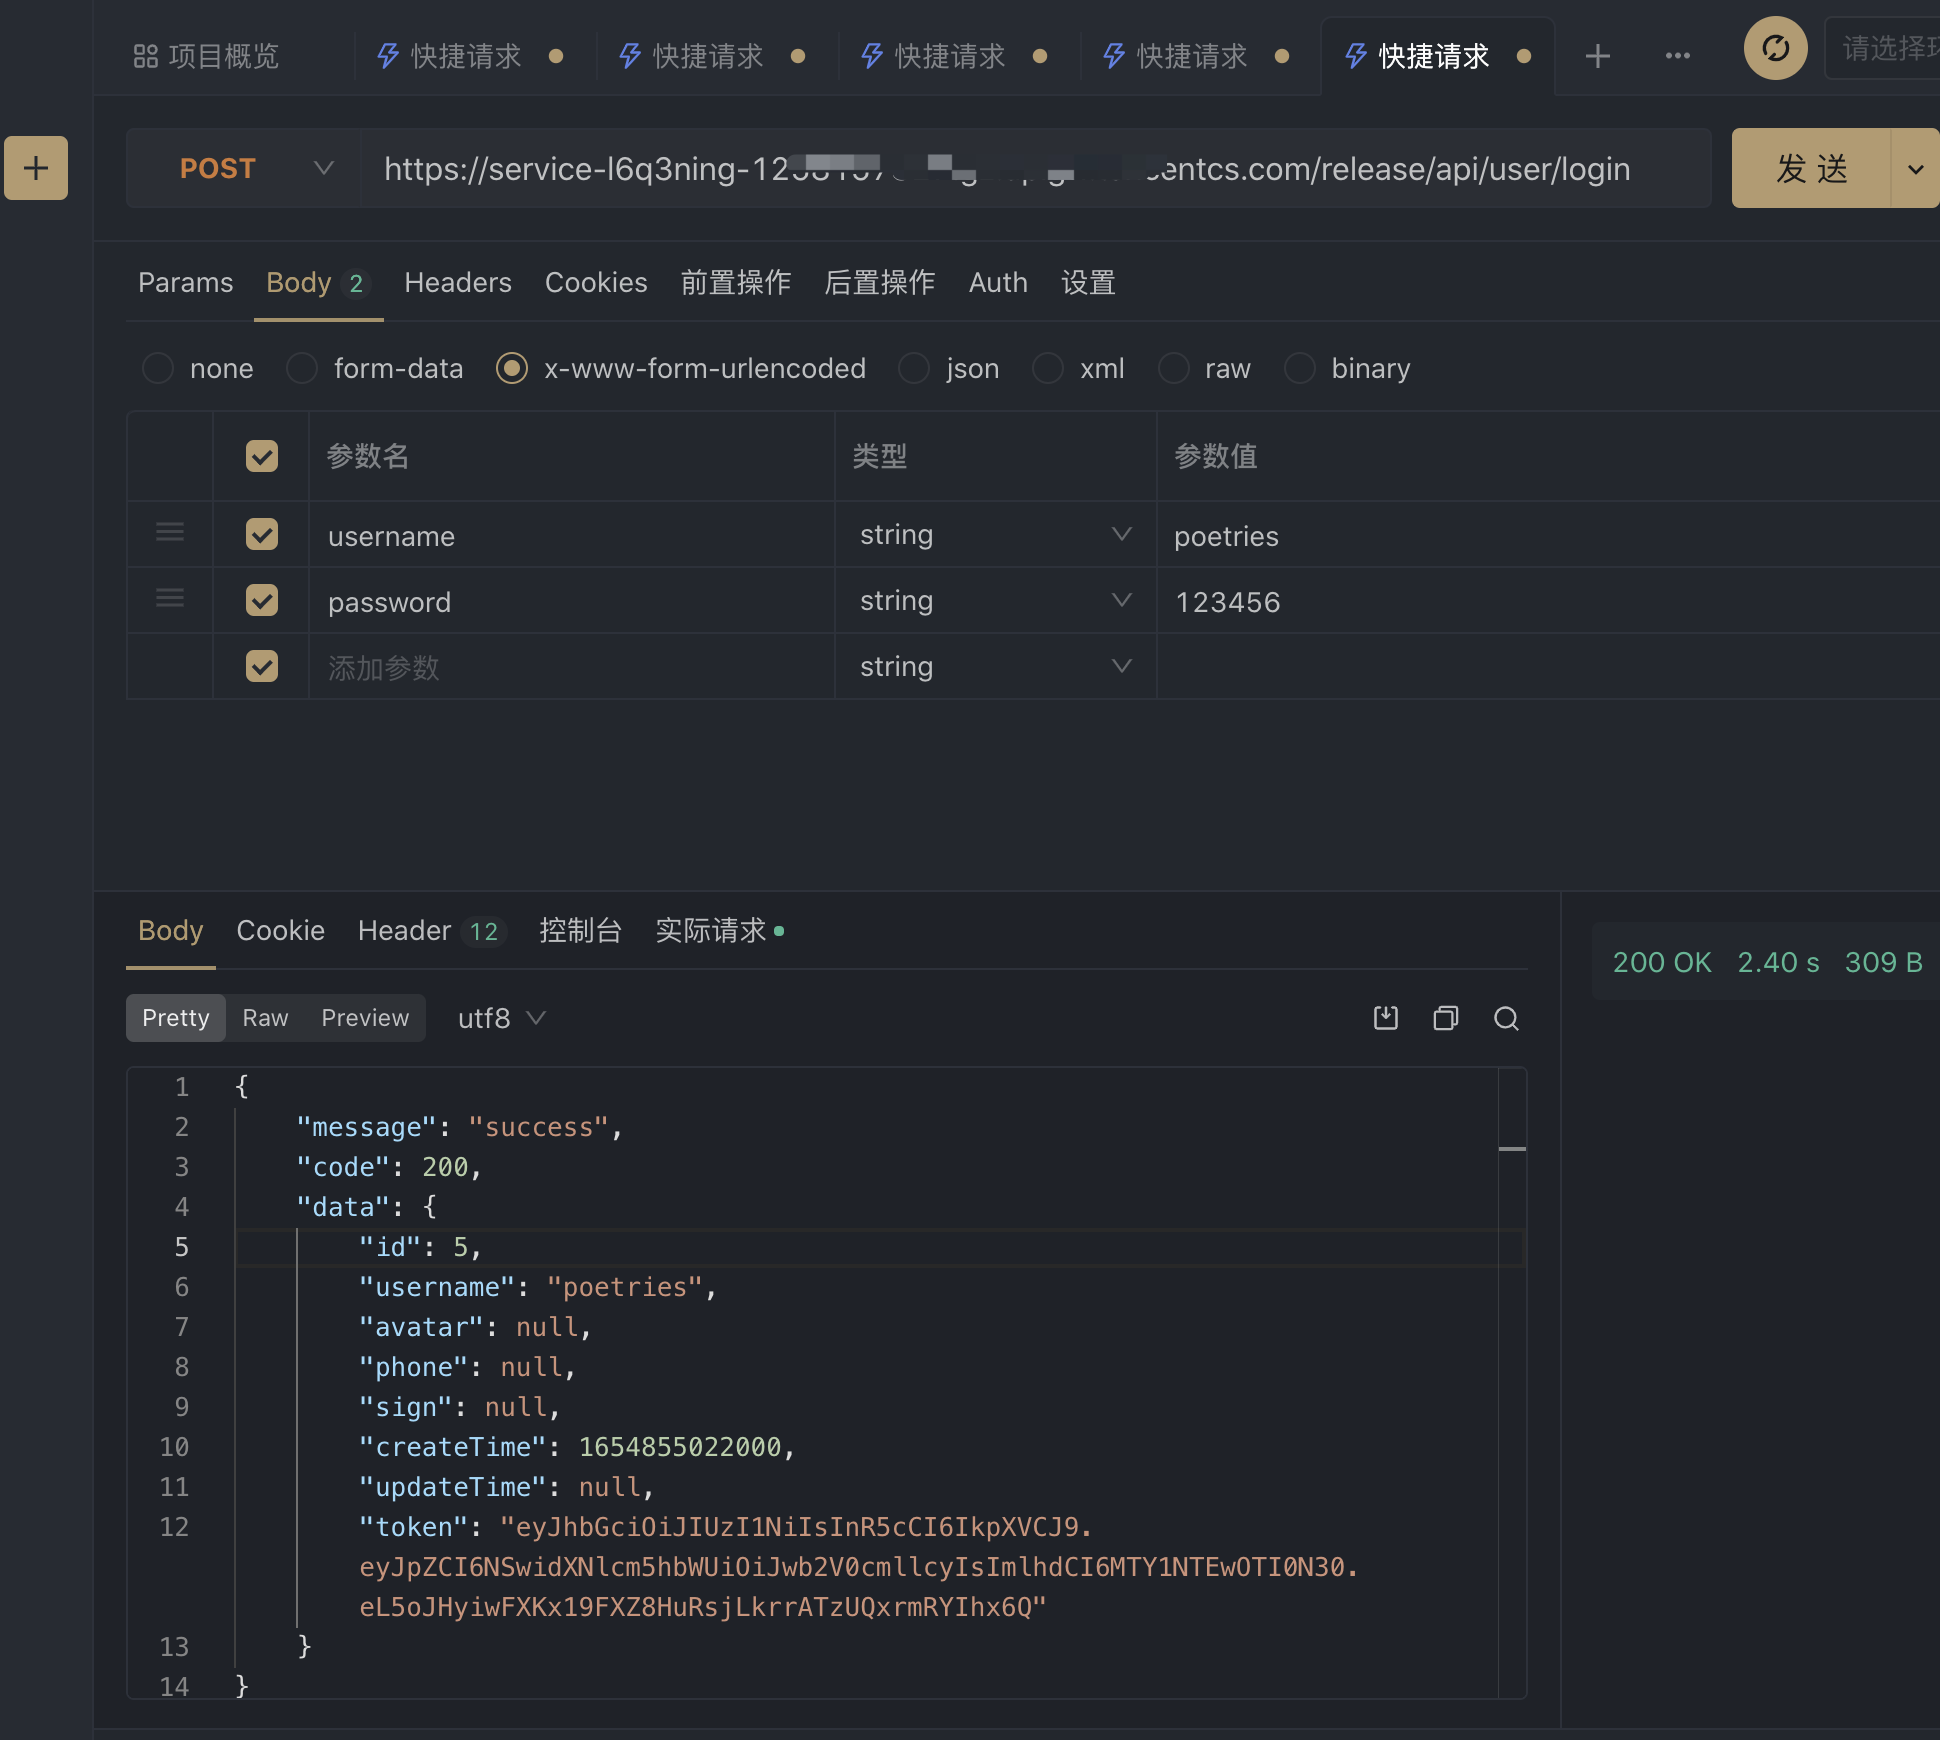
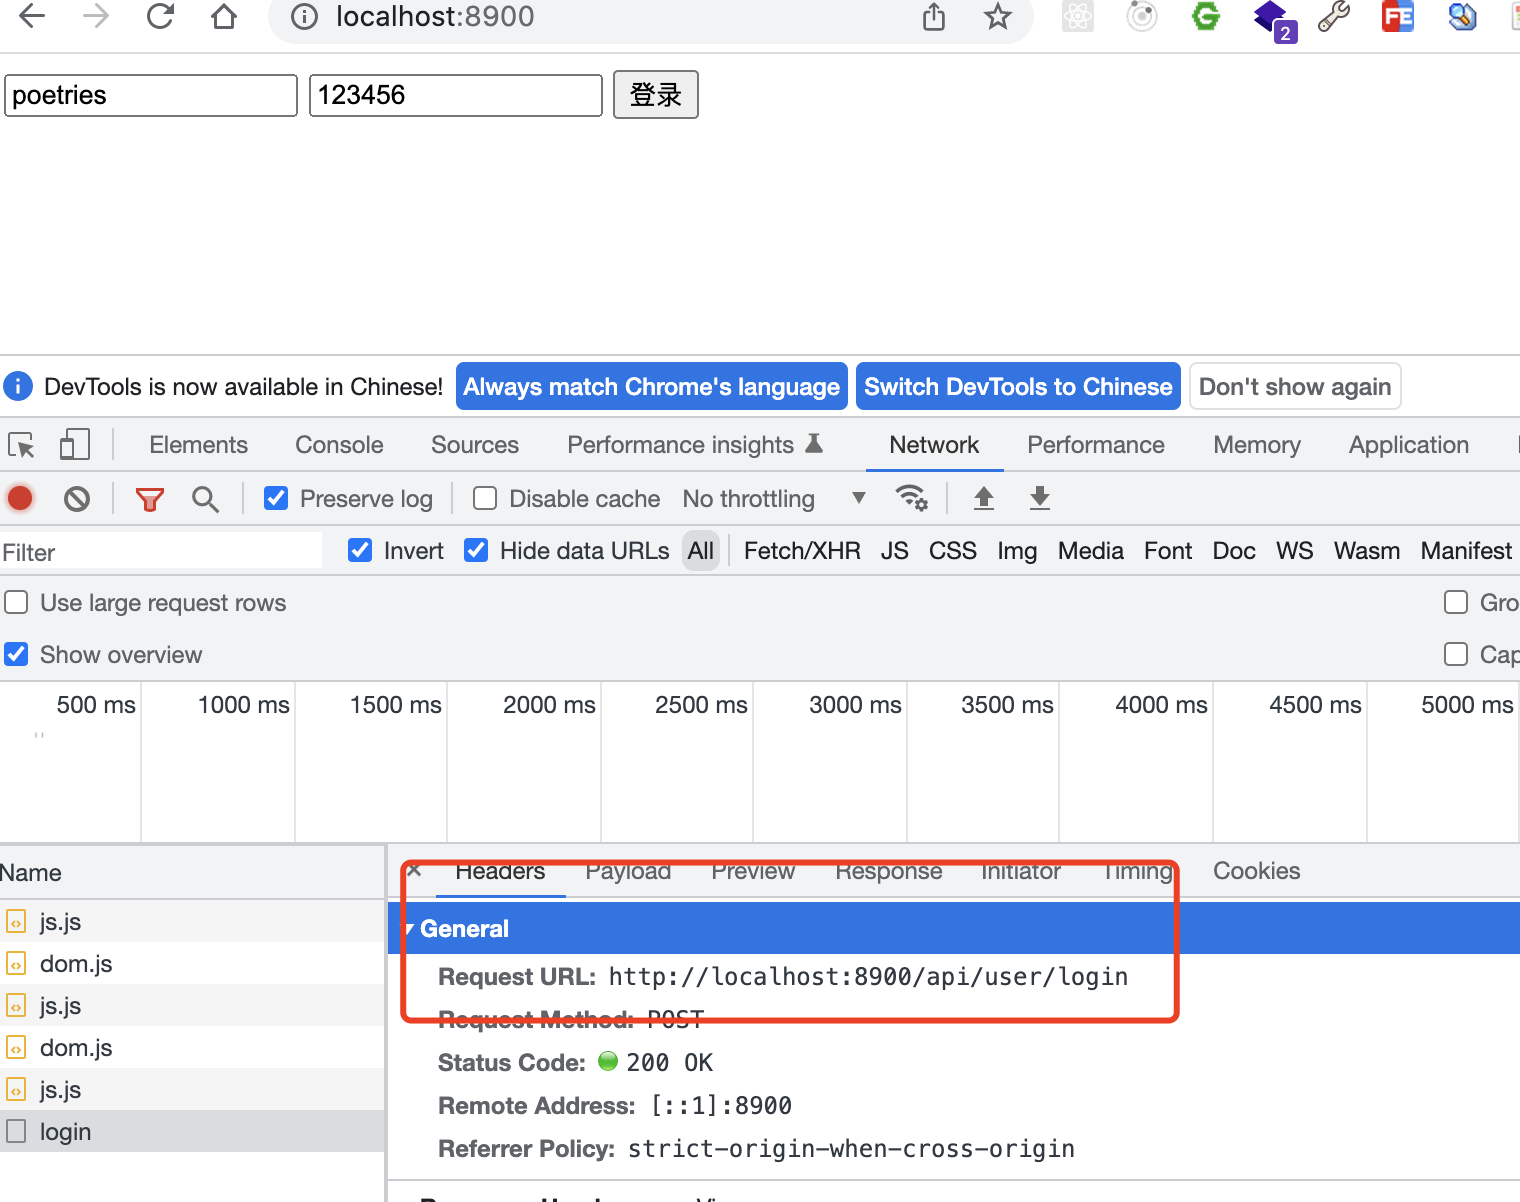
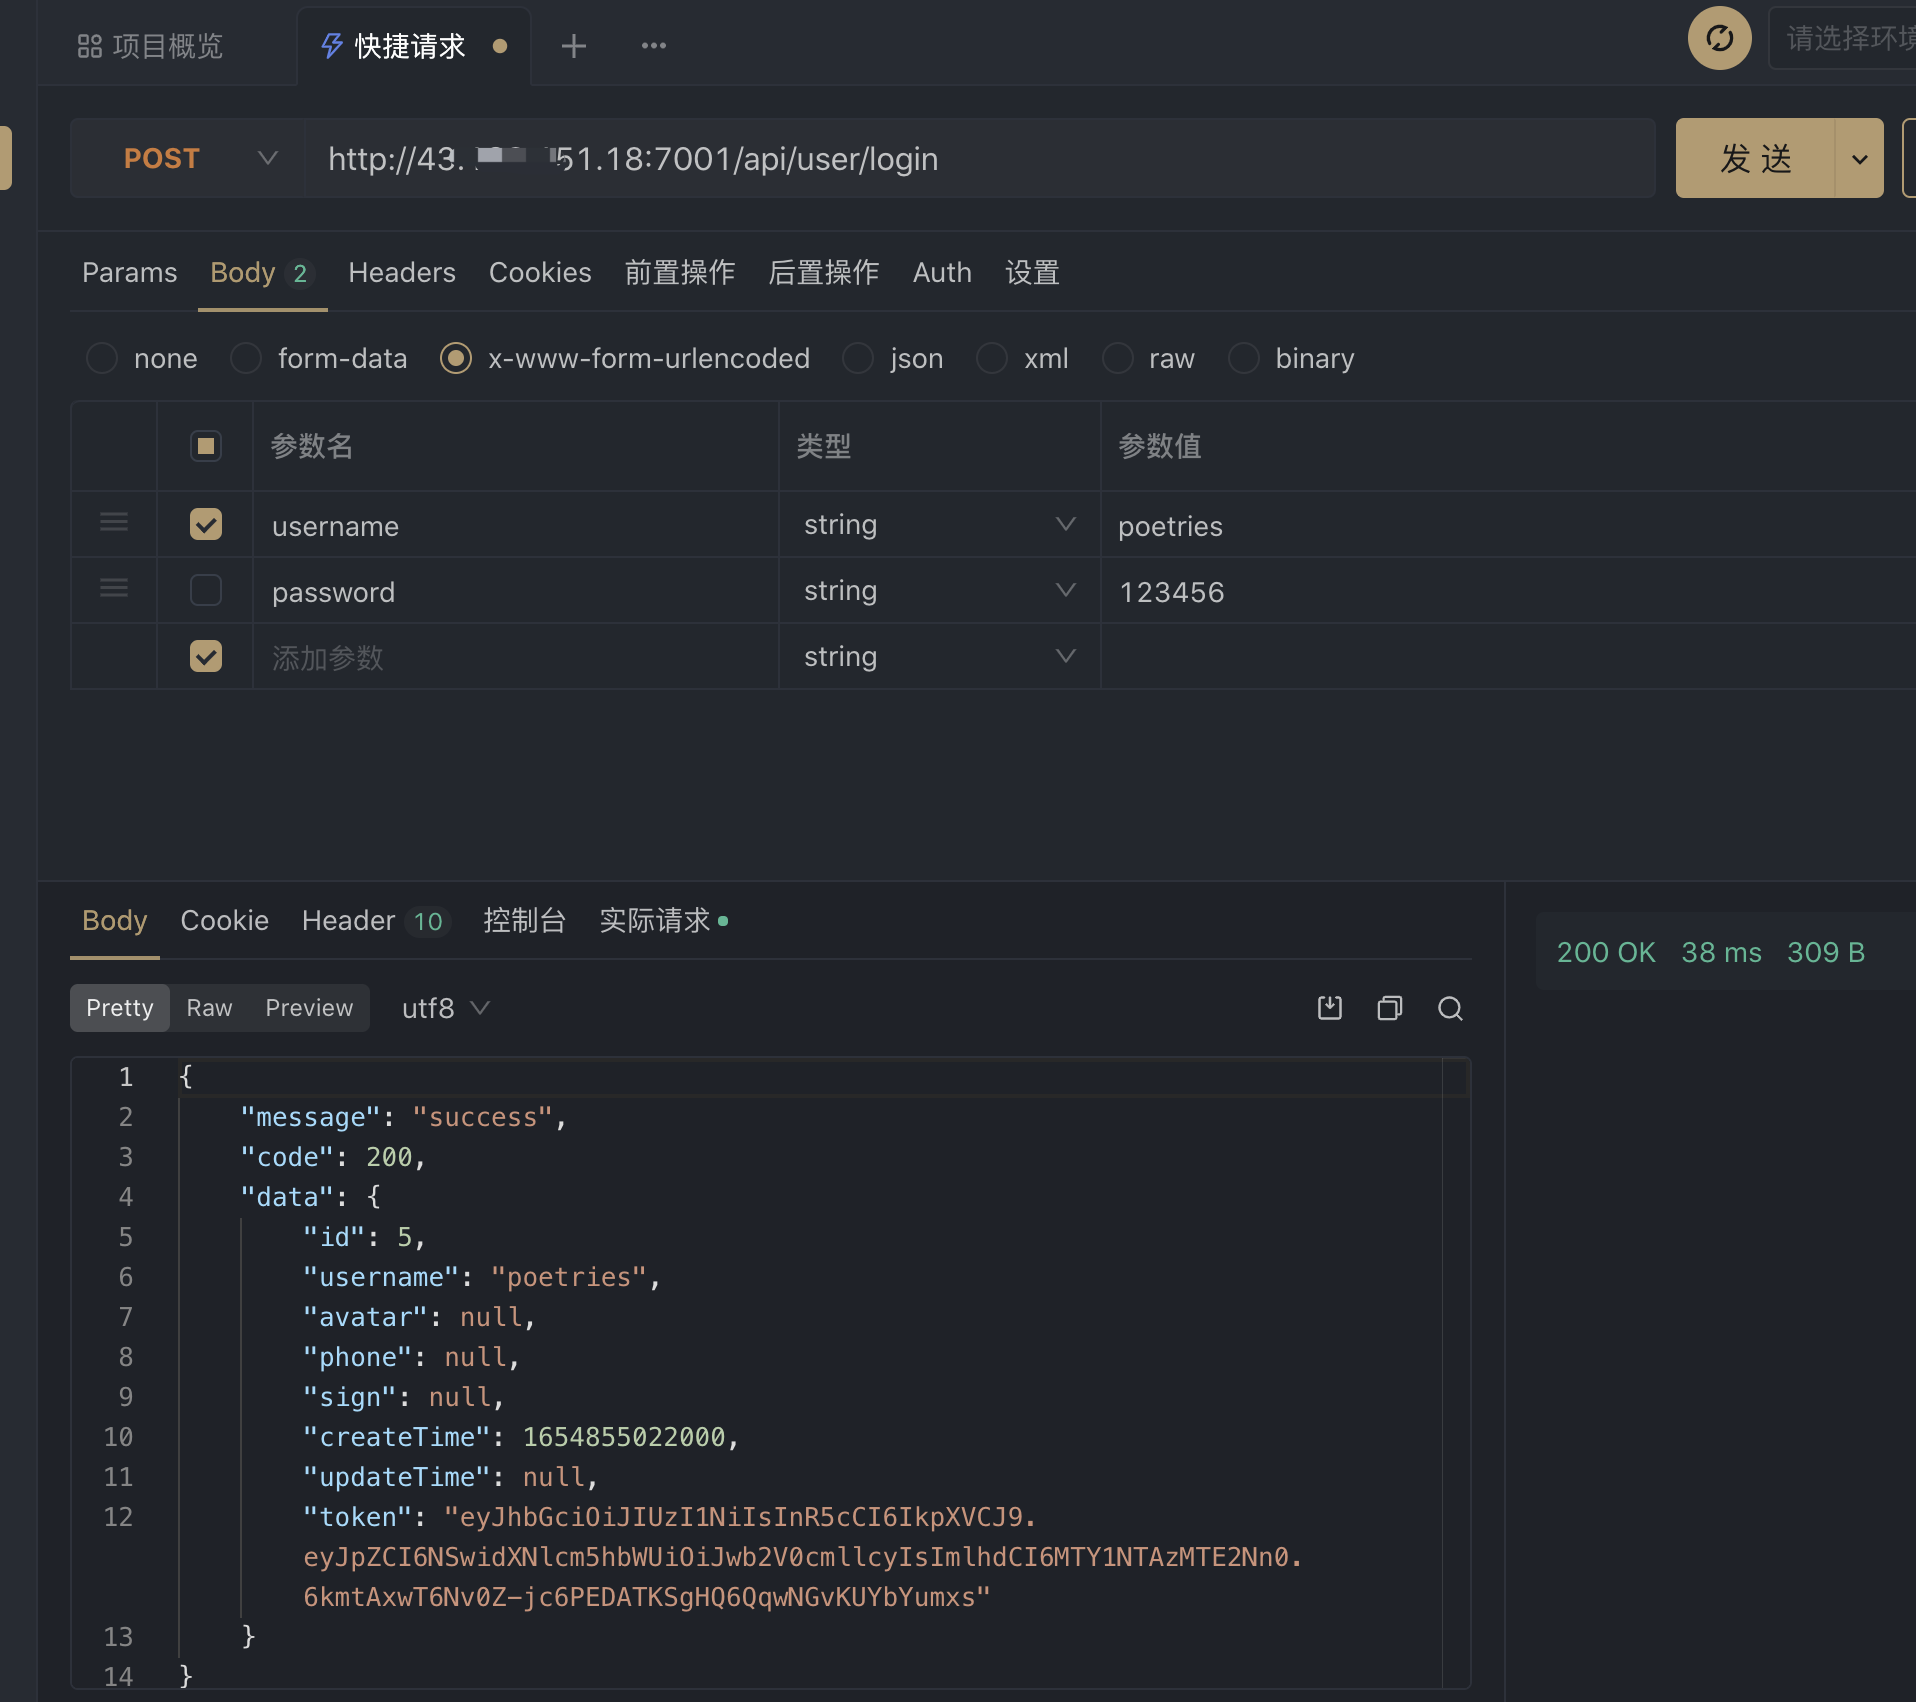
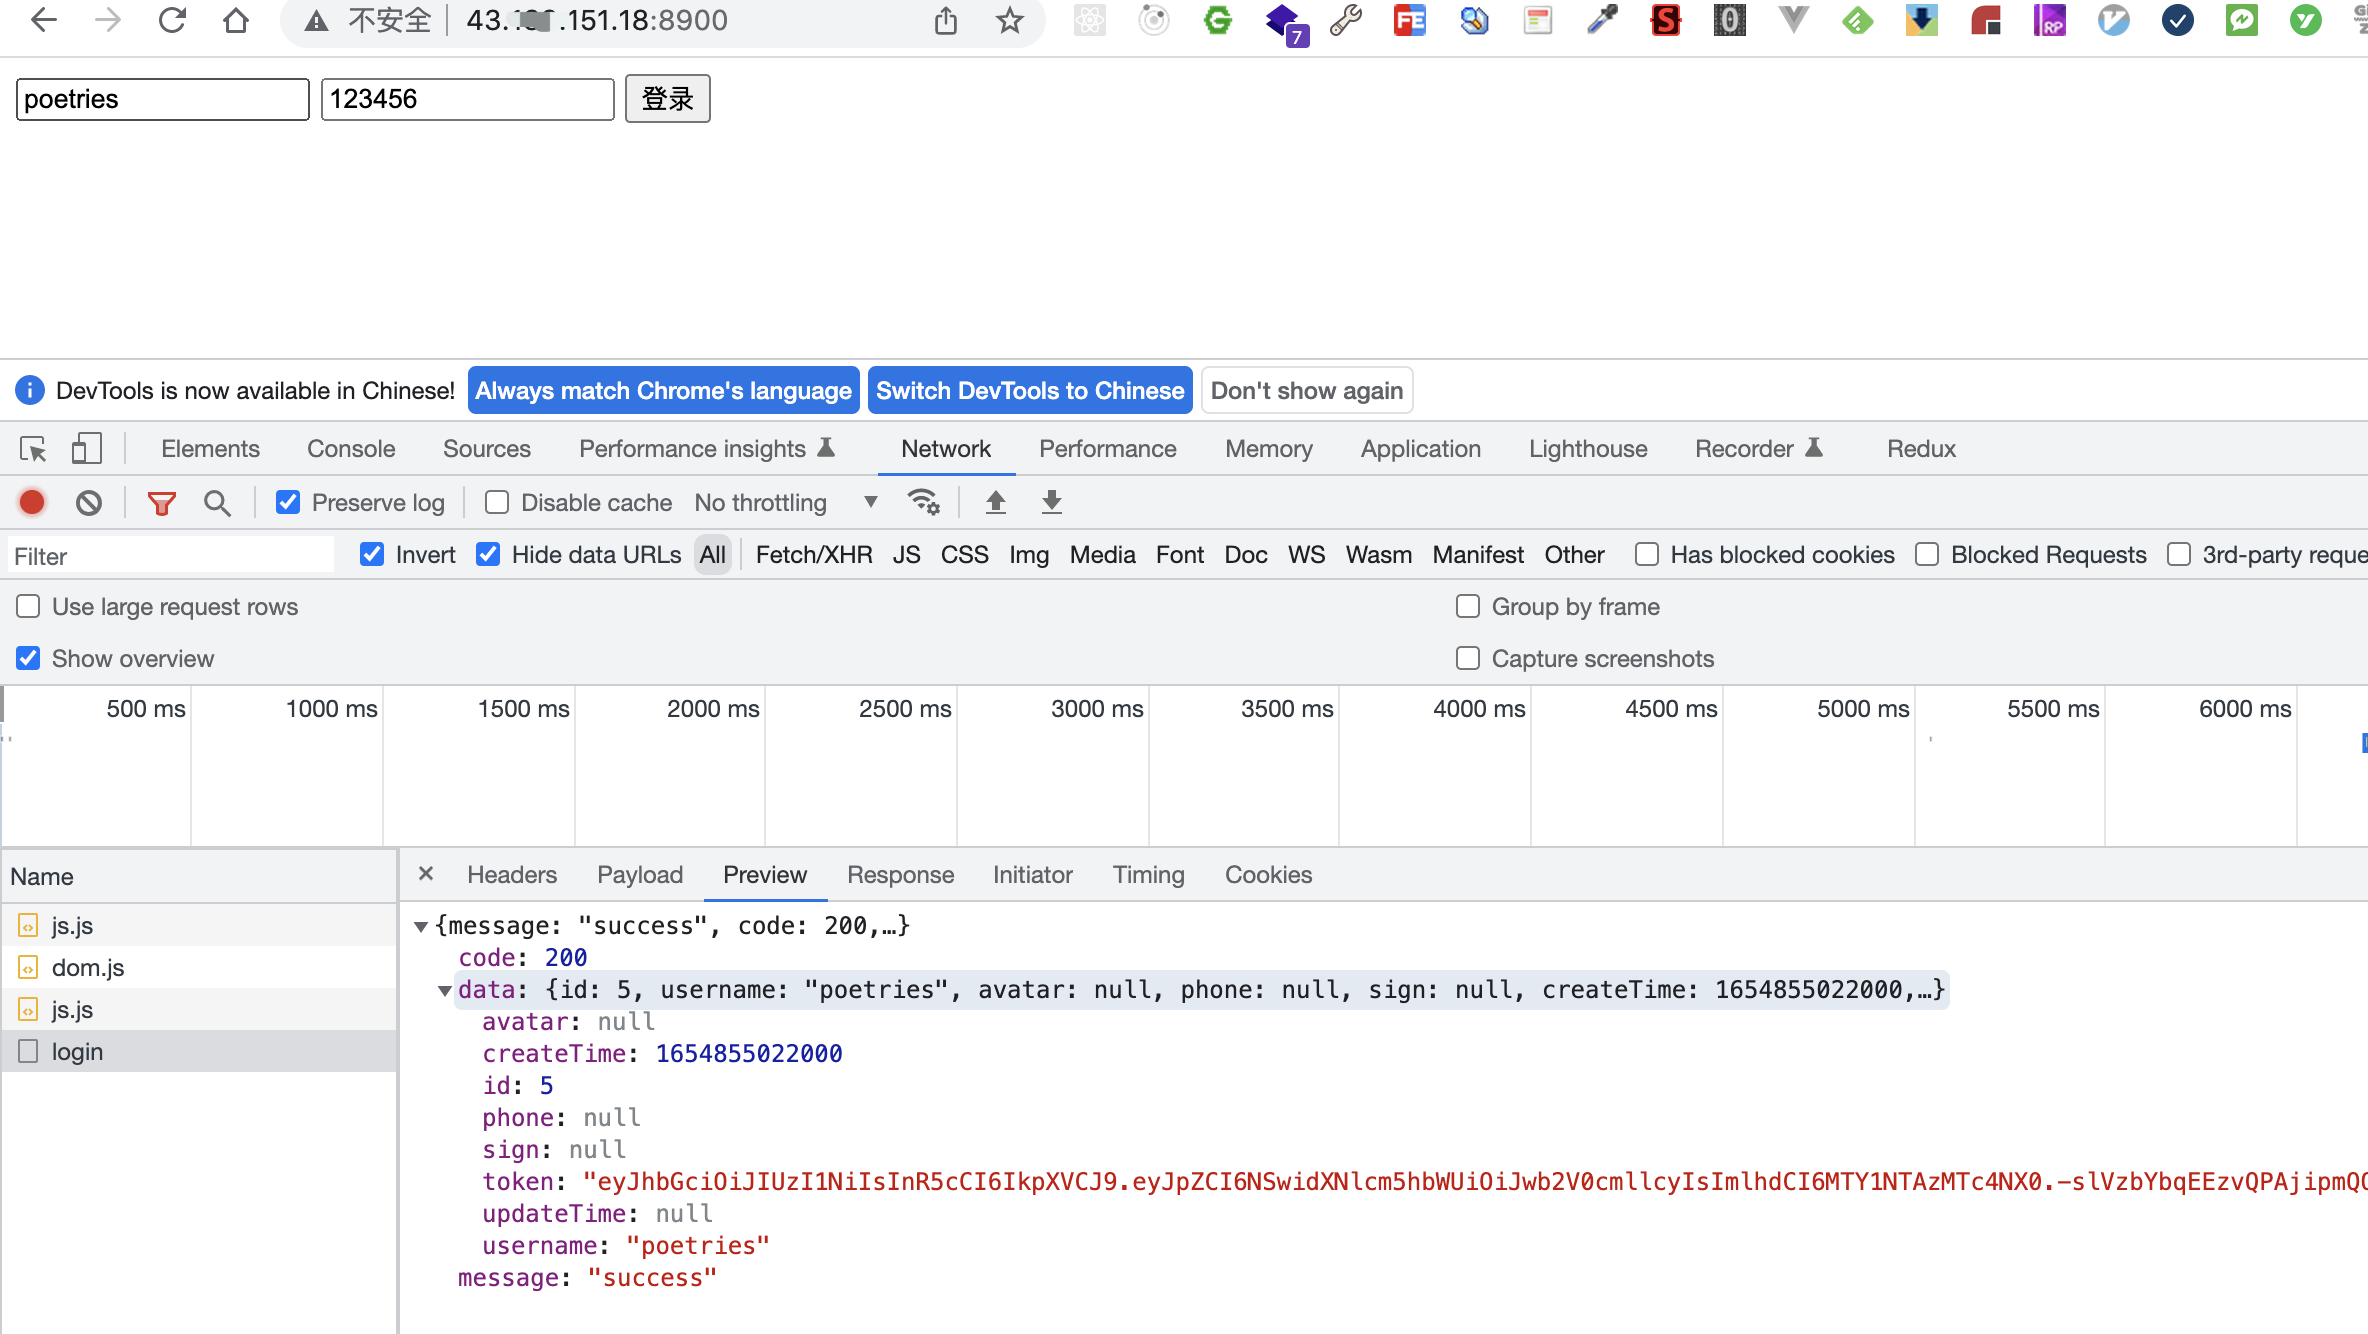
测试egg接口
访问前端项目测试接口
五、部署到云托管
云托管流水线部署更方便
5.1 redis服务
这里我们上面部署使用的自建服务器上docker搭建的redis服务作为演示
5.2 mysql服务
这里我们上面部署使用的自建服务器上docker搭建的mysql服务作为演示
5.3 egg部署
修改代码
然后上传代码到github,通过云托管流水线构建
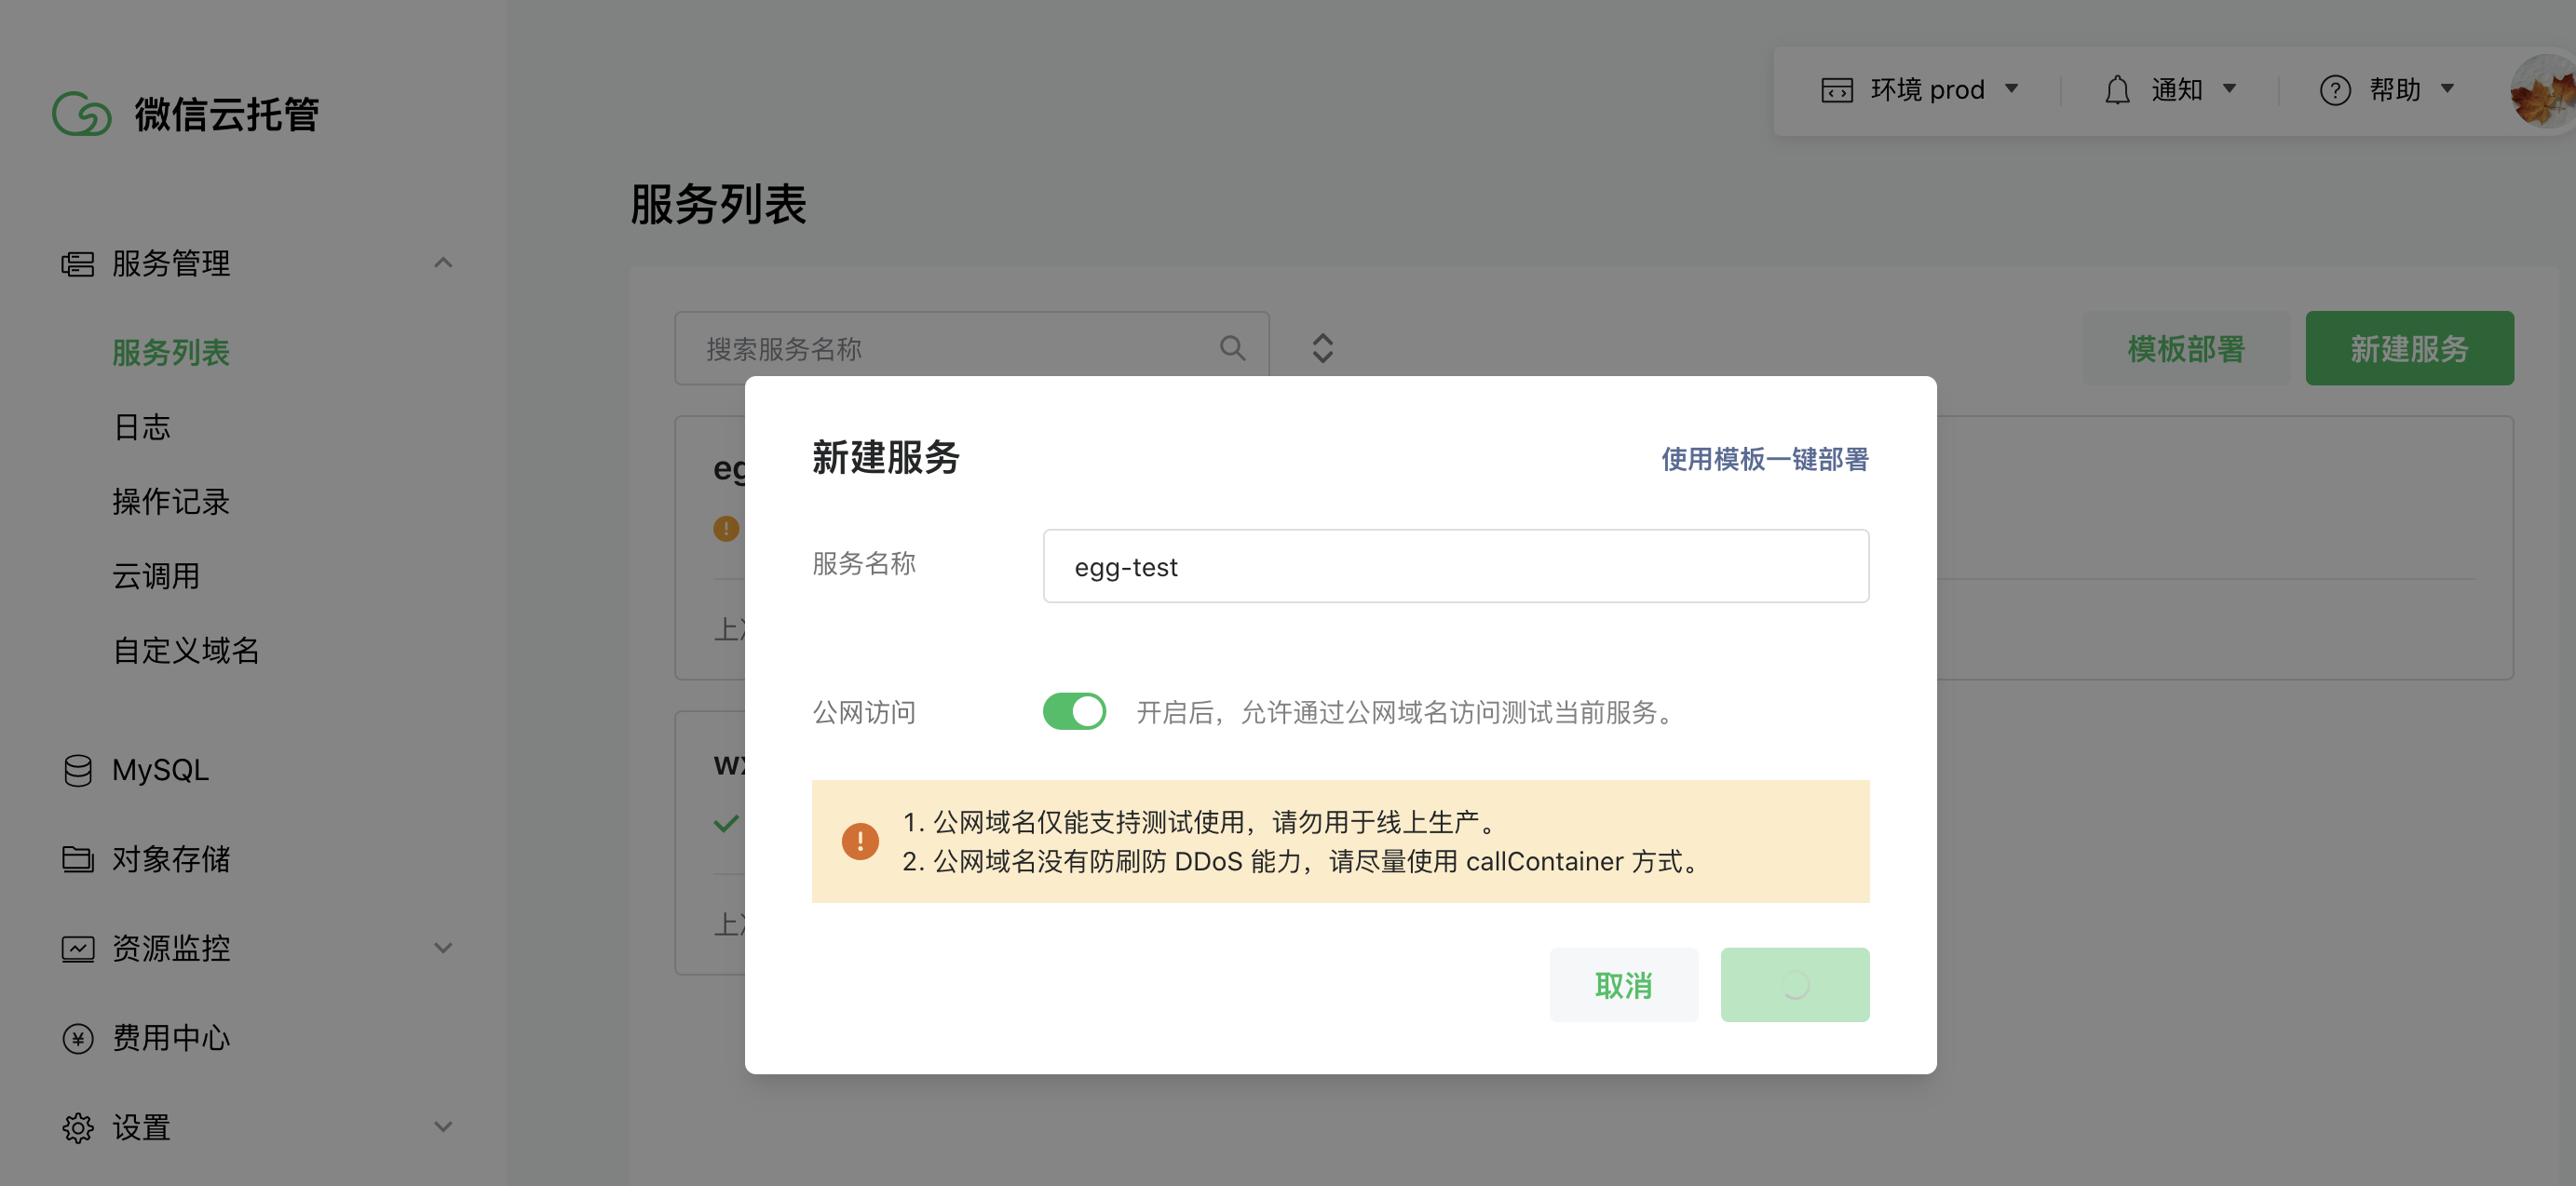
新建服务
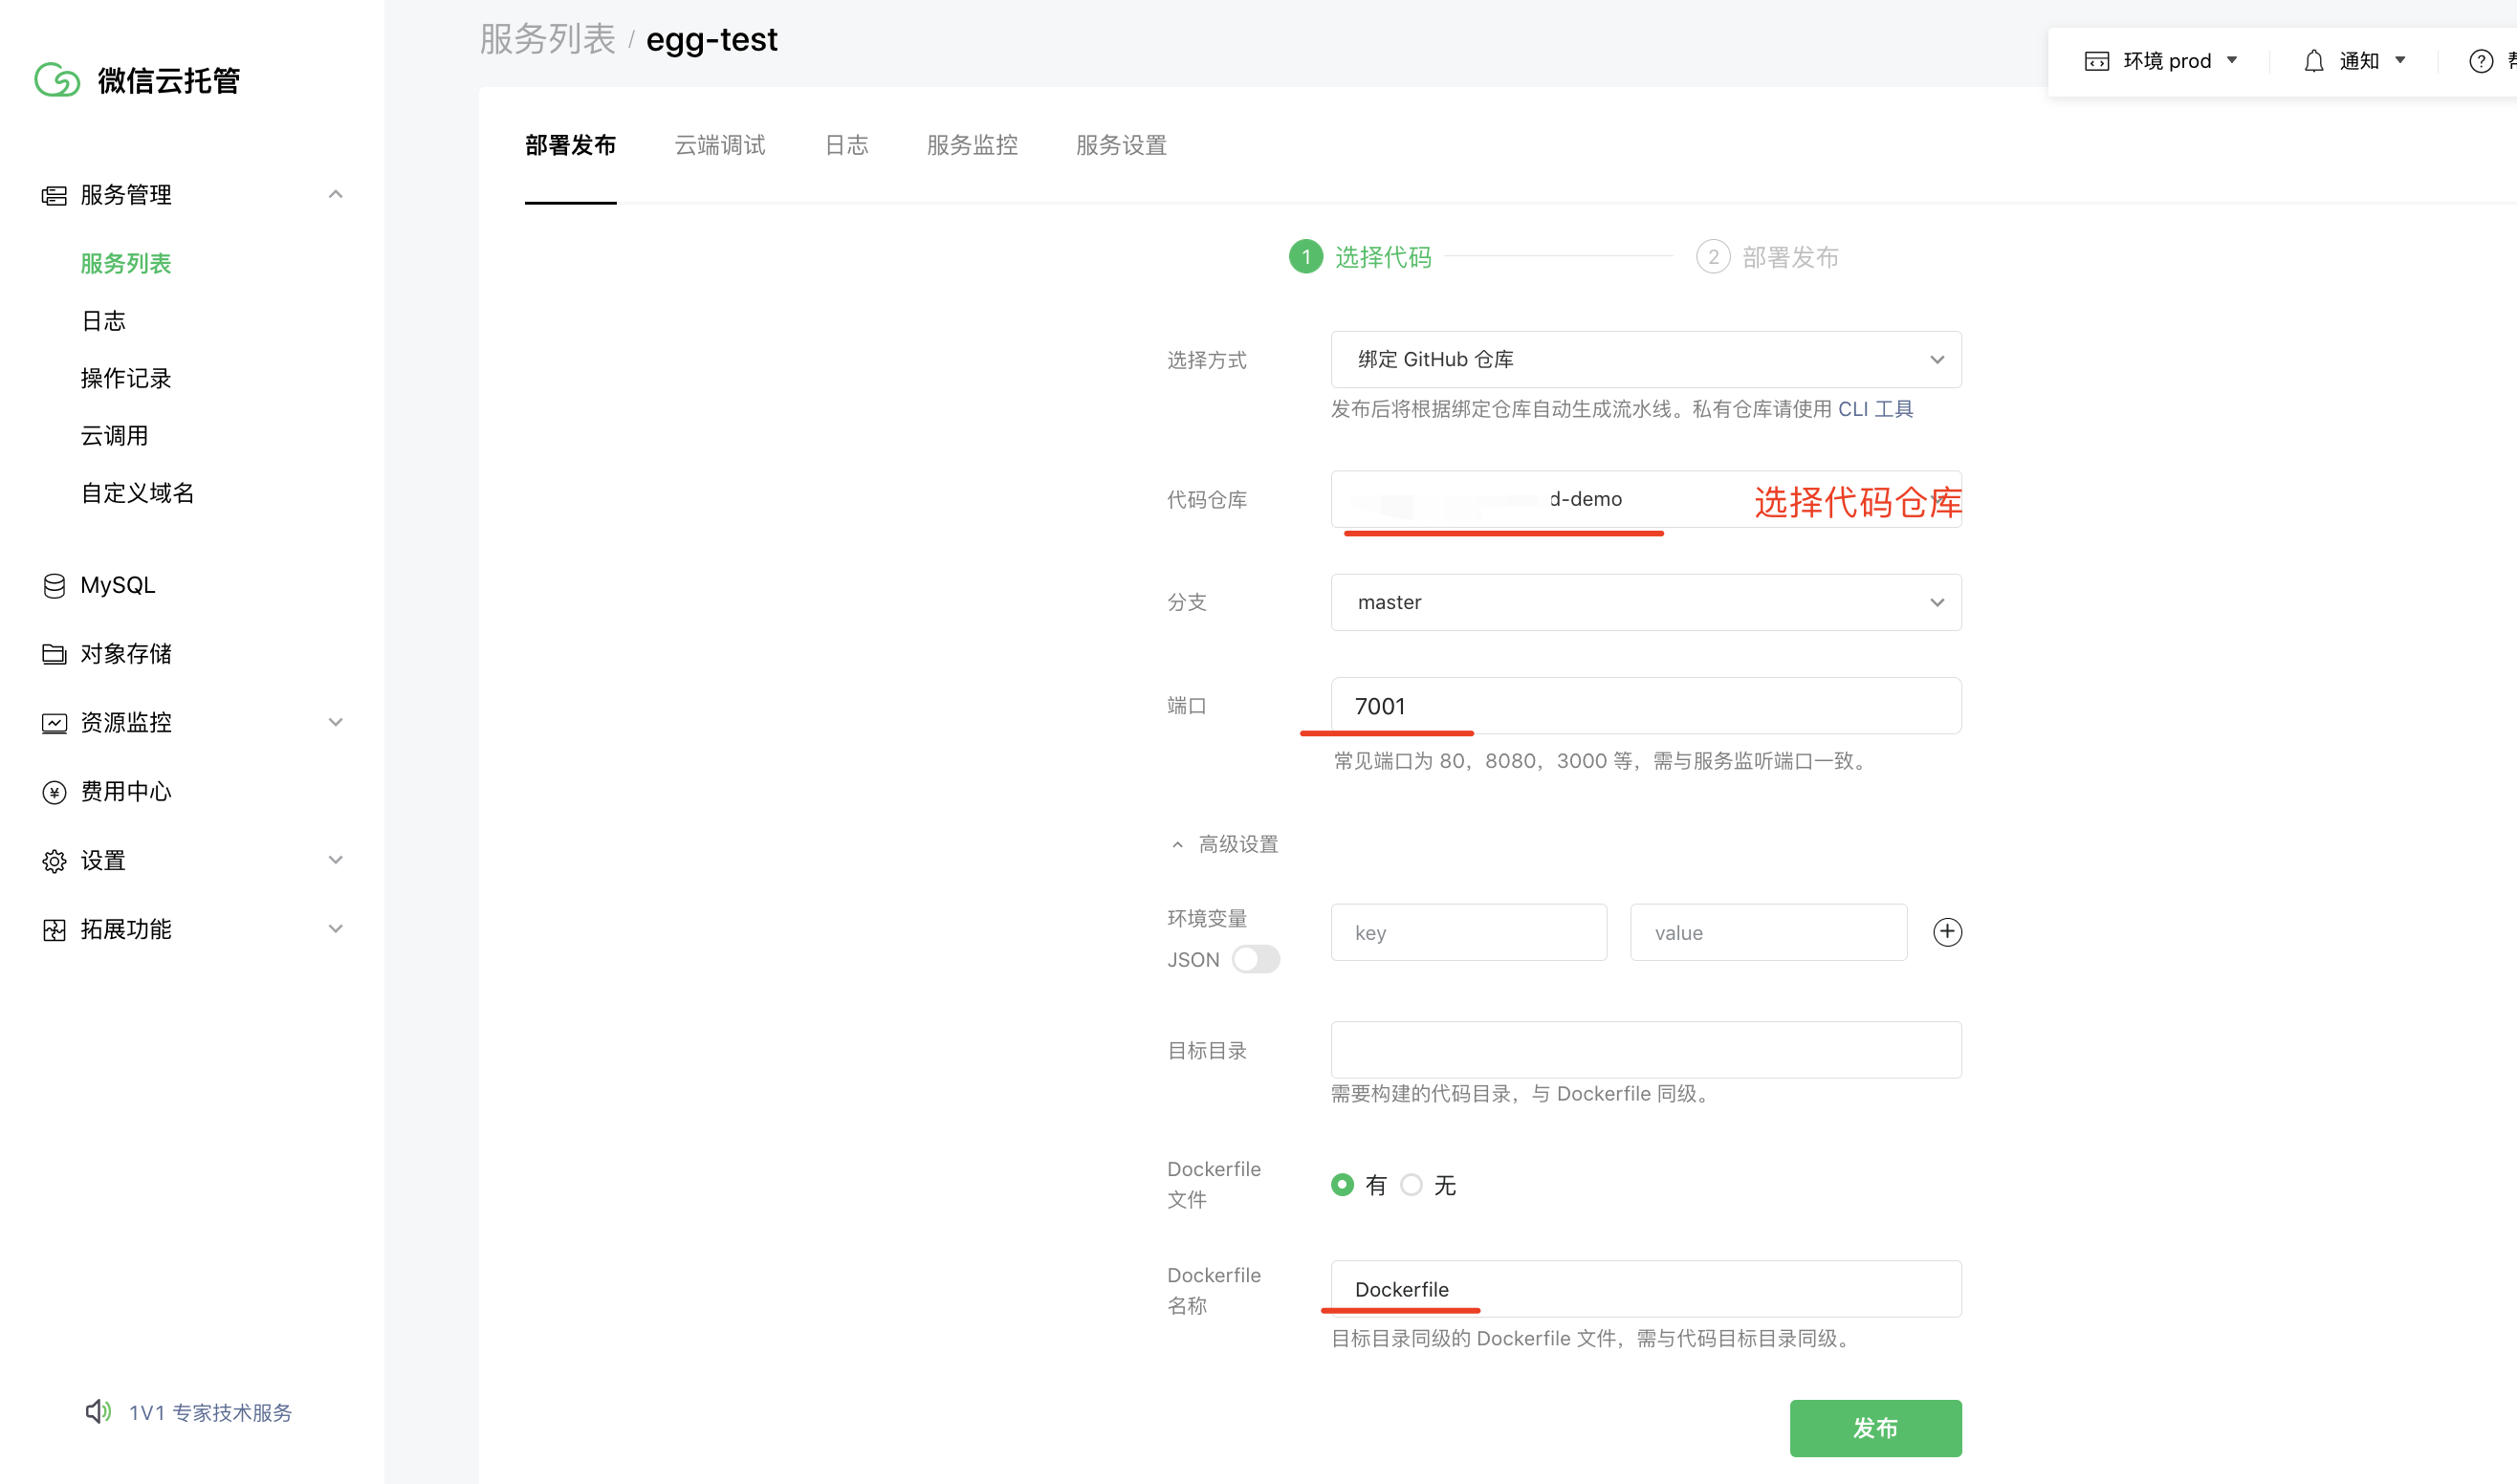
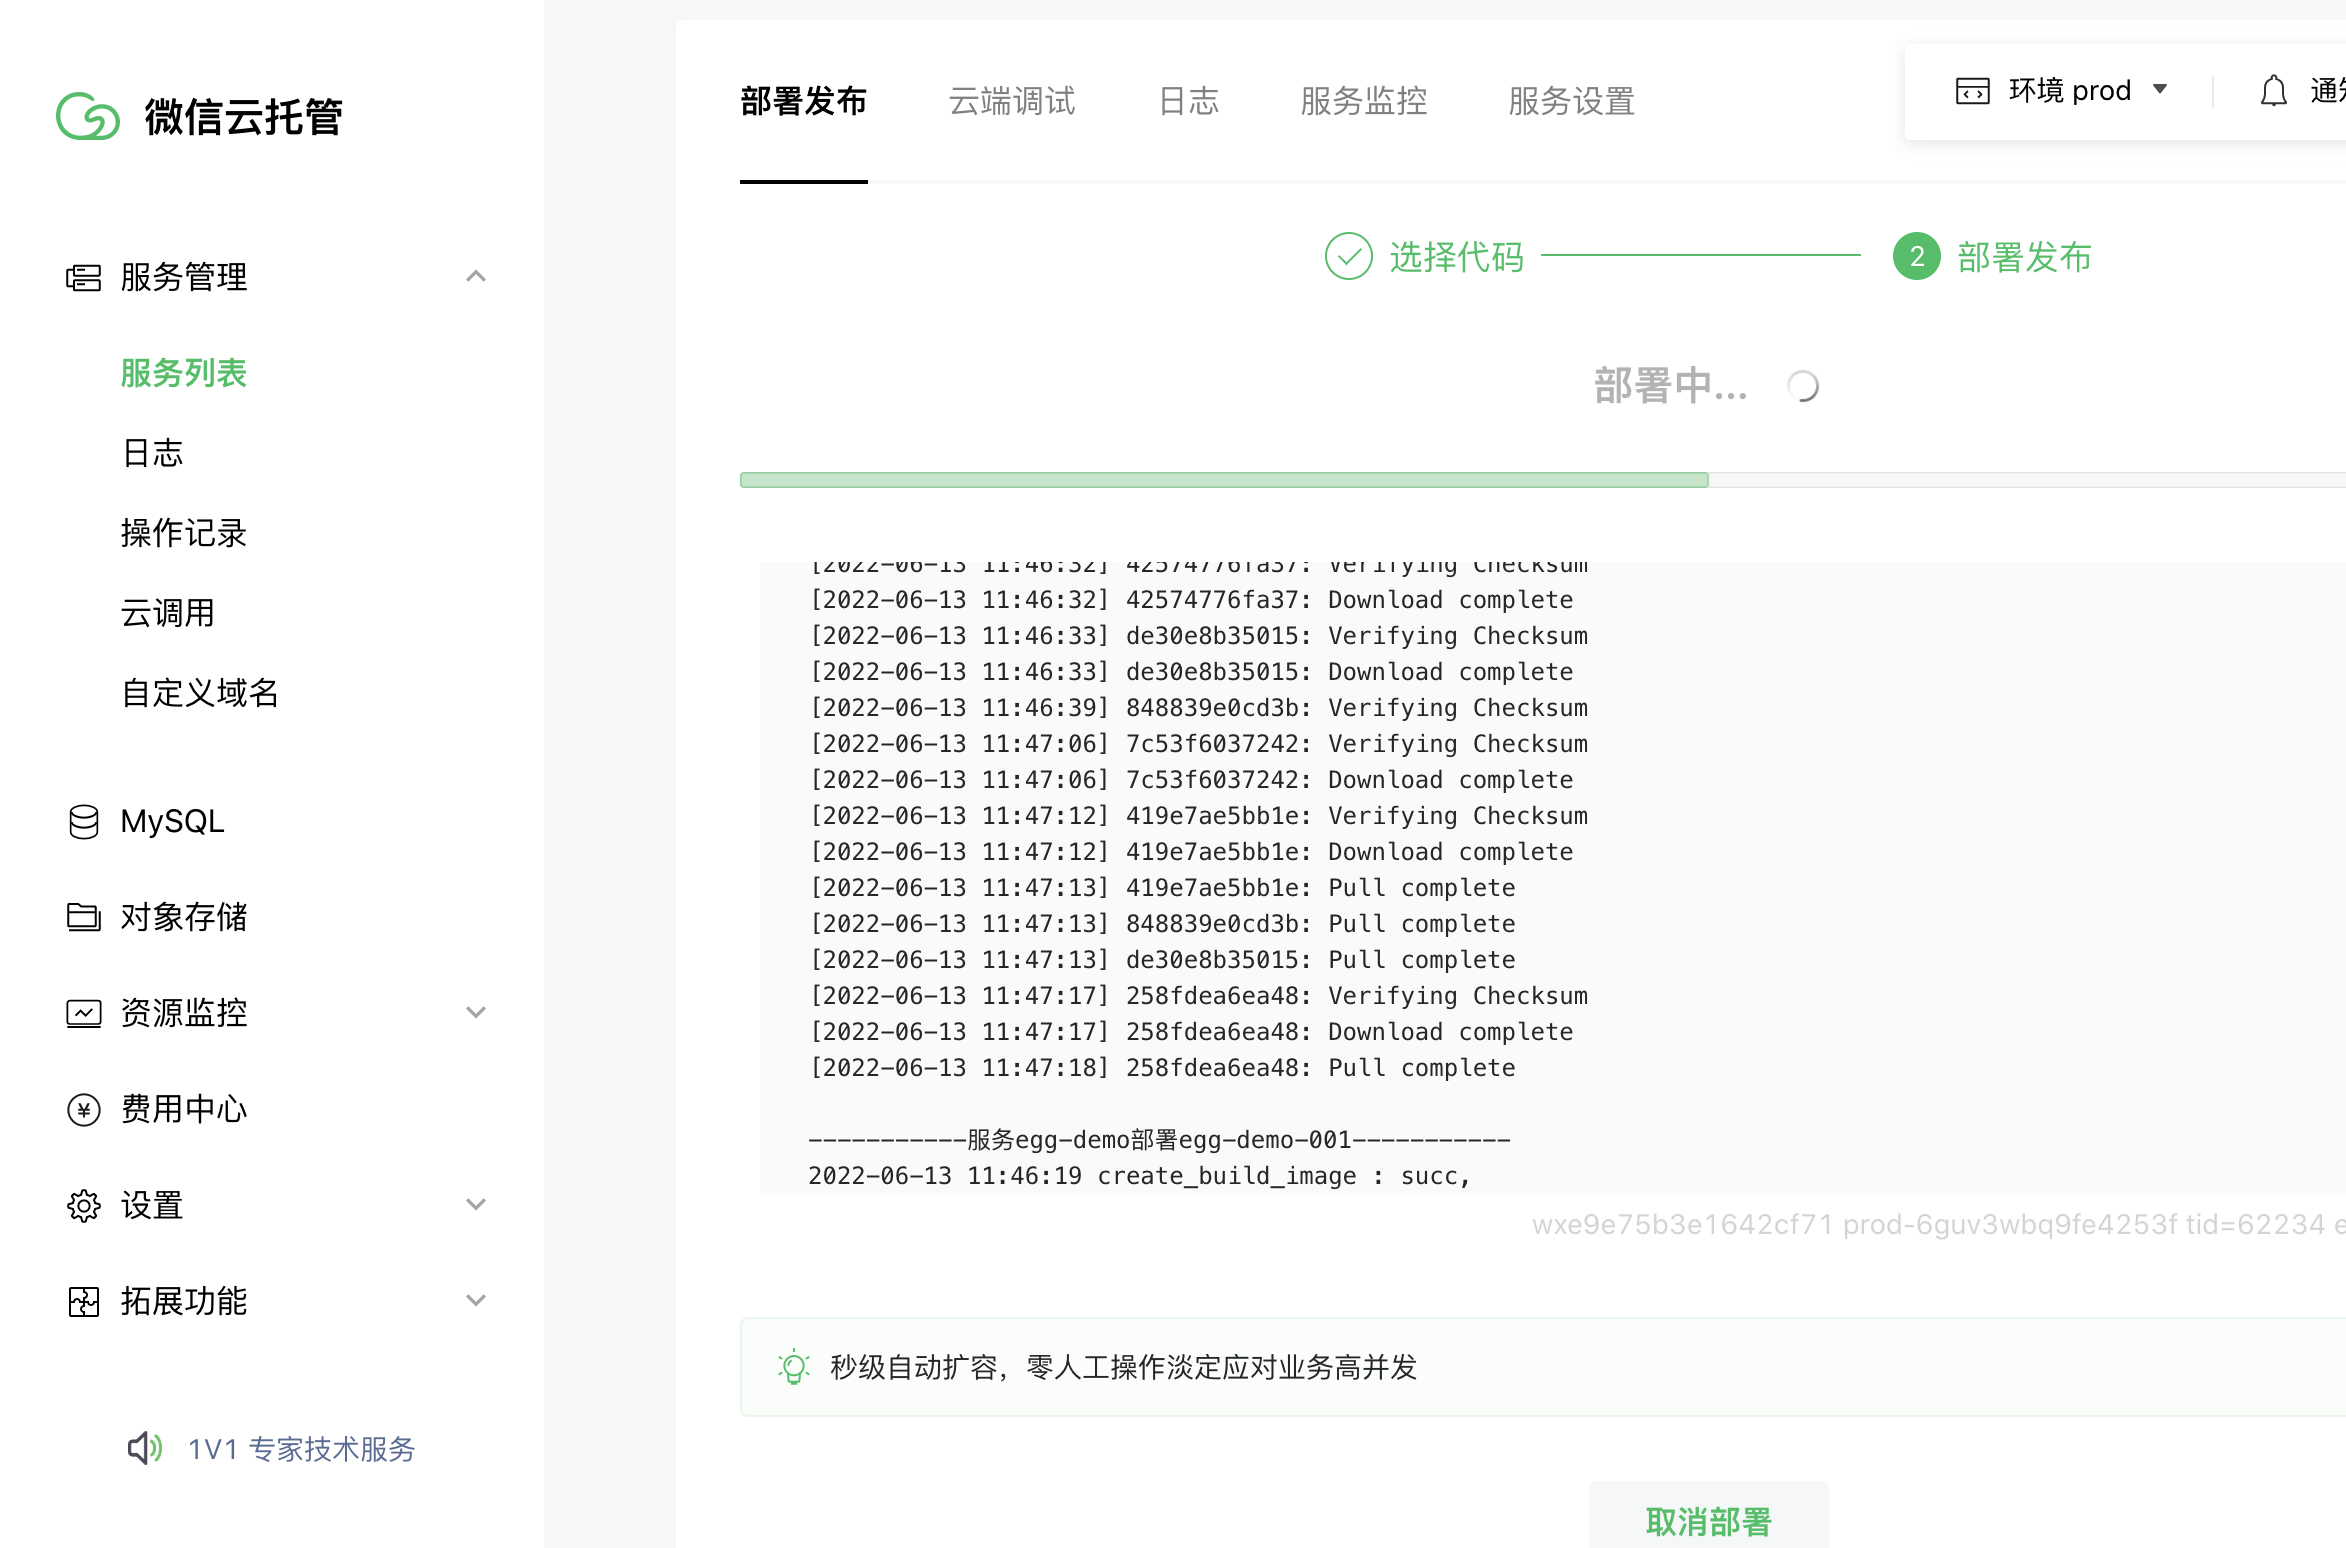
点击发布后,云托管会执行Dockerfile构建流水线,到日志可以查看构建进度

微信云托管部署成功后,可以在实例列表,点击进入容器看到代码,这里里面的内容不能修改,在容器启动后会覆盖


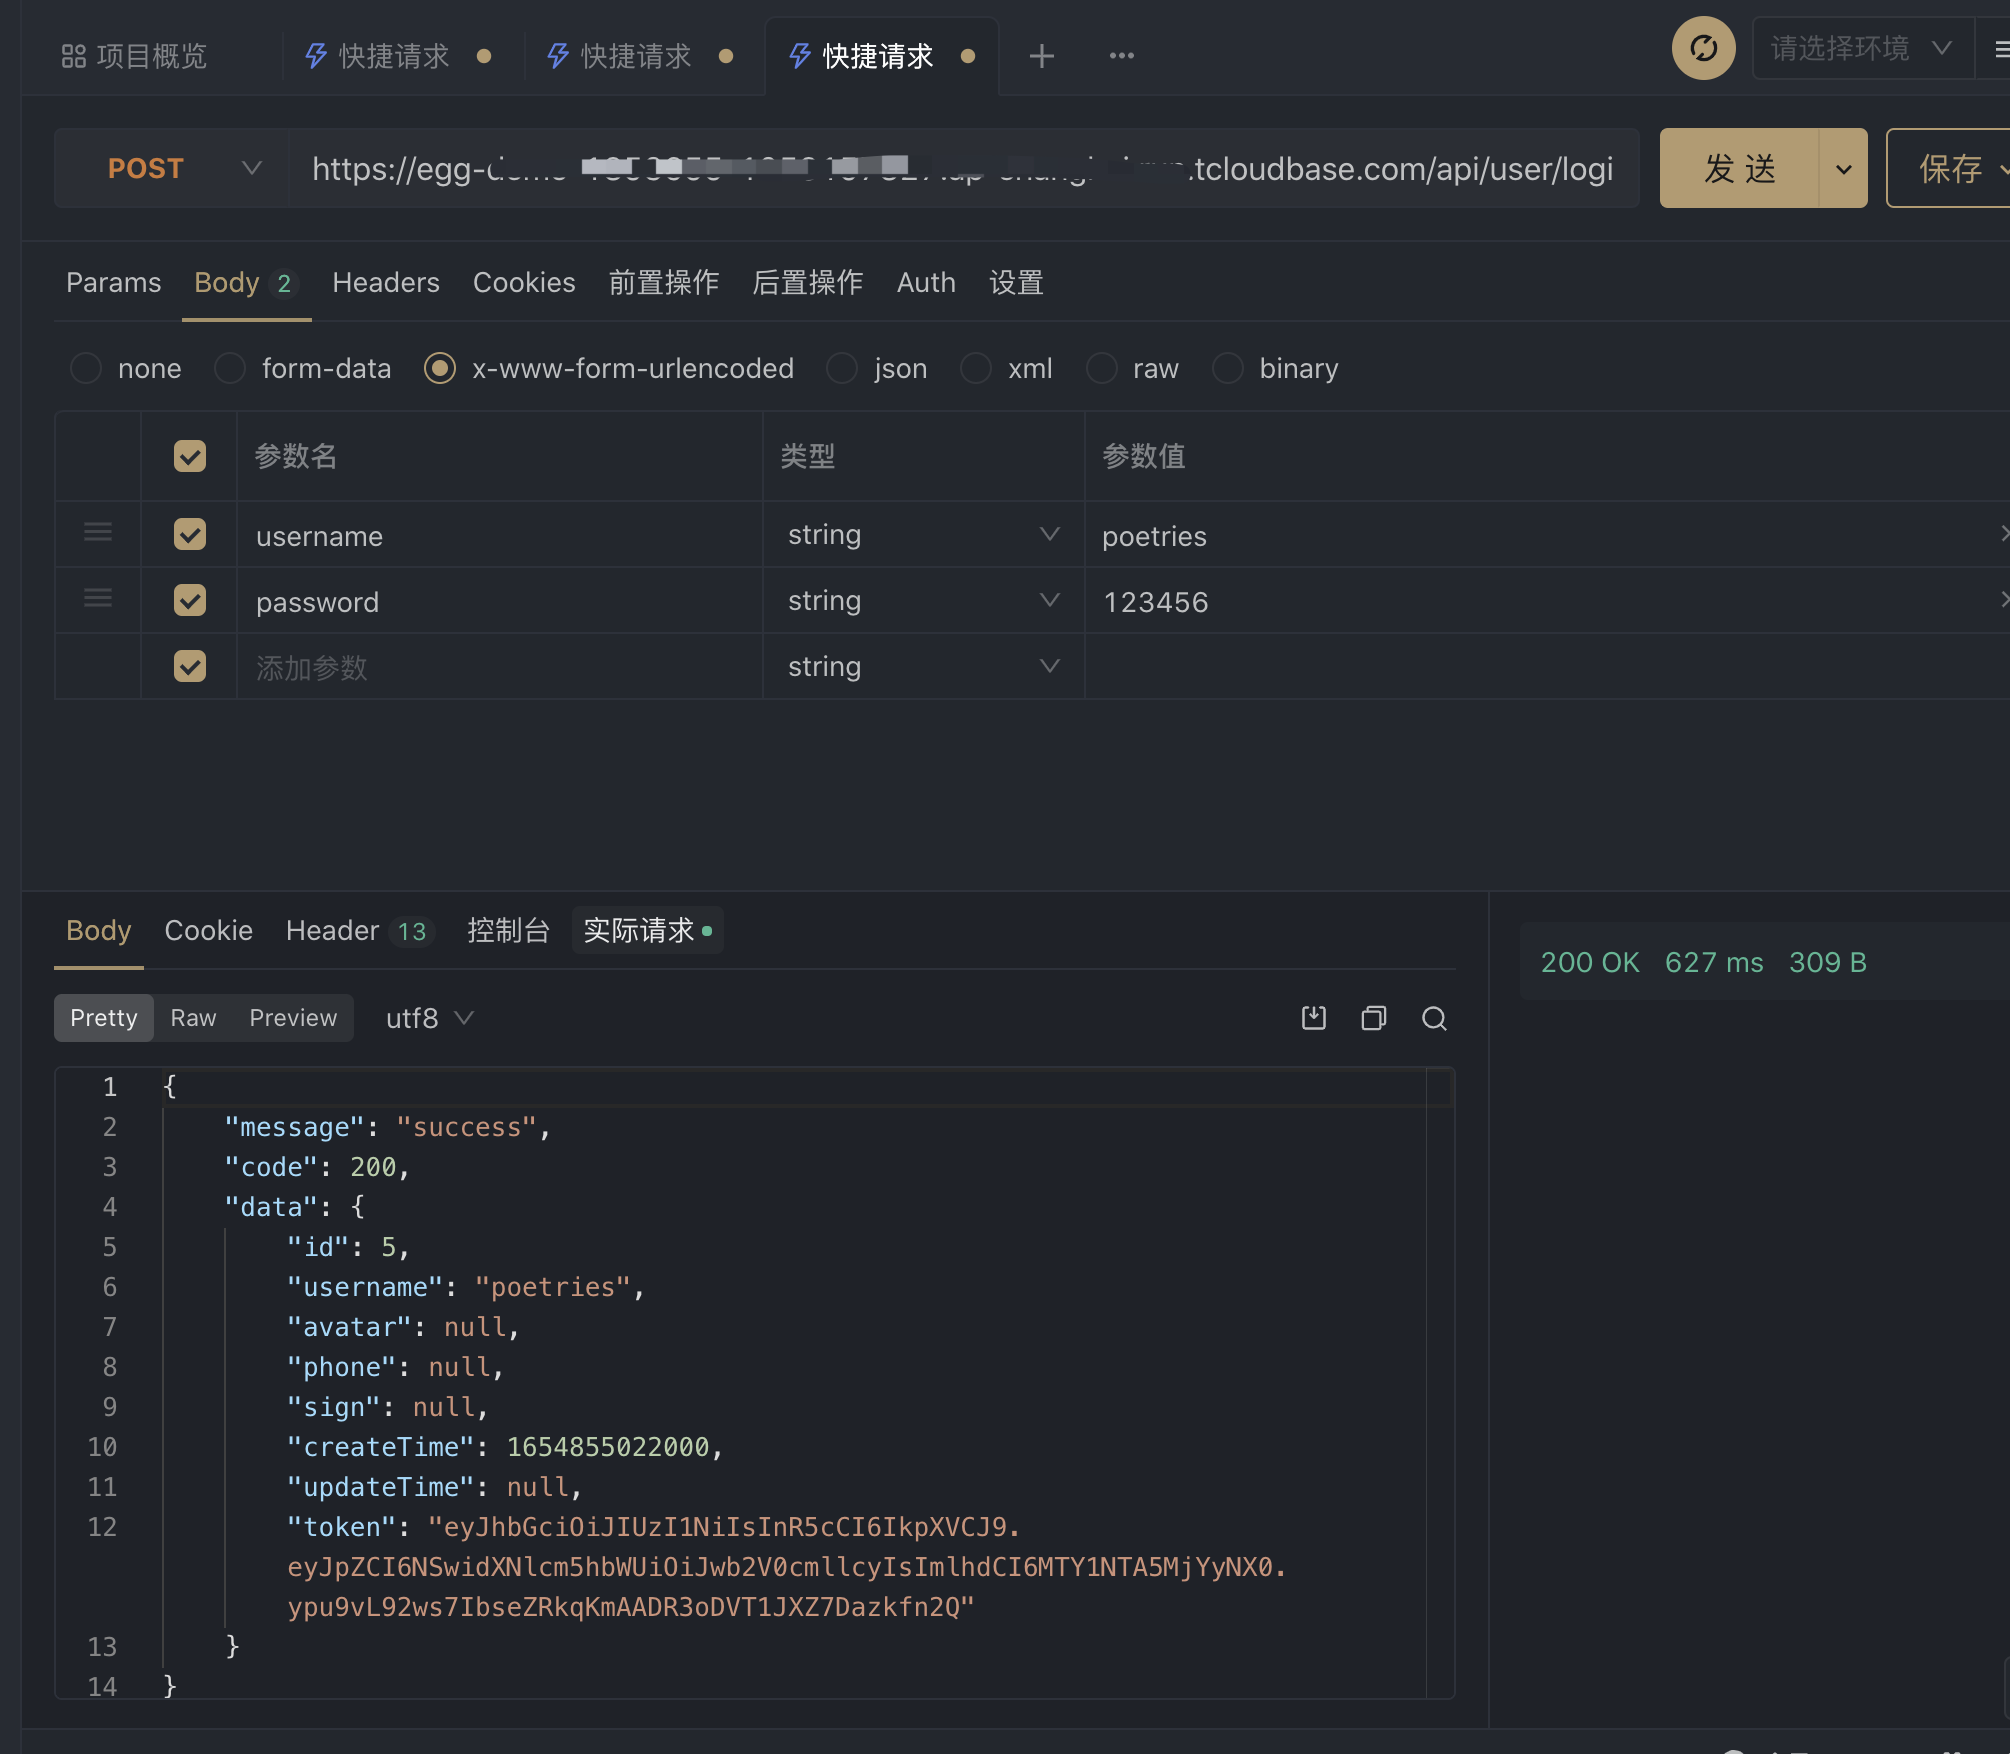
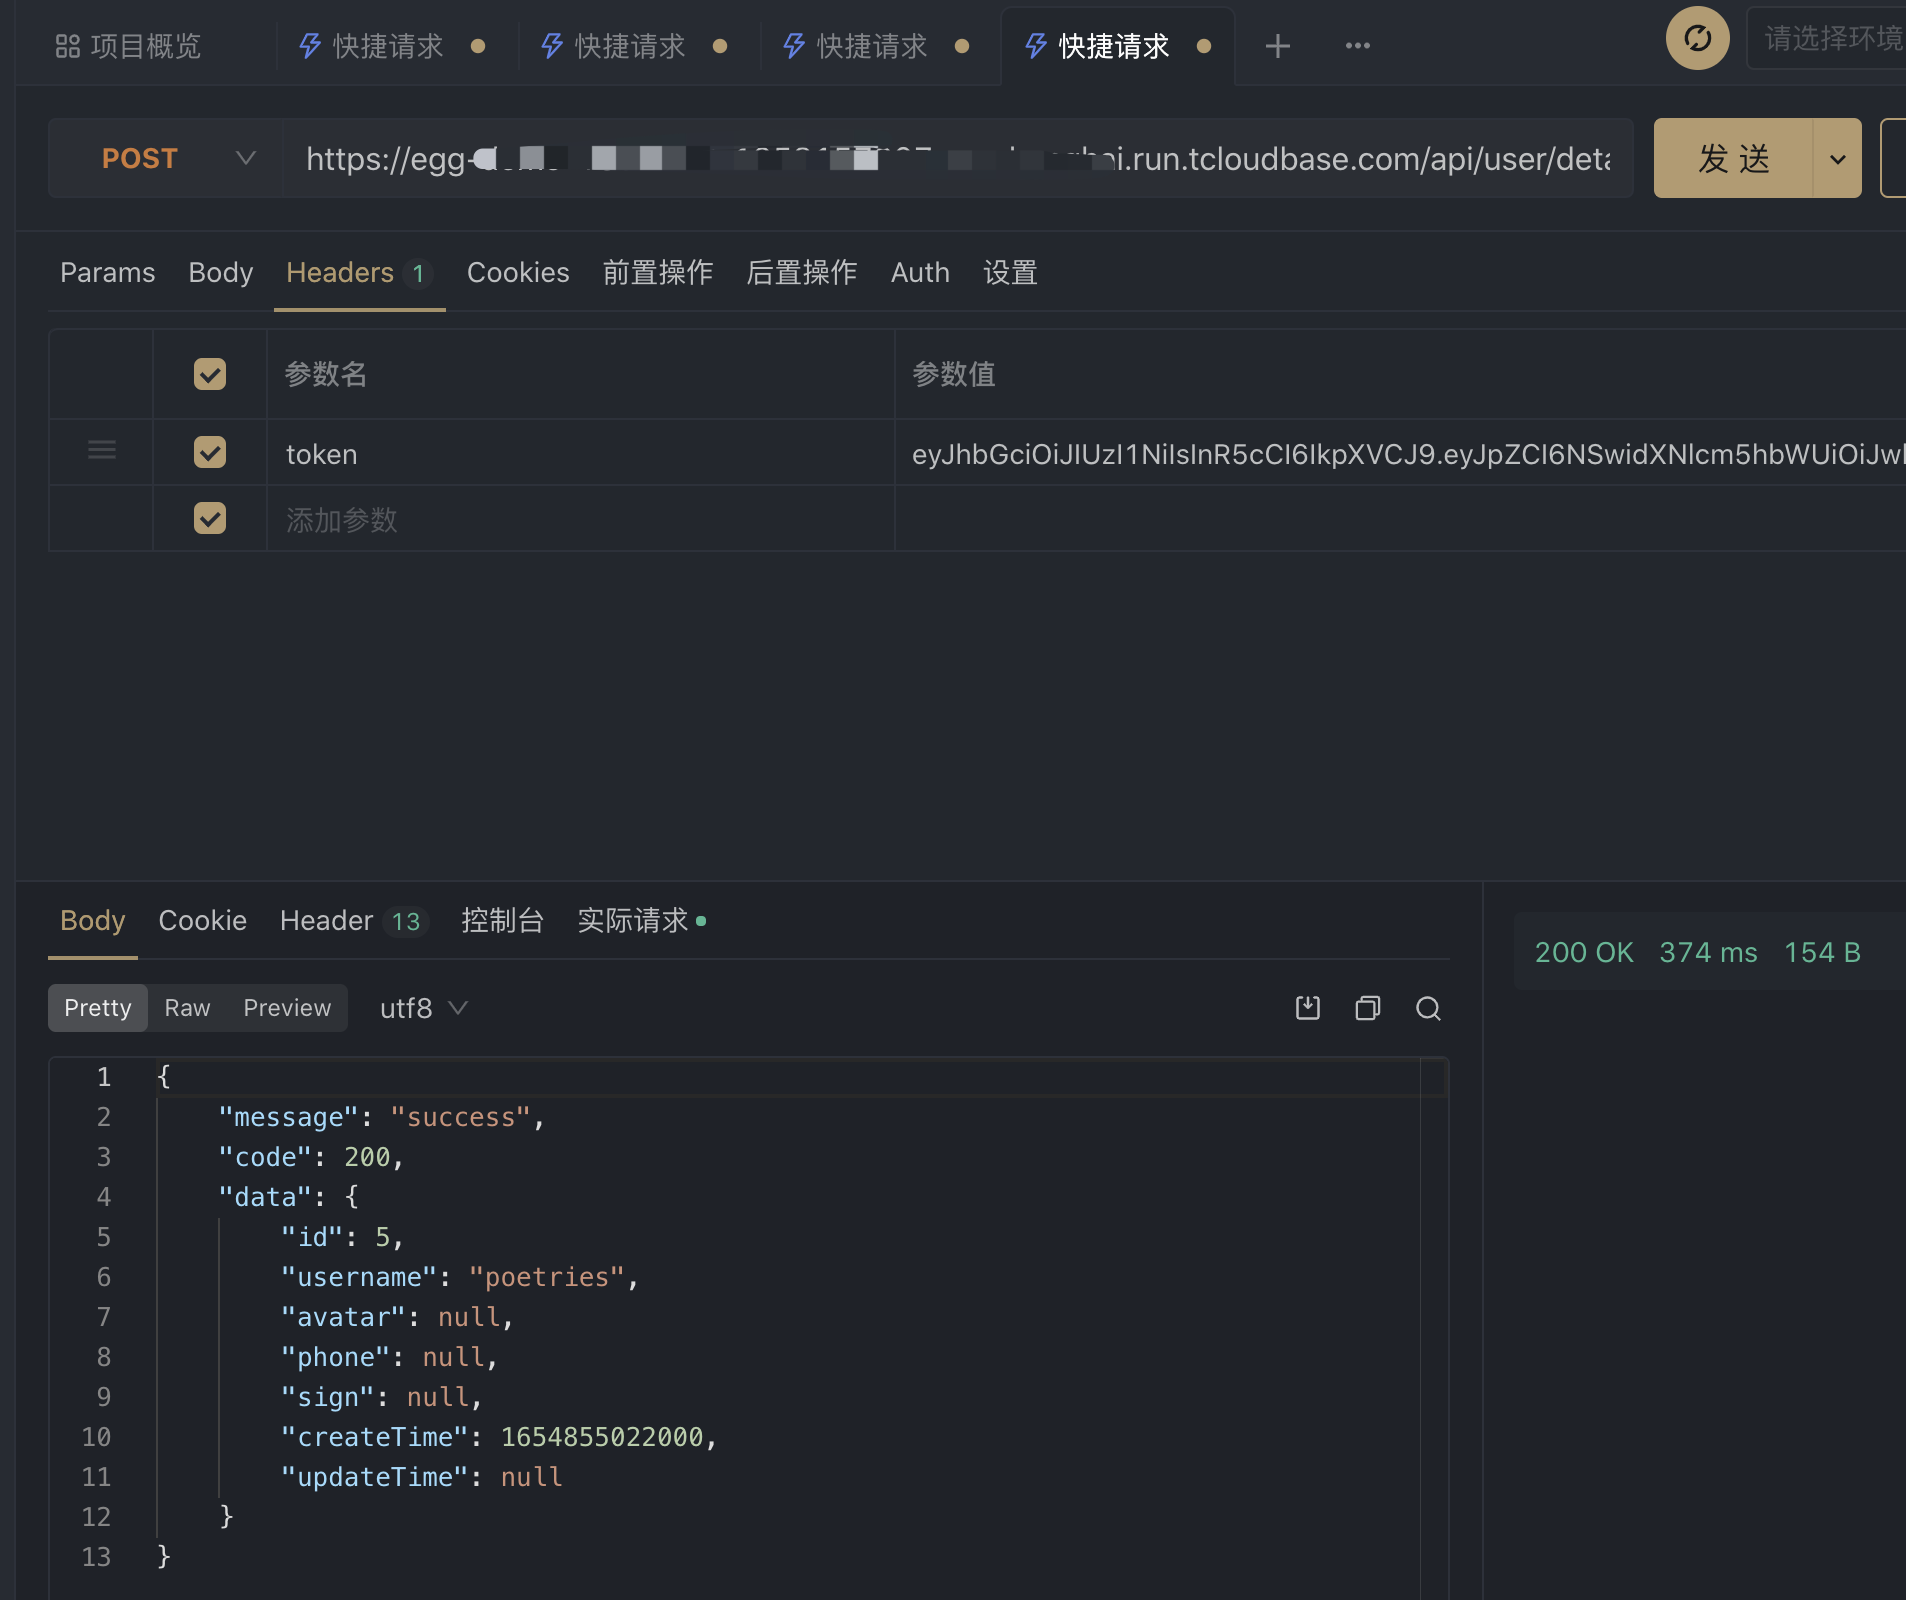
调试接口

postman测试
测试redis服务
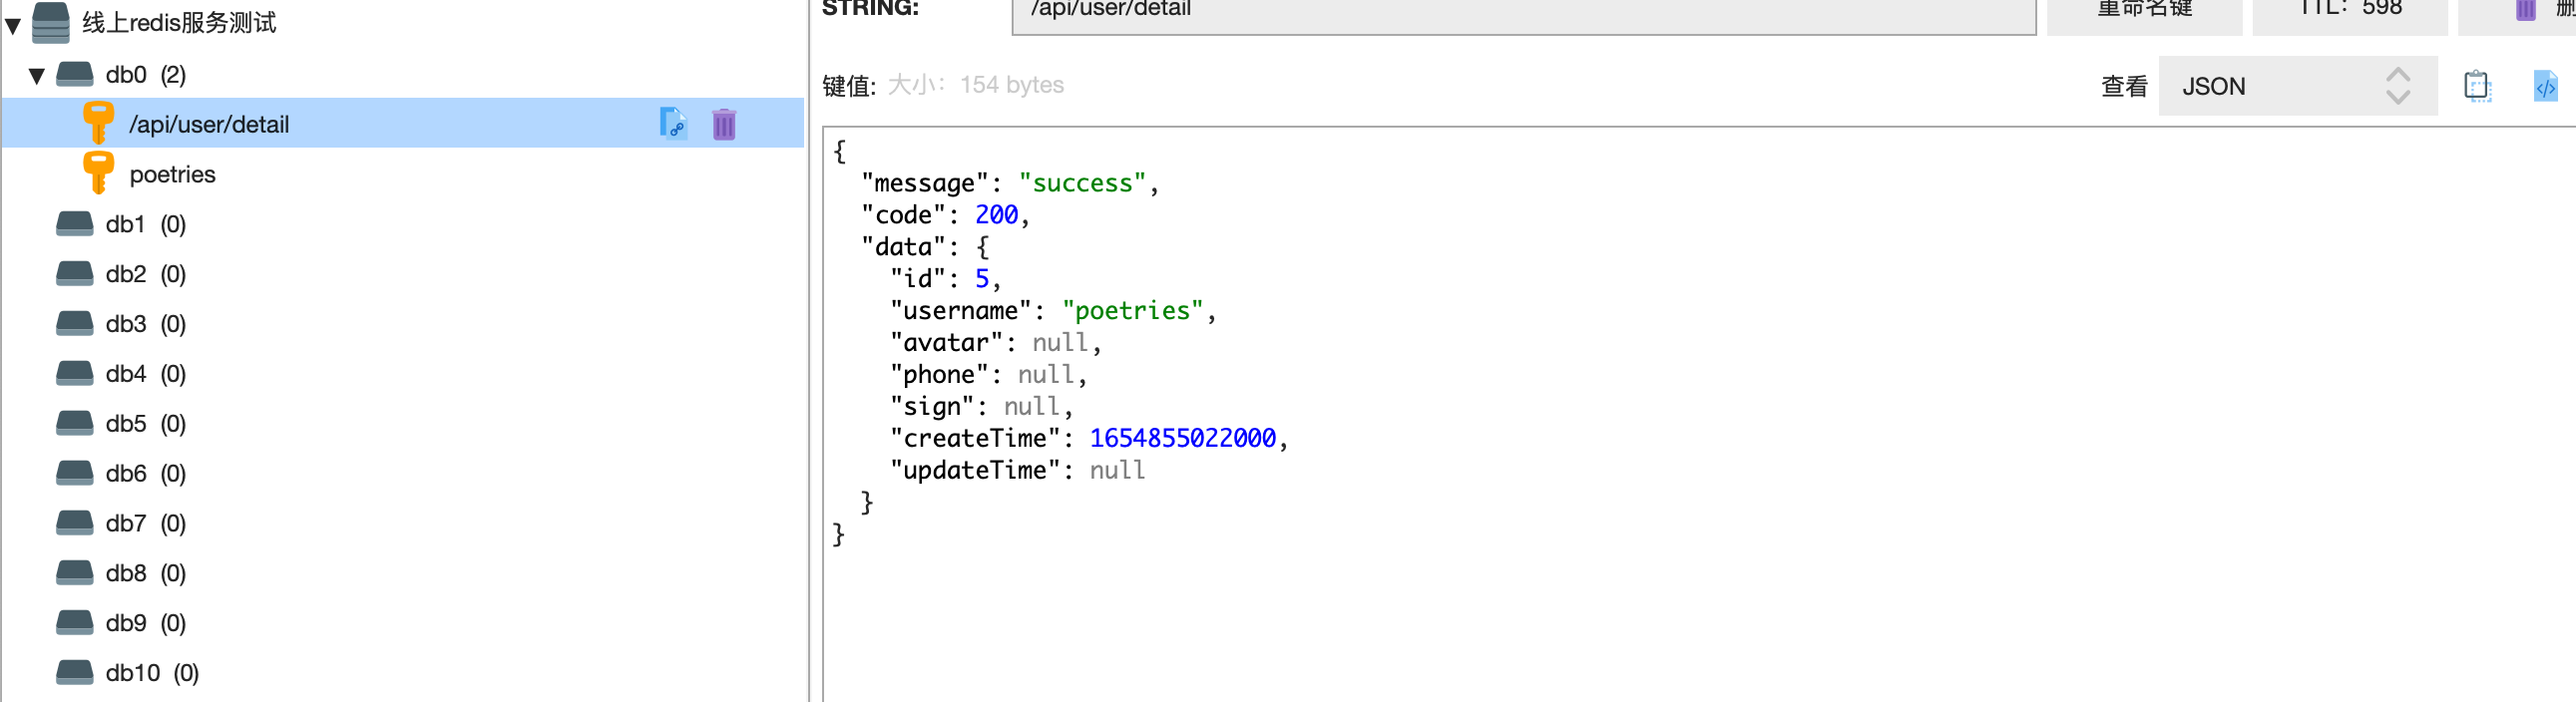
至此部署到微信云托管完成,后续修改代码提交到github会自动触发云托管部署
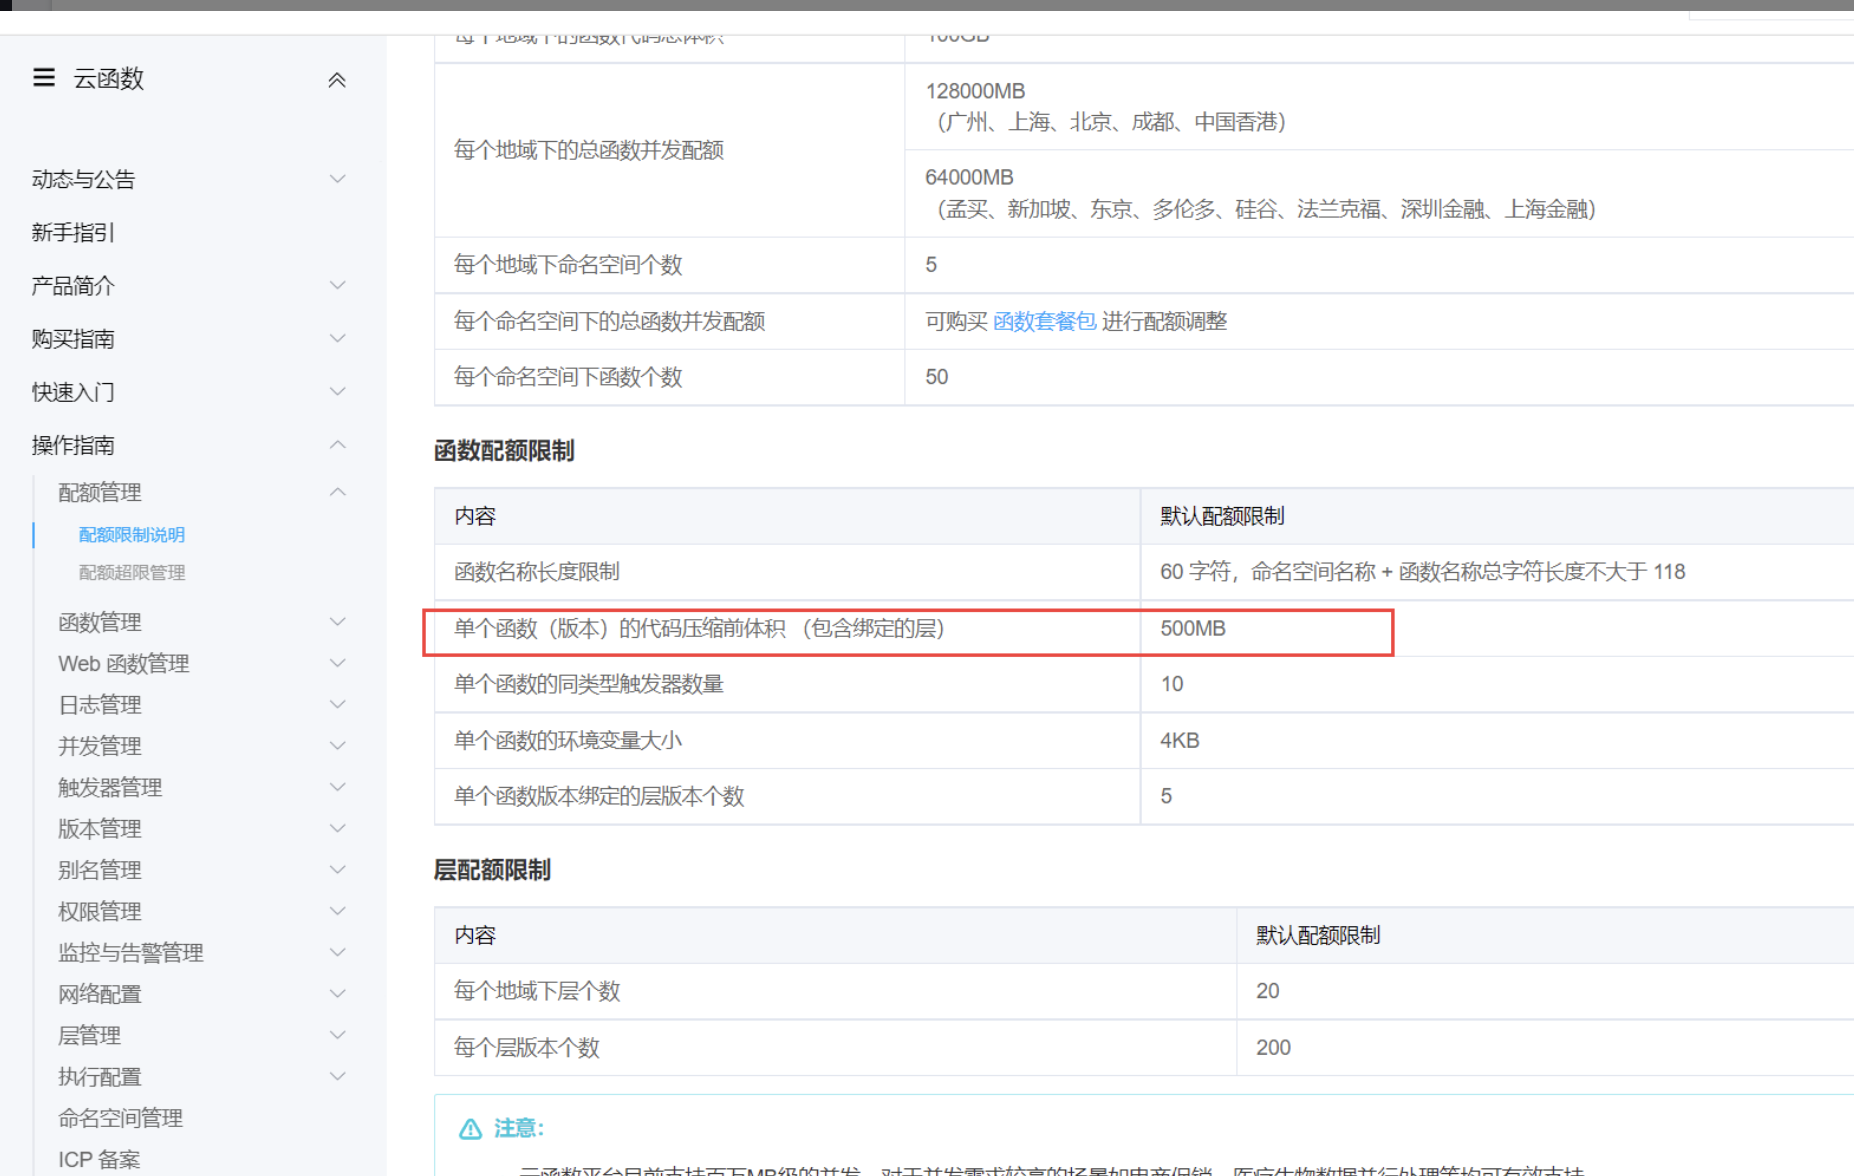
六、egg部署到腾讯serverless
需要注意,云函数的代码包不能超过500M
6.1 修改egg配置
由于云函数在执行时,只有
/tmp可读写的,所以我们需要将 egg.js 框架运行尝试的日志写到该目录下,为此需要修改config/config.default.js中的配置如下:
const config = (exports = { |
6.2 命令行部署
// 安装Serverless 框架 |
配置 YAML
在 egg 项目根目录,新建 Serverless 配置文件 serverless.yml
app: appDemo |
部署到腾讯云
- 部署命令:
sls deploy(意:sls是serverless命令的简写。) - 更多配置参考 https://github.com/serverless-components/tencent-egg/tree/v2

移除
通过以下命令移除部署的 Egg 服务资源,包括云函数和 API 网关。
$ sls remove |
账号配置(可选)
当前默认支持 CLI 扫描二维码登录,如您希望配置持久的环境变量/秘钥信息,也可以在项目根目录
serverless-egg中创建.env文件:
# .env |
如果已有腾讯云账号,可以在 API 密钥管理 中获取 SecretId 和SecretKey.
注意!!!
通常初始化的 egg 项目,会自动创建
app/public目录。但是在打包压缩时,如果该目录为空,则部署后,该目录不会存在。所以 egg 项目启动时会自动创建,但是云函数是没有操作权限的,建议可以在app/public目录下创建一个空文件.gitkeep,来解决此问题。
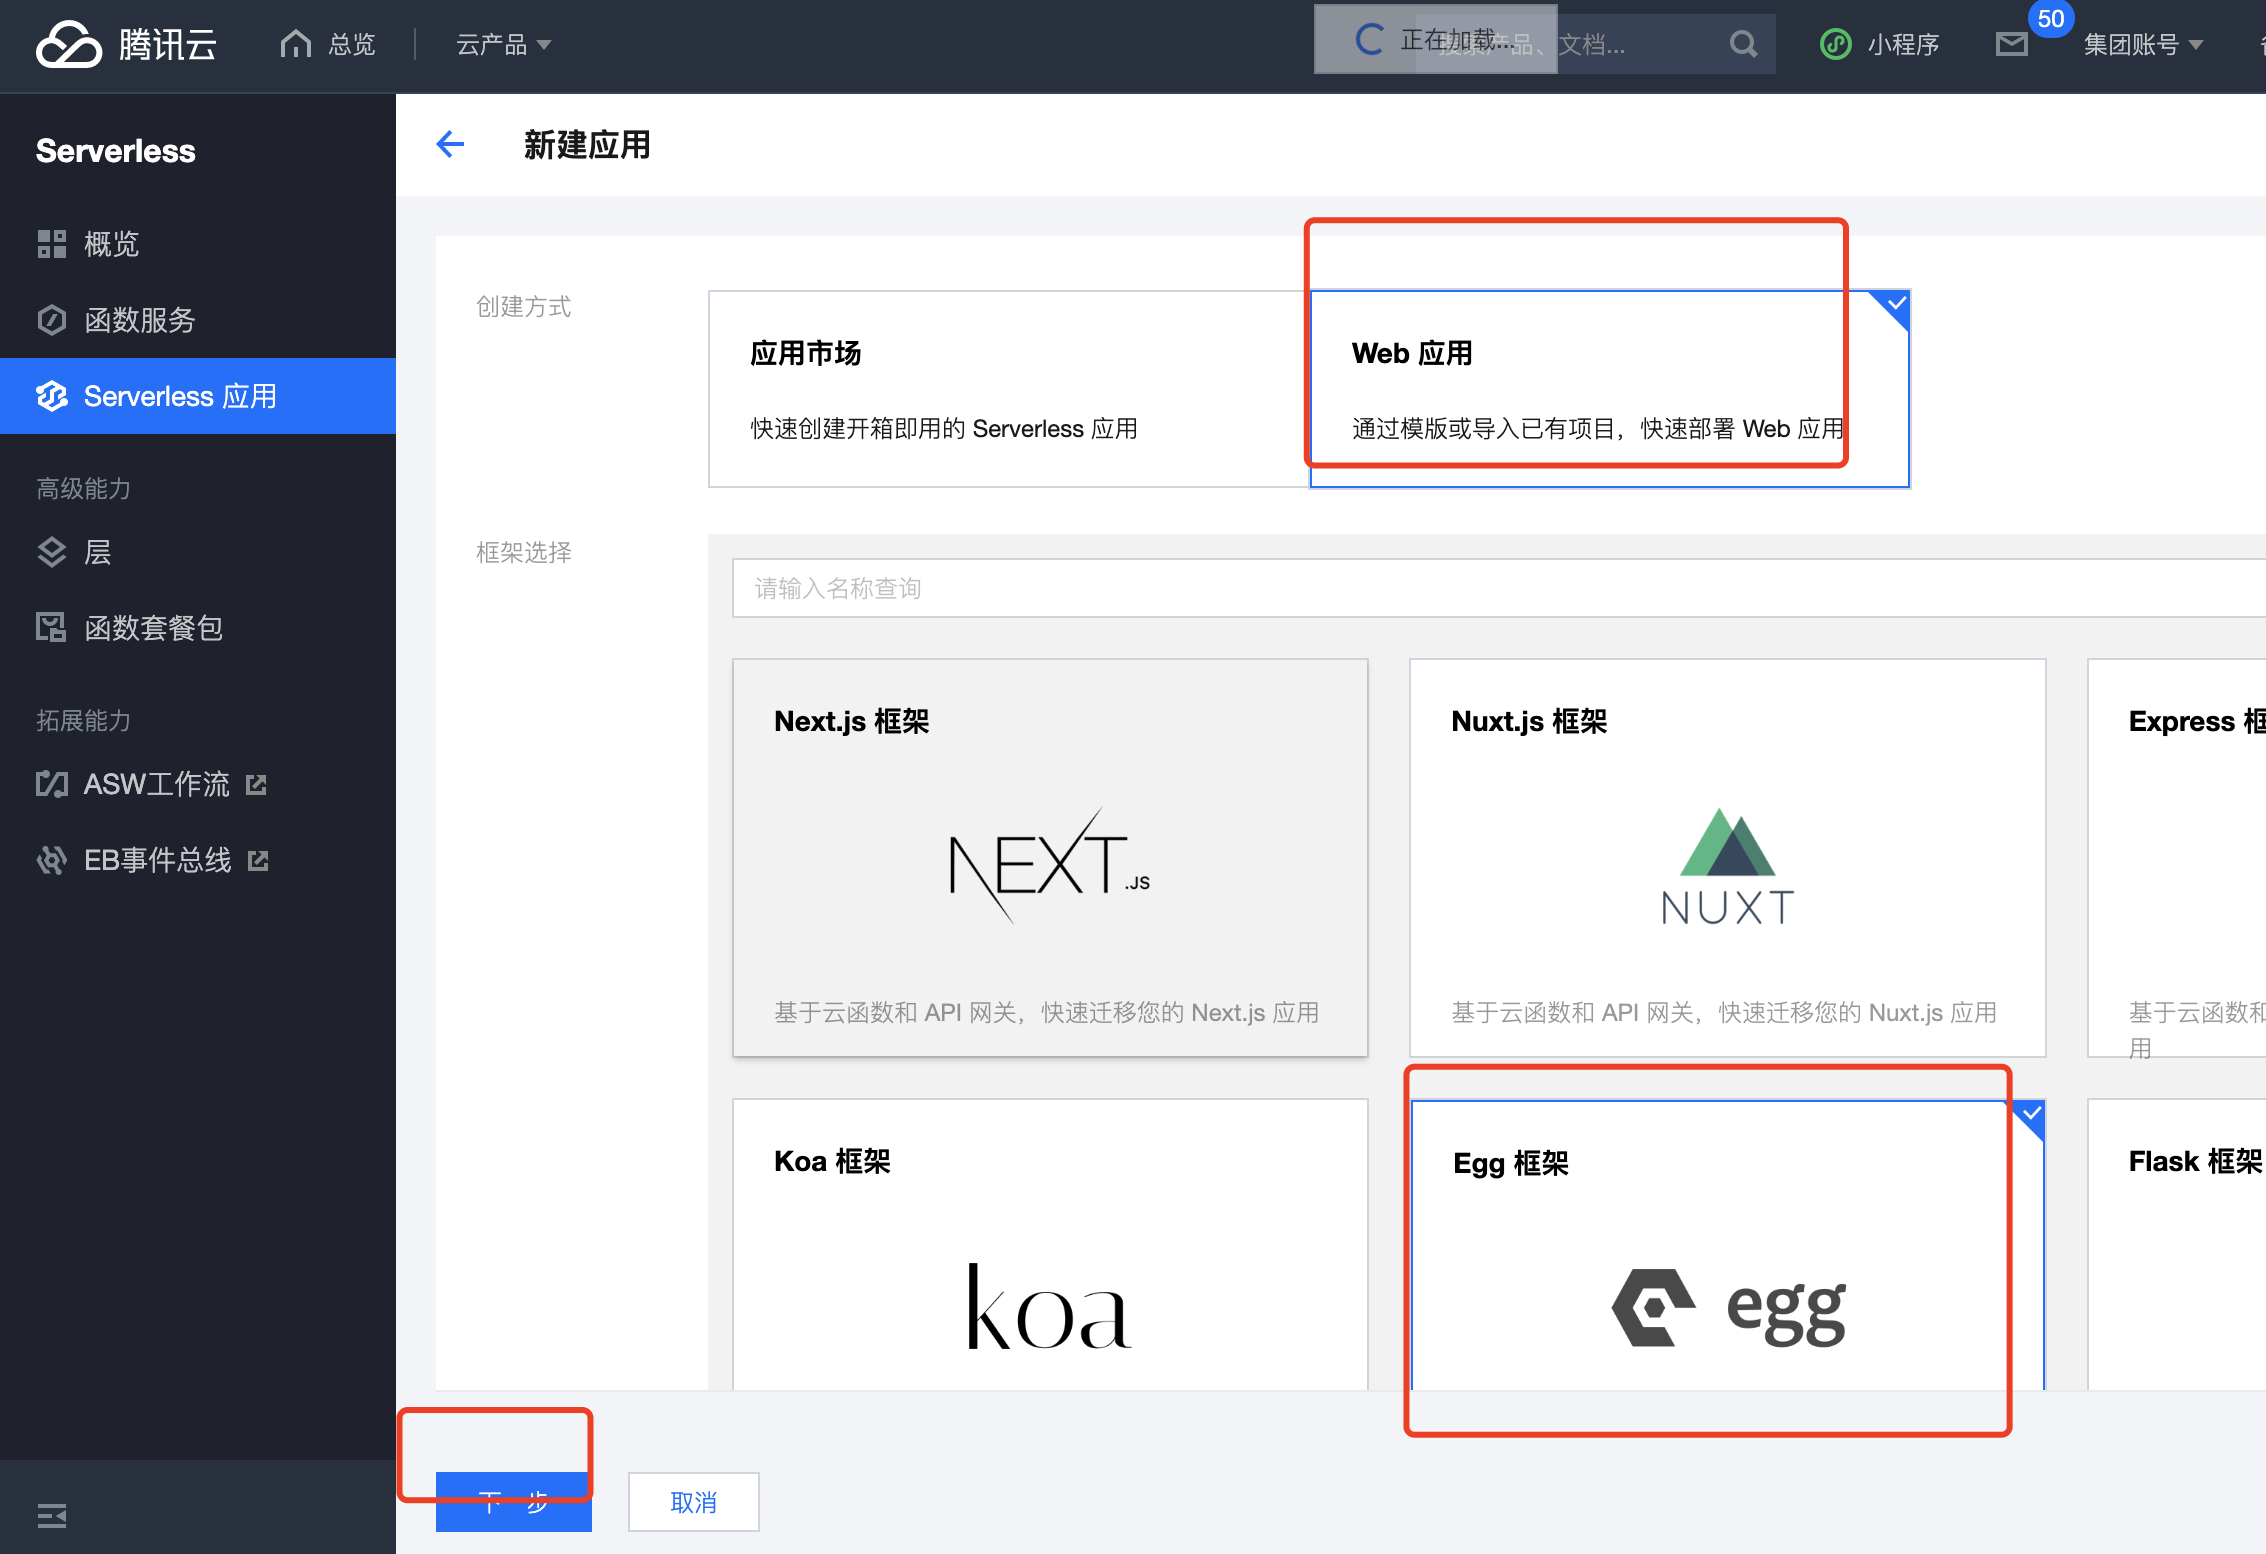
6.3 控制台创建部署-模板部署
- 登录控制台 https://console.cloud.tencent.com/sls
- 单击新建应用,选择Web 应用>Egg 框架,如下图所示:

- 单击“下一步”,完成基础配置选择。
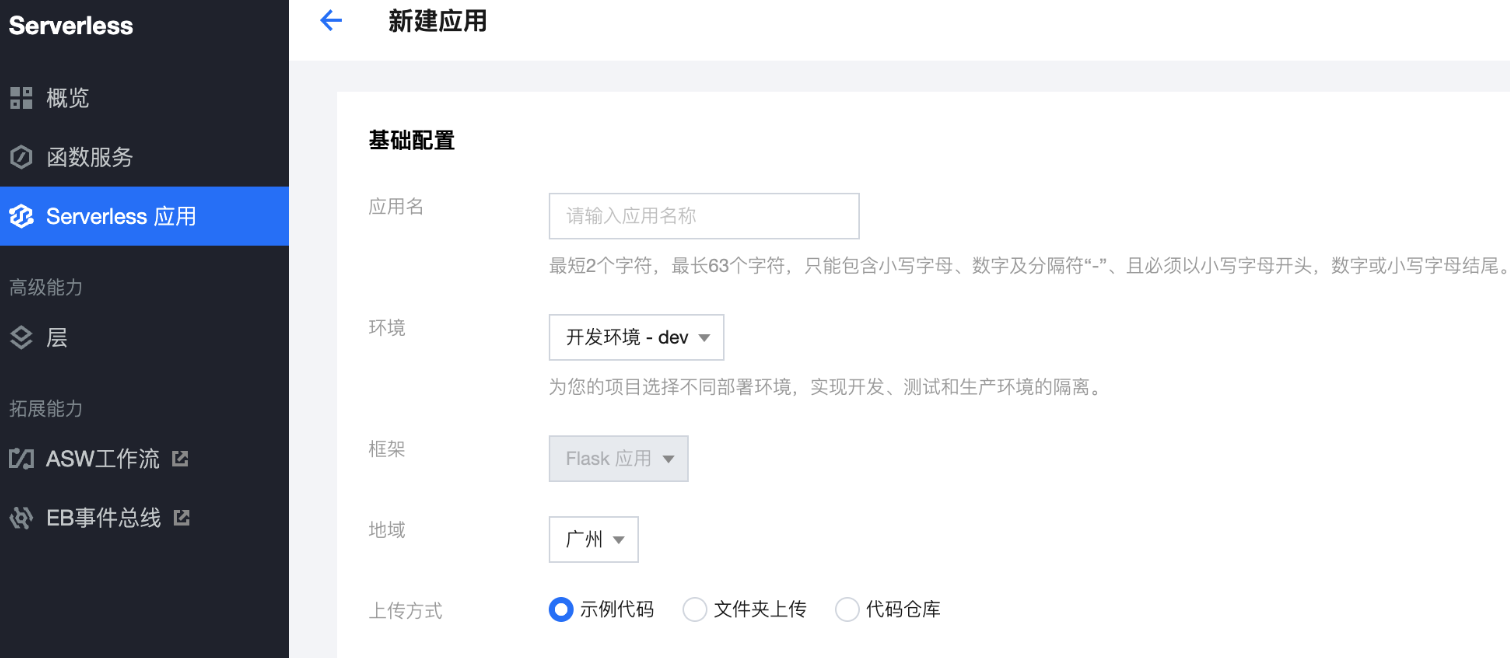
- 上传方式,选择示例代码直接部署,单击完成,即可开始应用的部署。
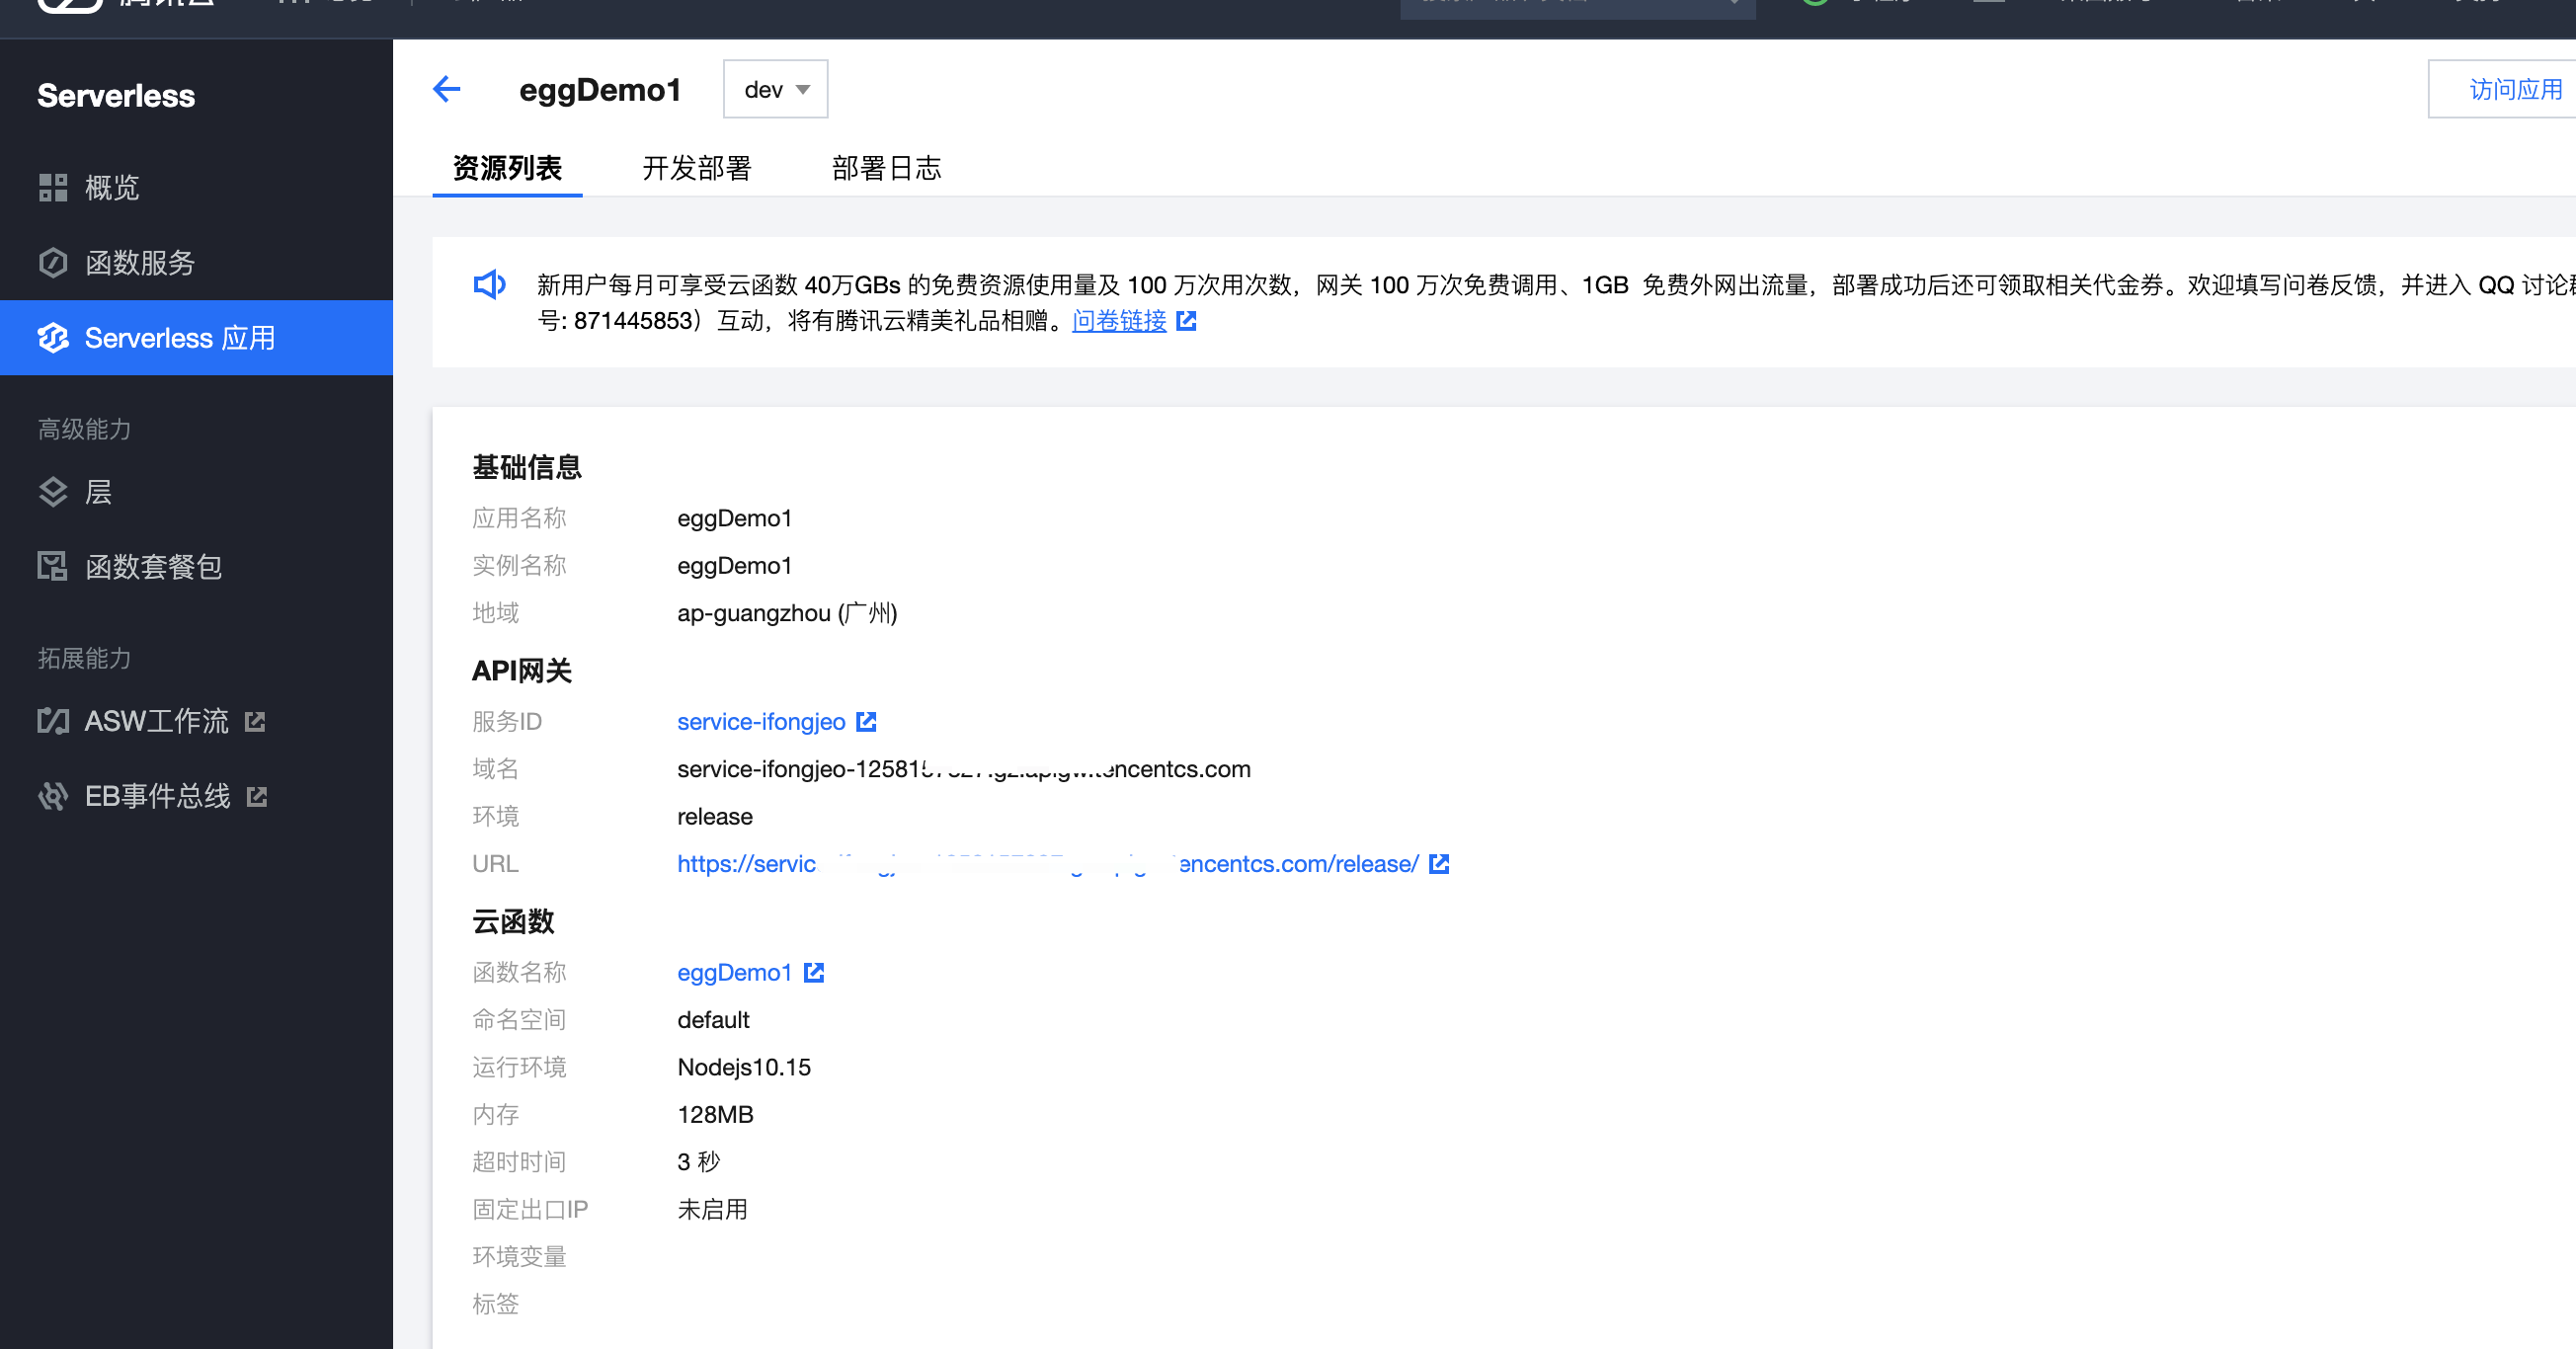
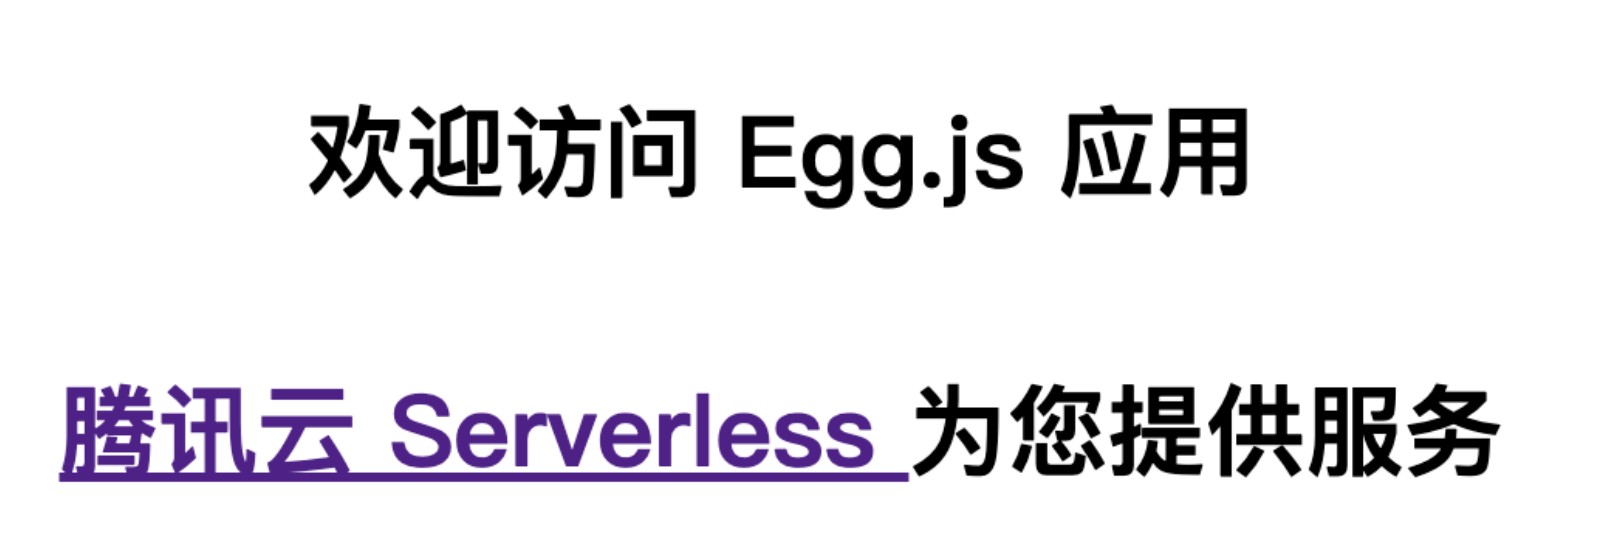
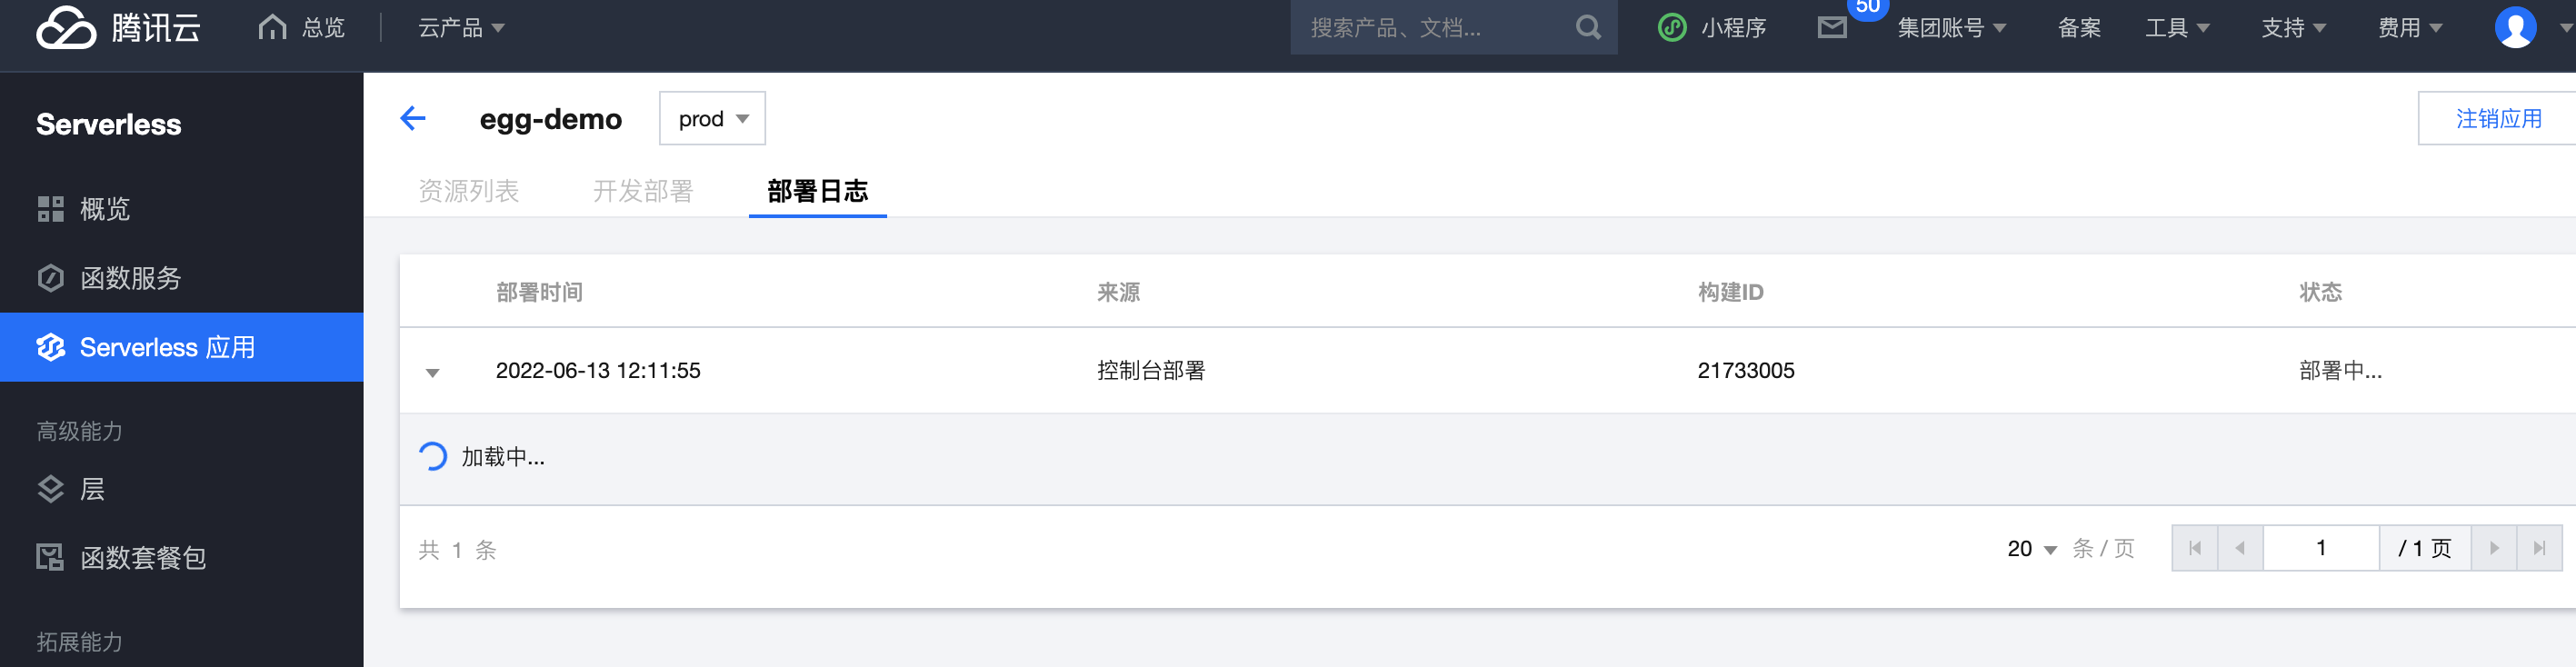
- 部署完成后,您可在应用详情页面,查看示例应用的基本信息,并通过 API 网关生成的访问路径 URL 进行访问,查看您部署的 Egg 项目。
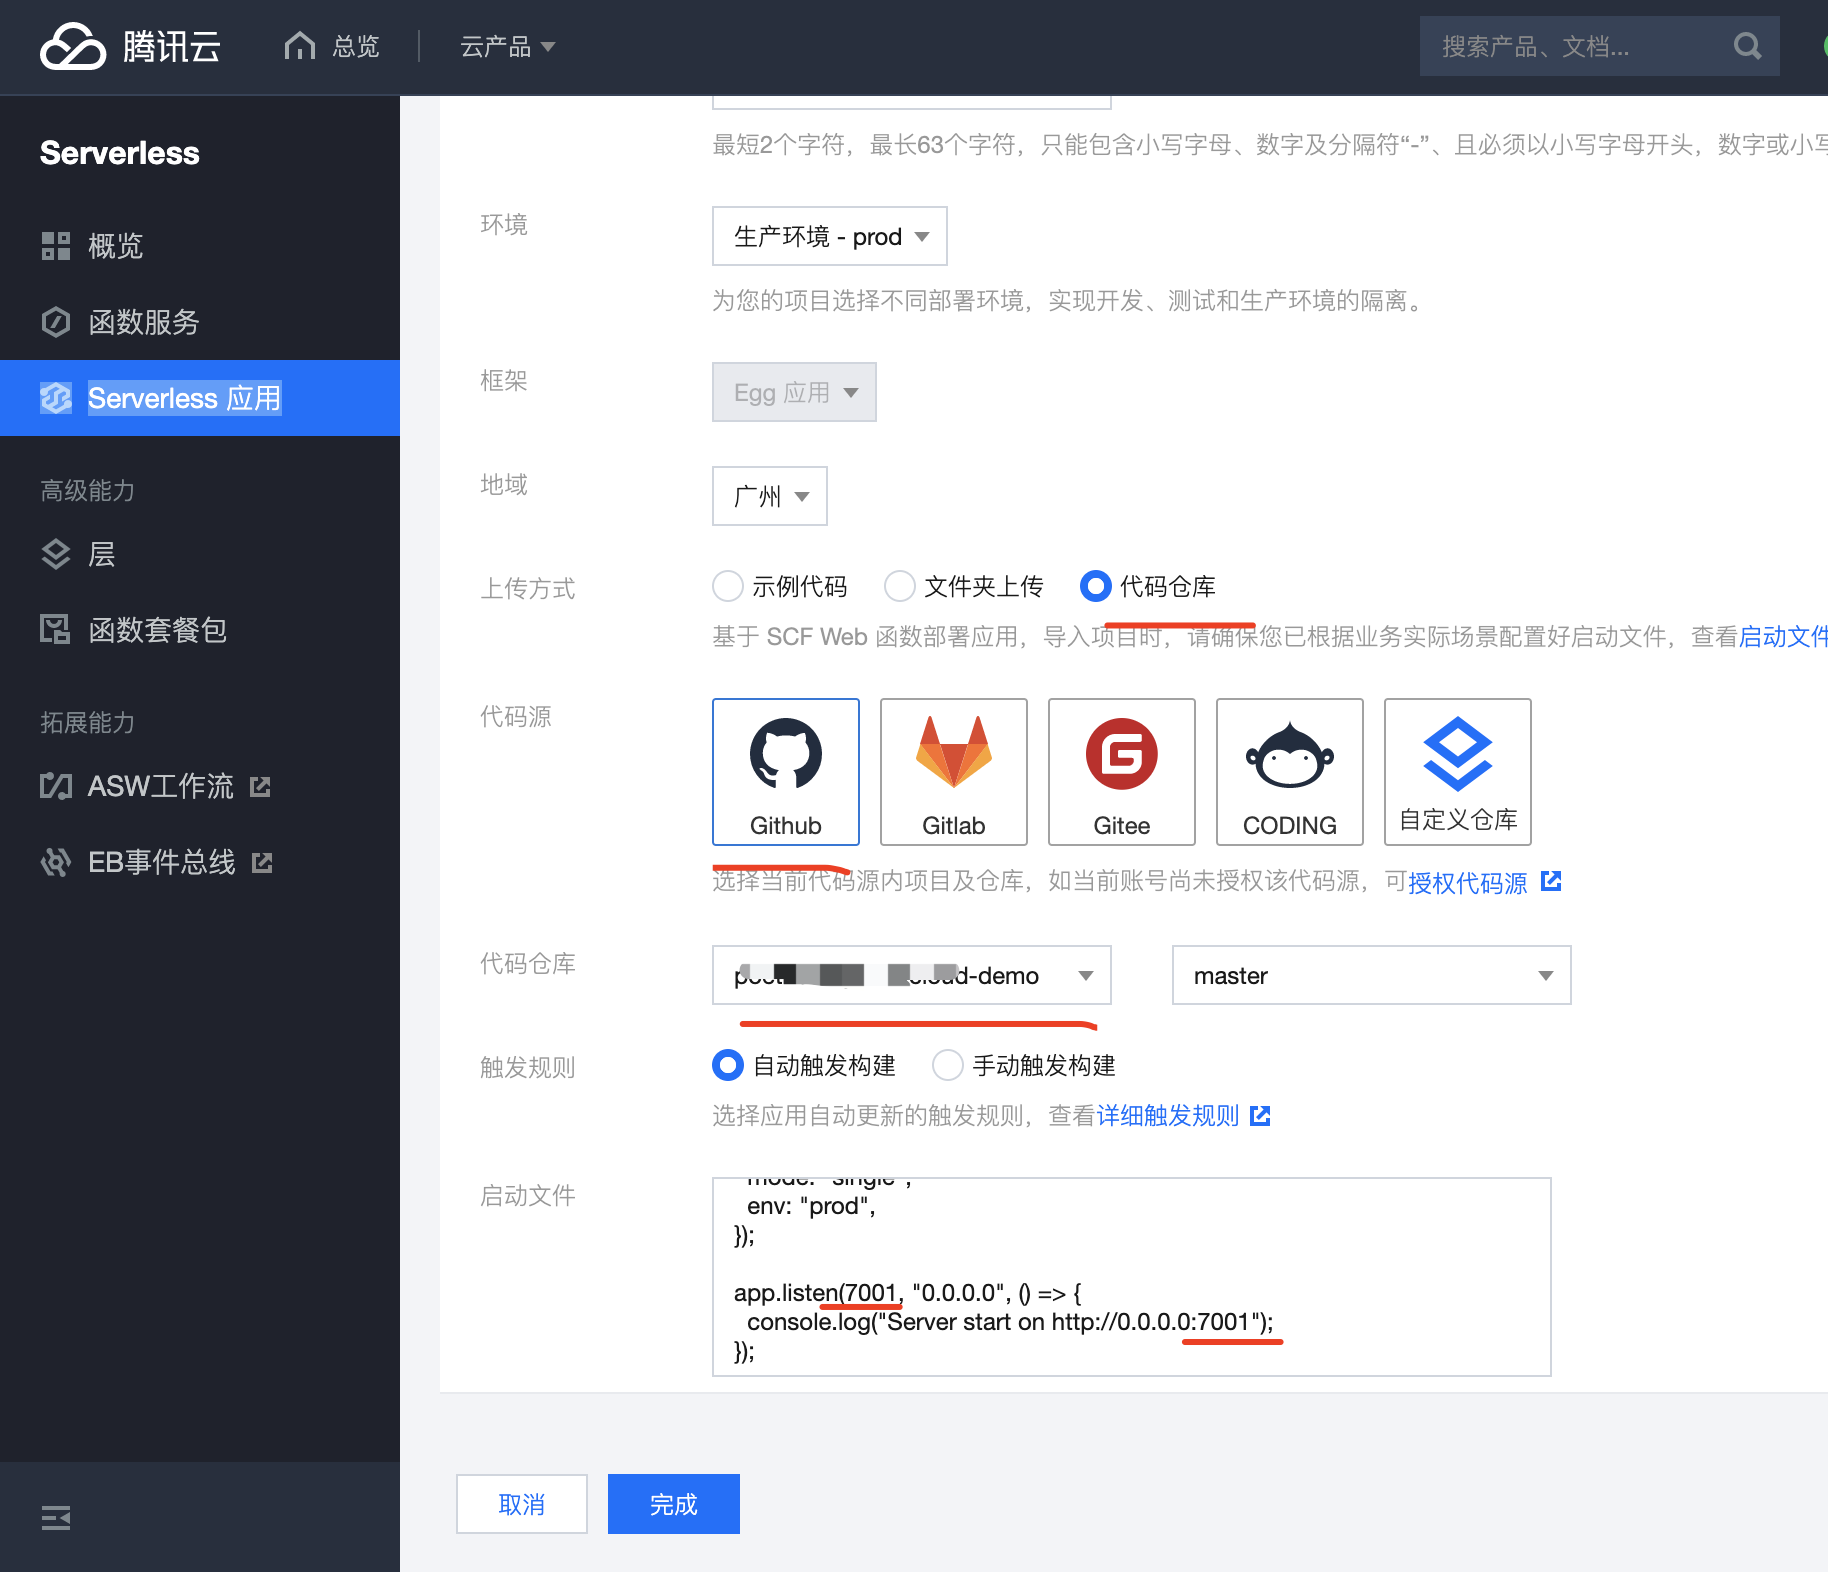
6.4 控制台创建部署-自定义部署
如果除了代码部署外,您还需要更多能力或资源创建,如自动创建层托管依赖、一键实现静态资源分离、支持代码仓库直接拉取等,可以通过应用控制台,完成 Web 应用的创建工作
初始化项目
mkdir egg-example && cd egg-example |
部署上云
接下来执行以下步骤,对本地已创建完成的项目进行简单修改,使其可以通过 Web Function 快速部署,对于 Egg 框架,具体改造说明如下:
- 修改监听地址与端口为
0.0.0.0:9000。 - 修改写入路径,serverless 环境下只有
/tmp目录可读写。 - 新增
scf_bootstrap启动文件。
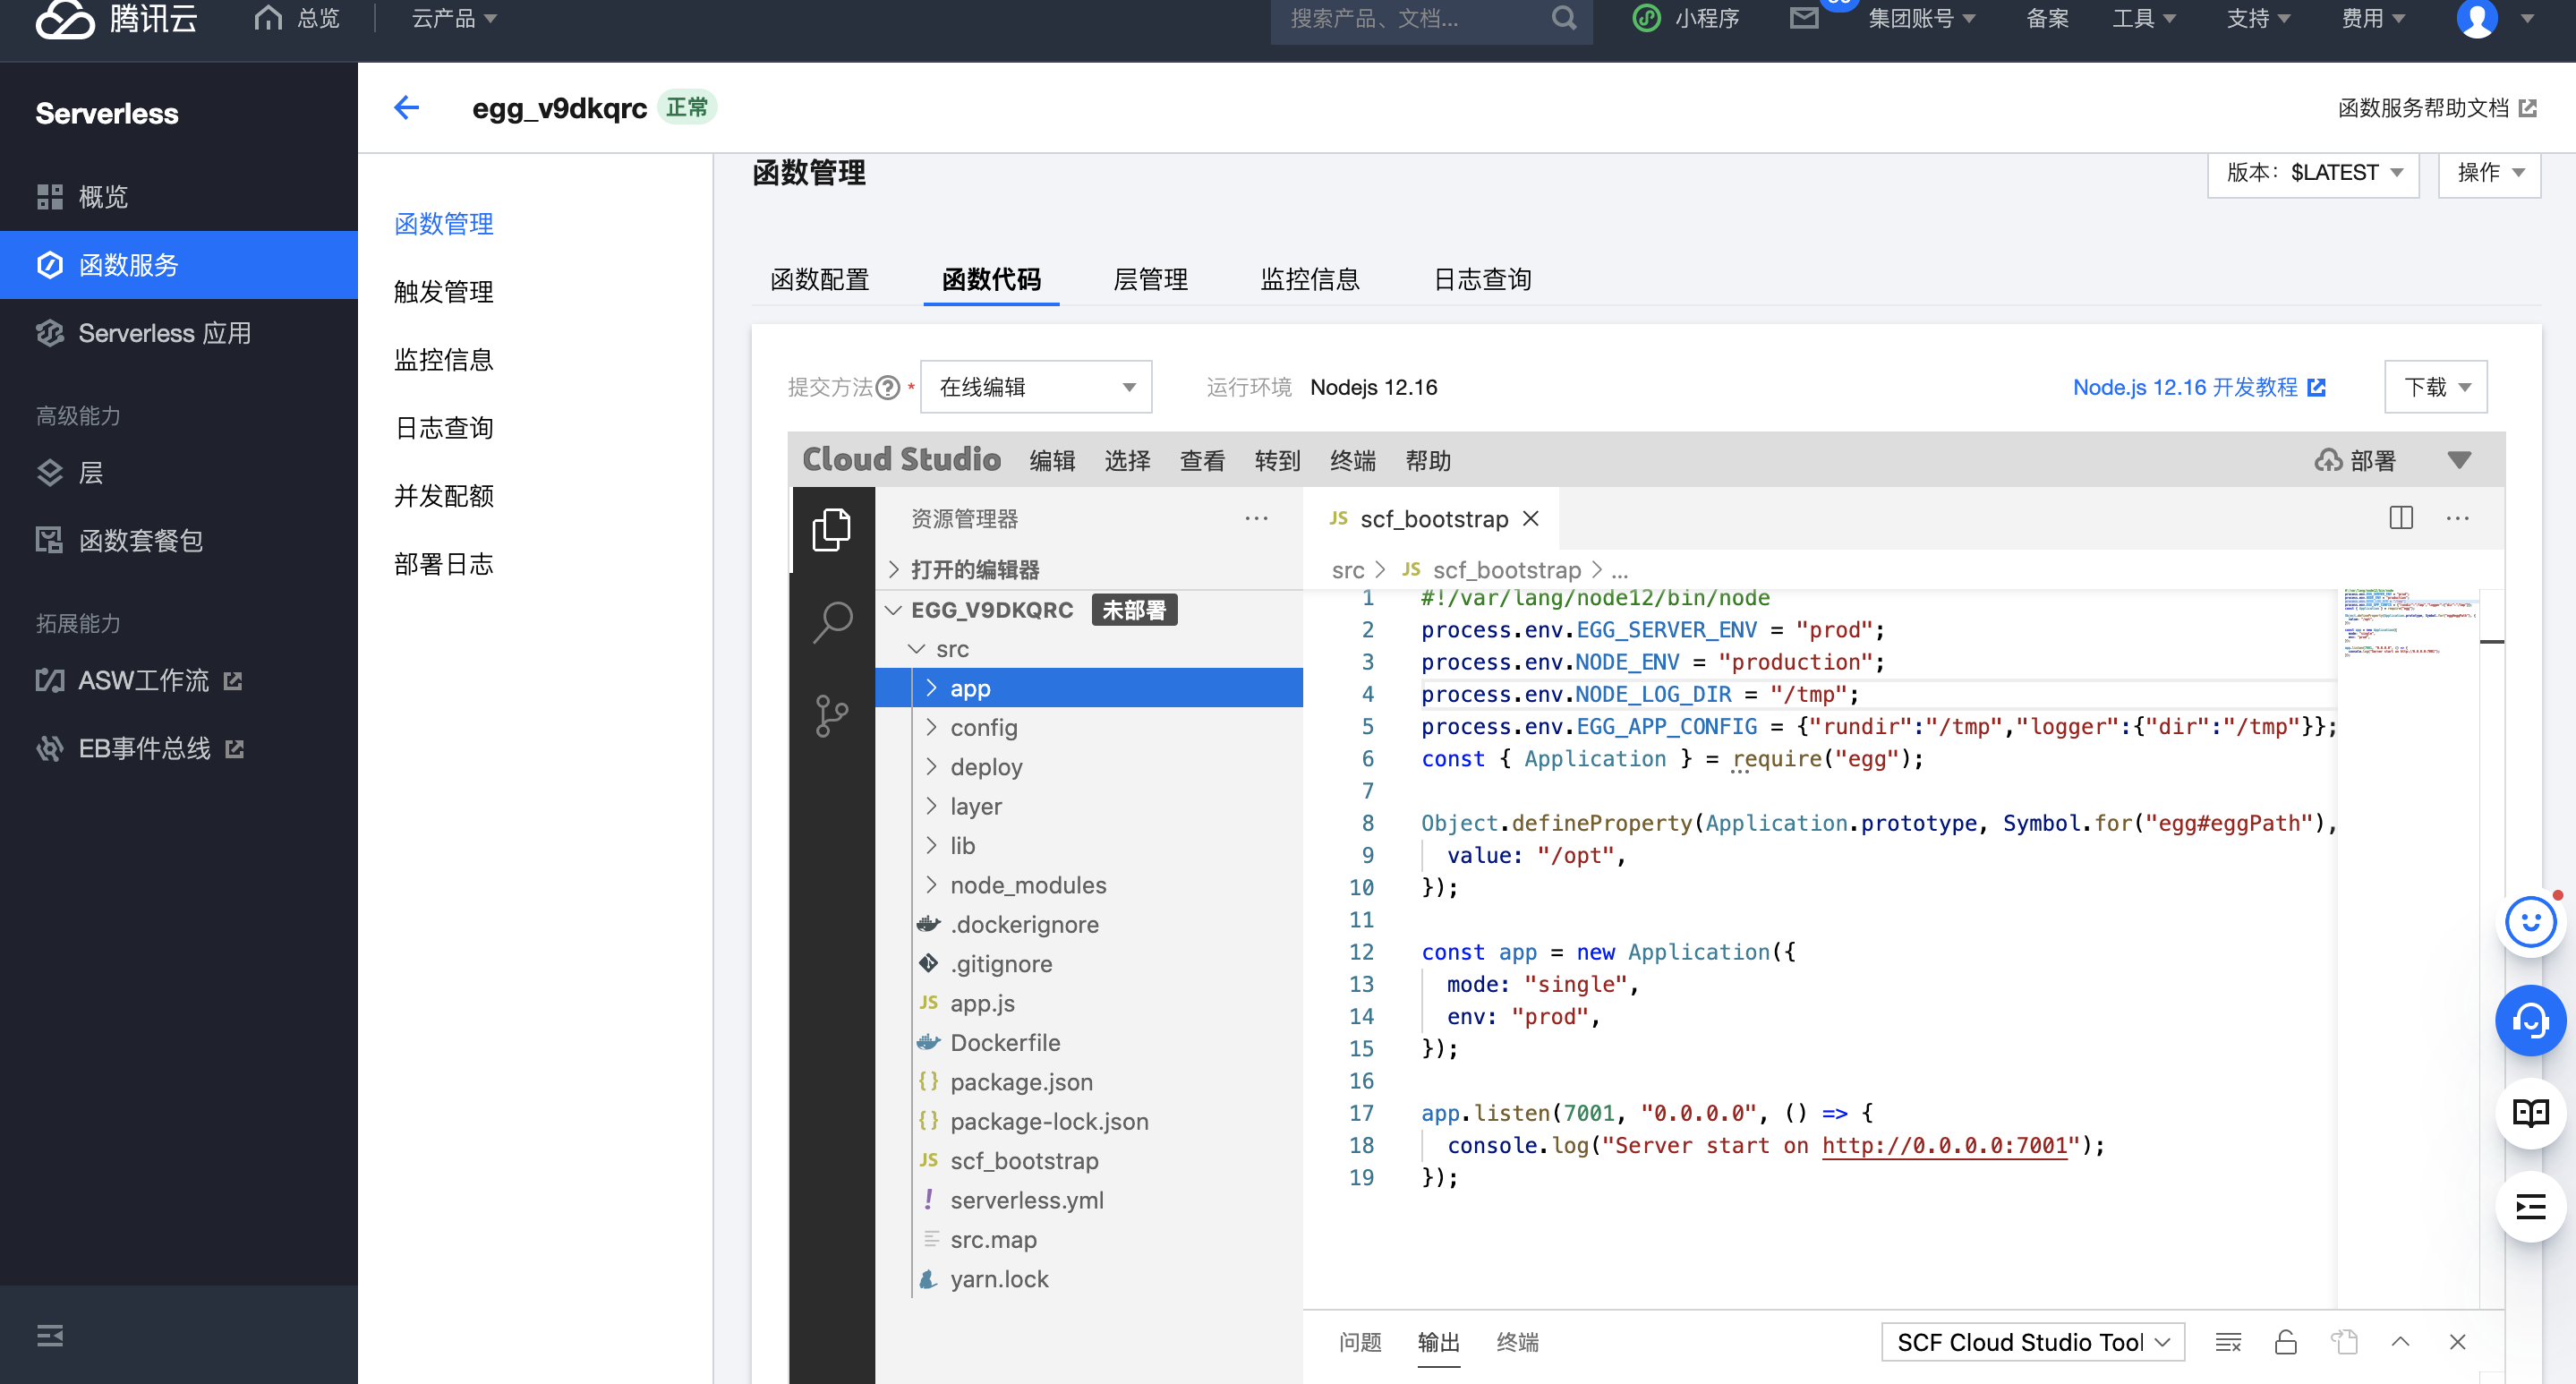
1. (可选)配置 scf_bootstrap 启动文件
您也可以在控制台完成该模块配置。
在项目根目录下新建
scf_bootstrap启动文件,在该文件添加如下内容(用于配置环境变量和启动服务,此处仅为示例,具体操作请以您实际业务场景来调整):
|
新建完成后,还需执行以下命令修改文件可执行权限,默认需要 777 或 755 权限才可正常启动。示例如下:
chmod 777 scf_bootstrap |
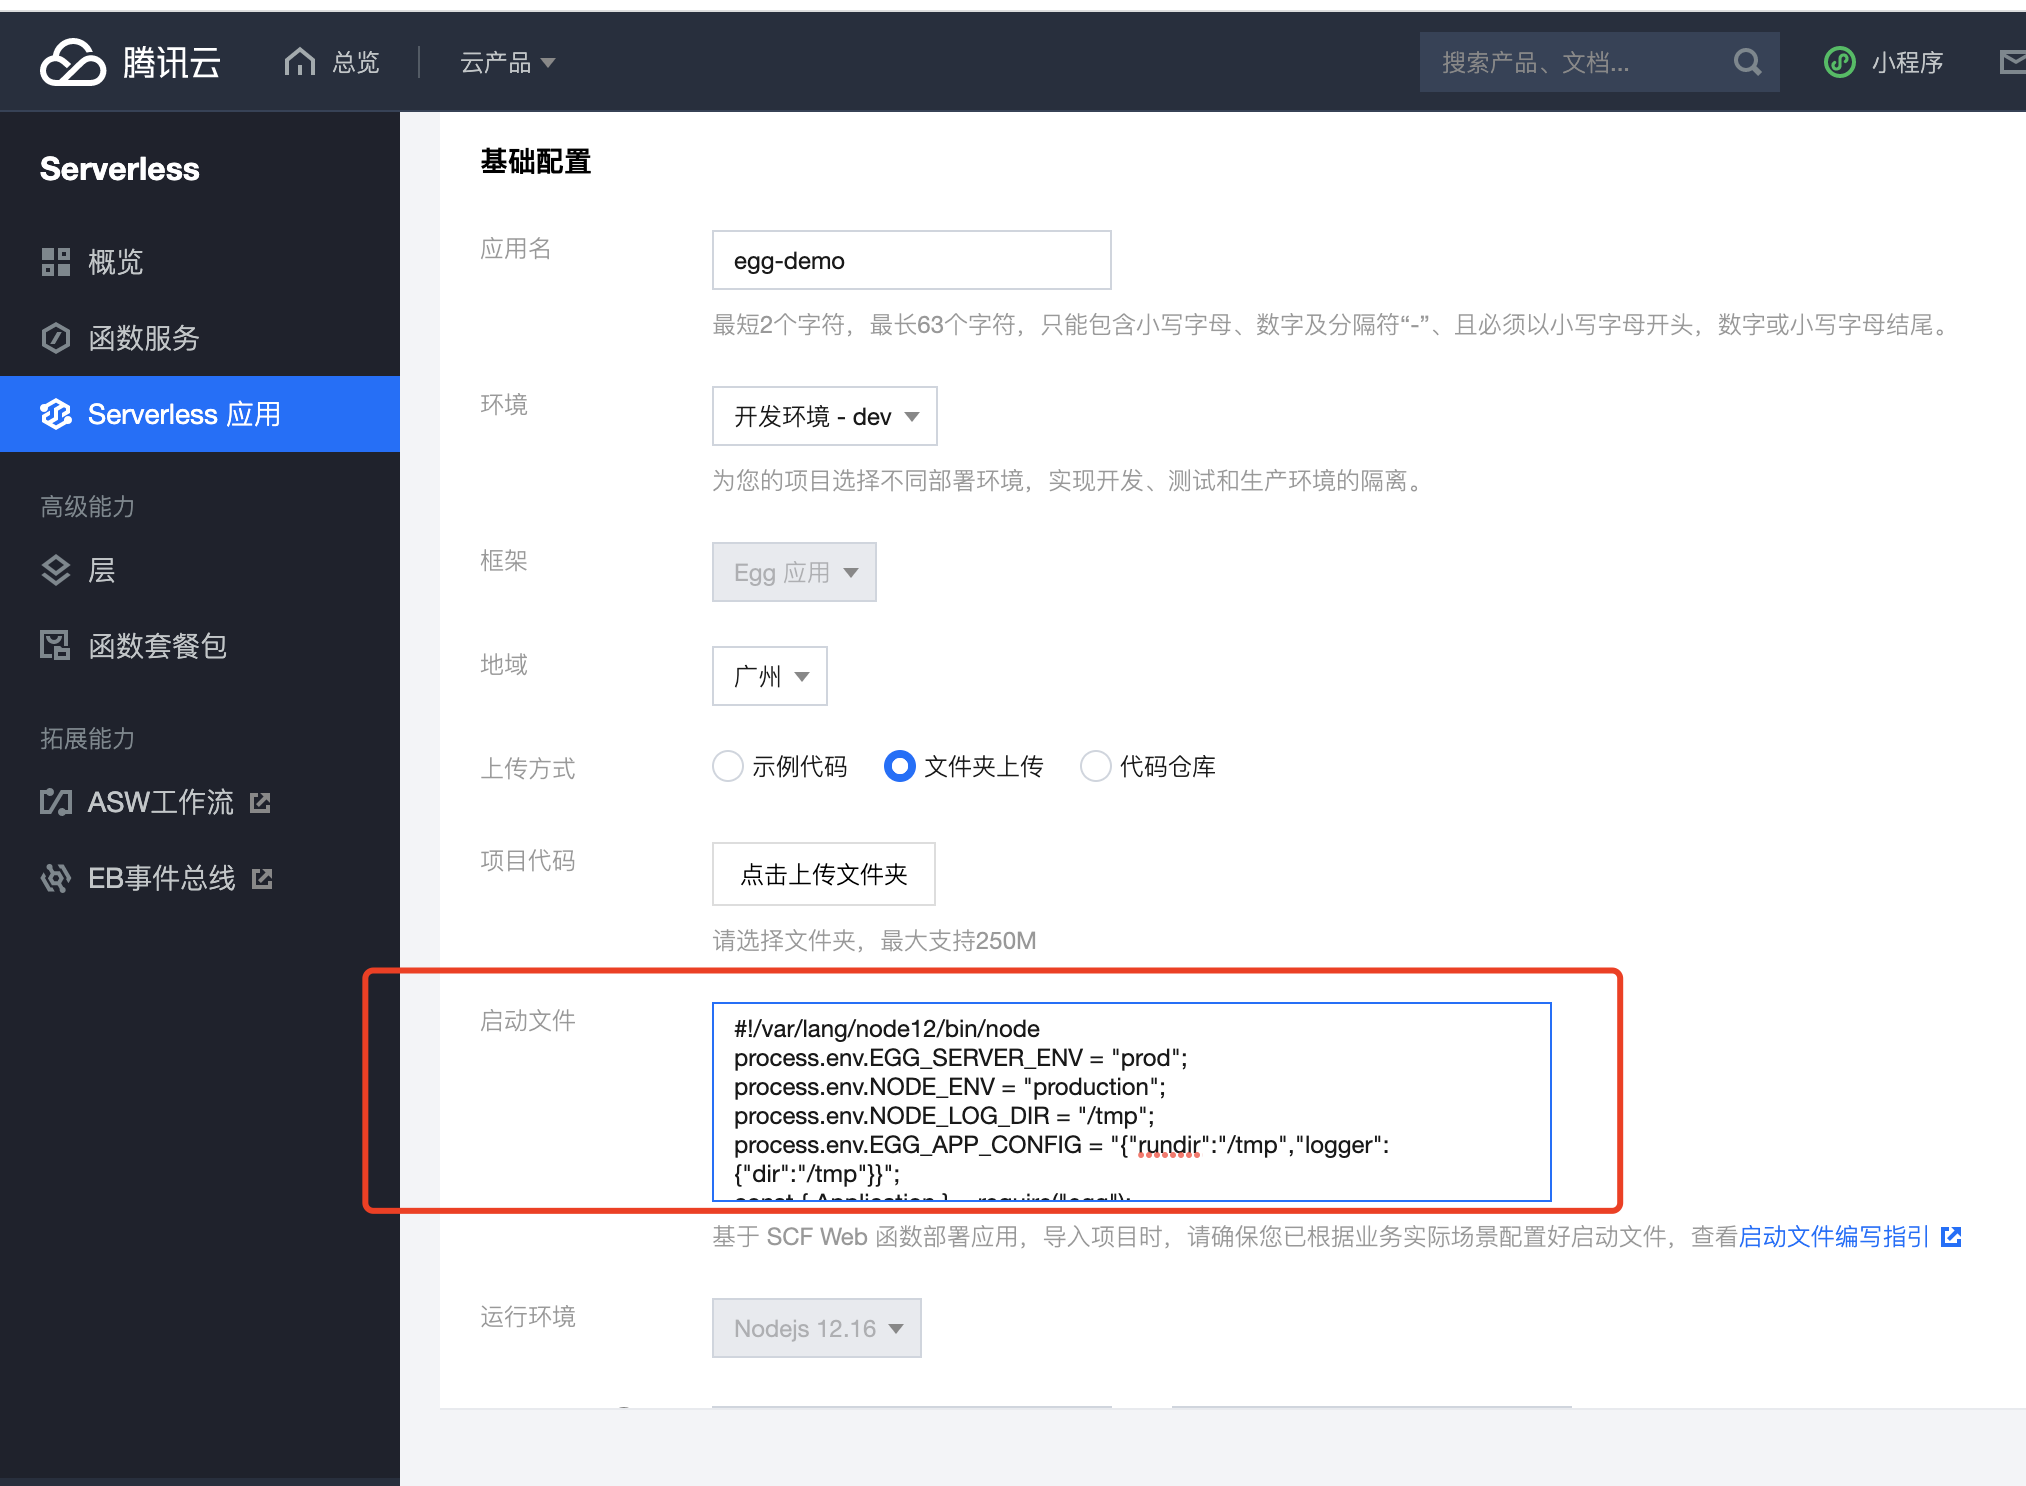
2. 控制台上传
您可以在控制台完成启动文件 scf_bootstrap 内容配置,配置完成后,控制台将为您自动生成 启动文件,和项目代码一起打包部署
启动文件以项目内文件为准,如果您的项目里已经包含 scf_bootstrap 文件,将不会覆盖该内容。

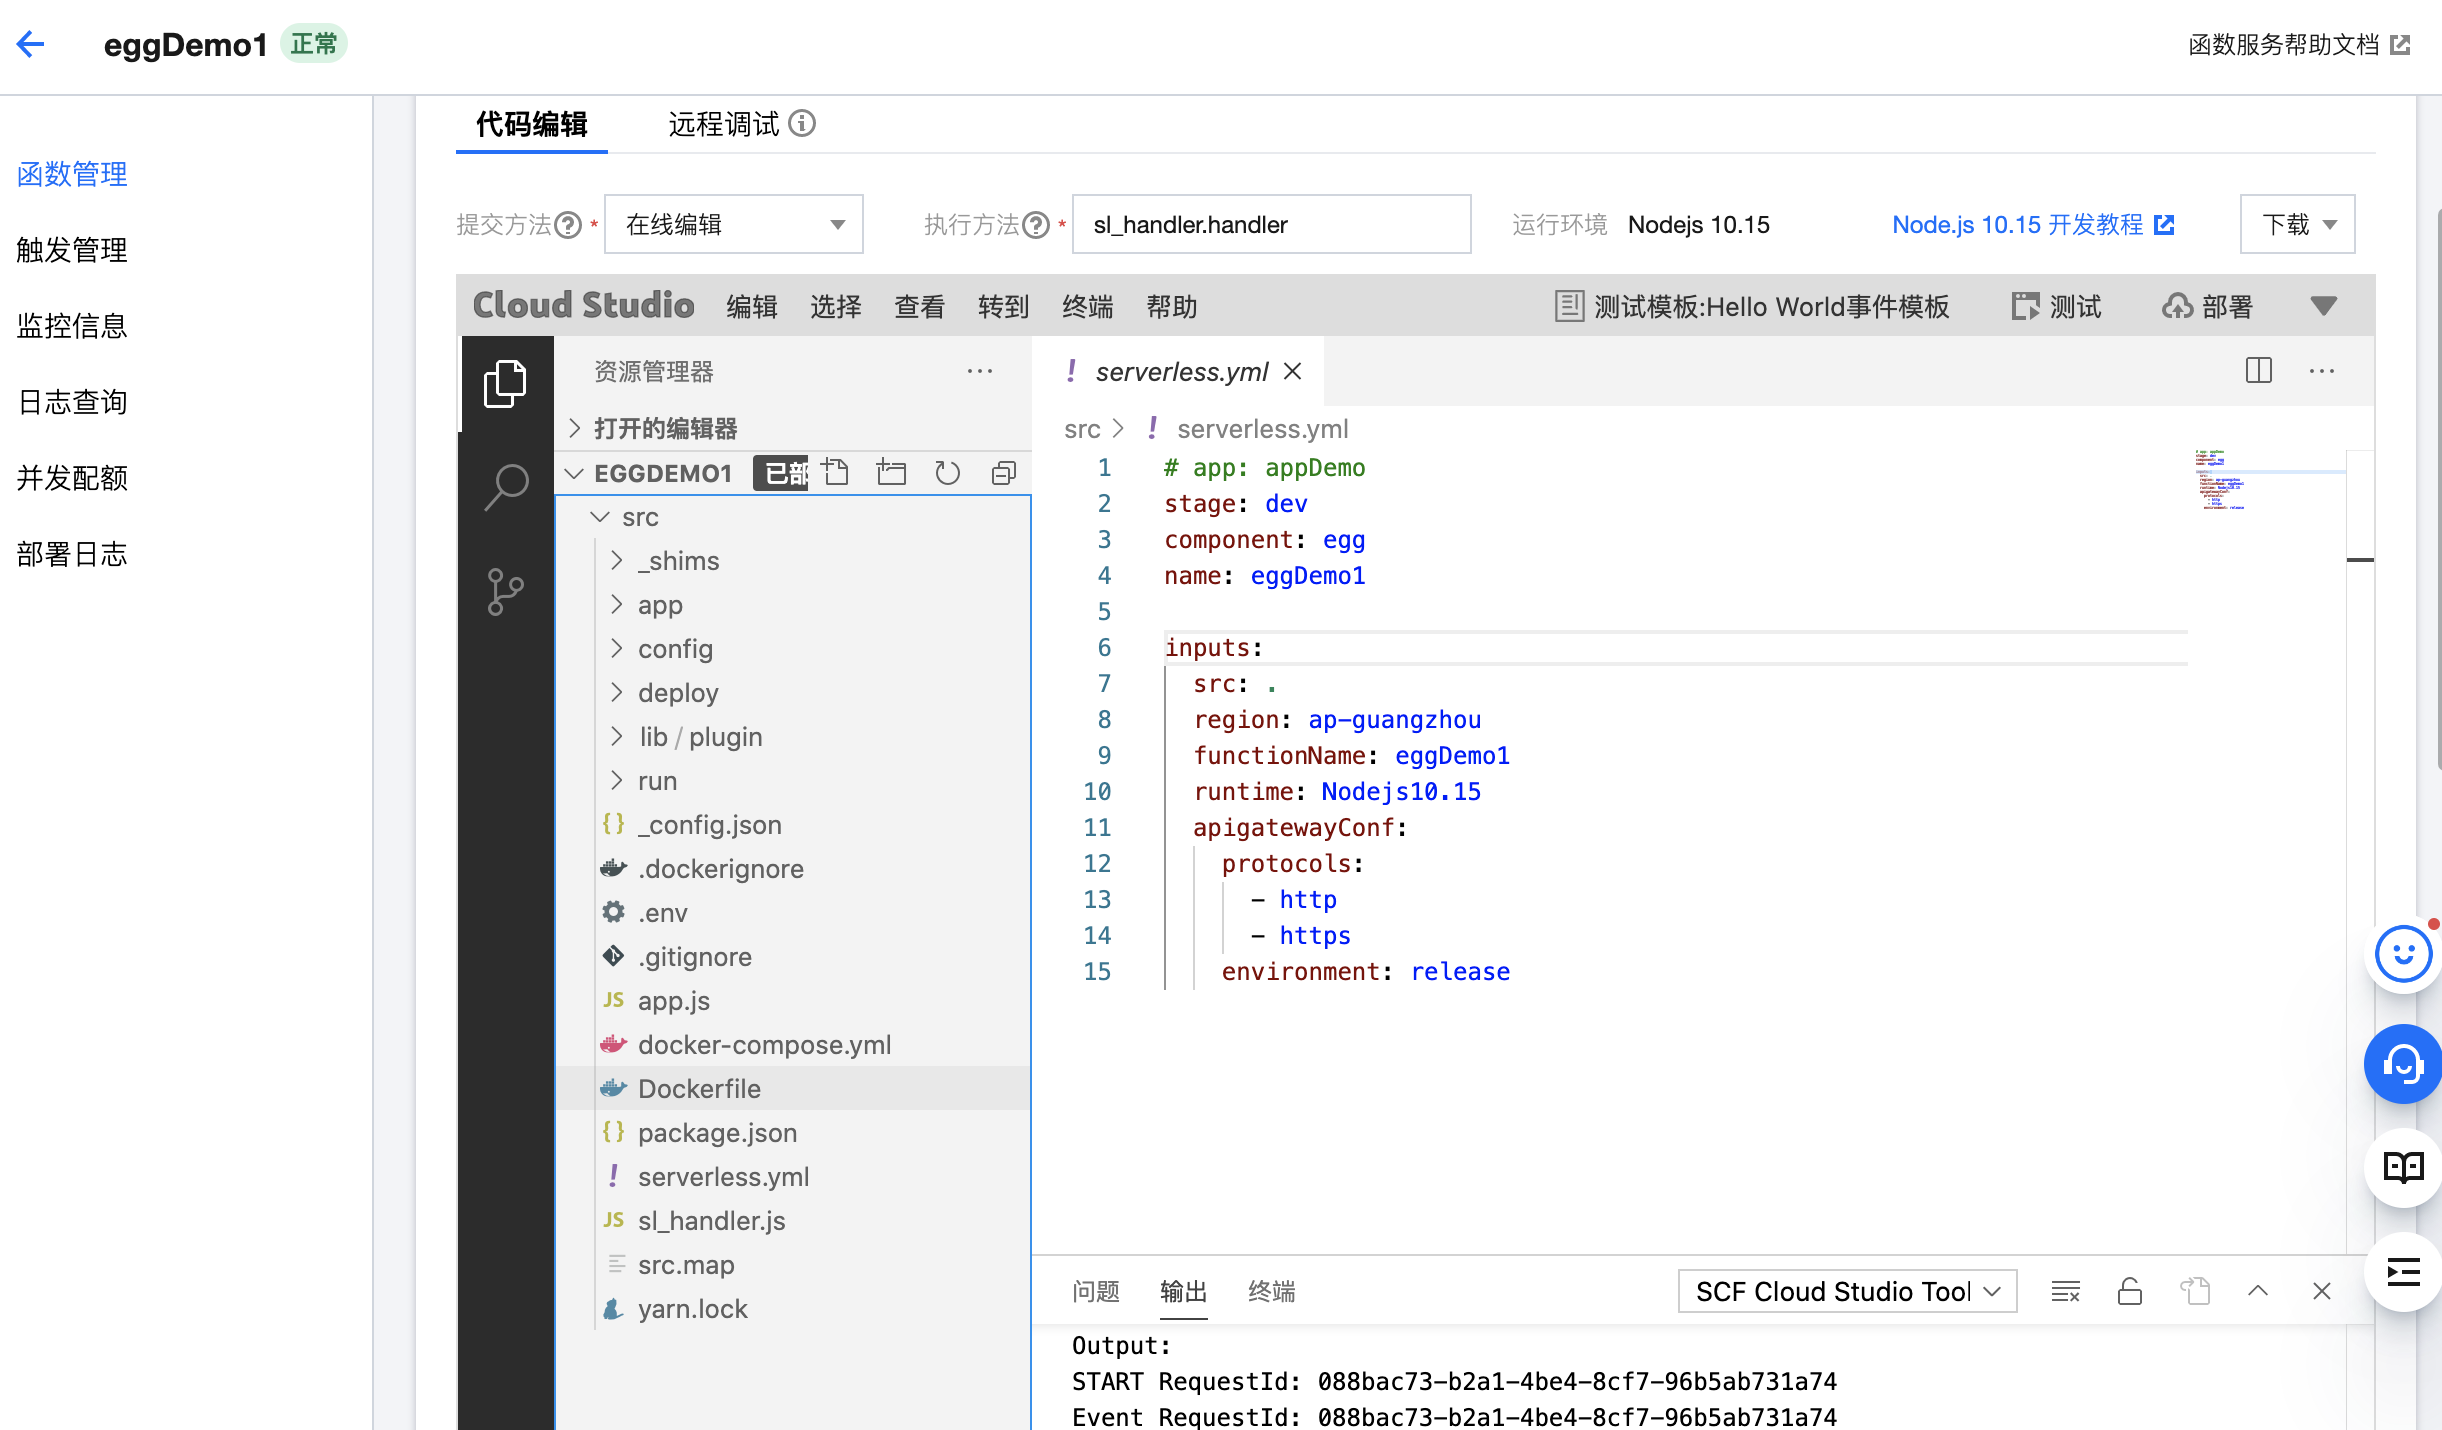
查看函数,修改代码查看日志等
高级配置管理
您可在“高级配置”里进行更多应用管理操作,如创建层、绑定自定义域名、配置环境变量等。

6.5 测试接口